Back to Blog webdev
 kubernetes
 ai
ai typescript
 showdev
 ai
ai agents
How I Created a Lifetime Free Link-in-Bio Page
Vijay Thapa April 16, 2026
0 views
To manage and share multiple important links with followers, Link-in-Bio pages are really valuable...
To manage and share multiple important links with followers, Link-in-Bio pages are really valuable tools.
> _Whether to redirect followers to the online store or lead forms or to other social media pages, with one link that sits on a social media profile, Link-in-Bio page helps businesses or influencers to generate revenue or grow subscribers._
But most of the platforms have **subscription fees (which range from $100-$1,000 annually)** for the most important features like branding, custom domain, advanced analytics, etc.
While looking for the best platforms that’s free and trustable, I found one that has all the advanced features for **completely FREE**.
So I’m sharing with you the complete knowledge of setting up a Link-in-Bio page that’s free forever.
With this _you can either set up the page for your business or earn money by helping others to set up the page_ following these instructions.
### Requirements
To start creating a lifetime free link in bio page, here’s a list of requirements you’ll need to have
1. Google Account (Gmail) as we’ll be using Google' s platform i.e. Google Sites.
2. Basic understanding of Drag and Drop builders like Google Sites.
3. Laptop or a Desktop Computer (cannot be created on a mobile phone).
4. No design or Coding skills required.
## Step-By-Step Guide to Creating a Lifetime Free Link-in-Bio Page
Once you have these basic requirements, you can follow the step-by-step instructions below
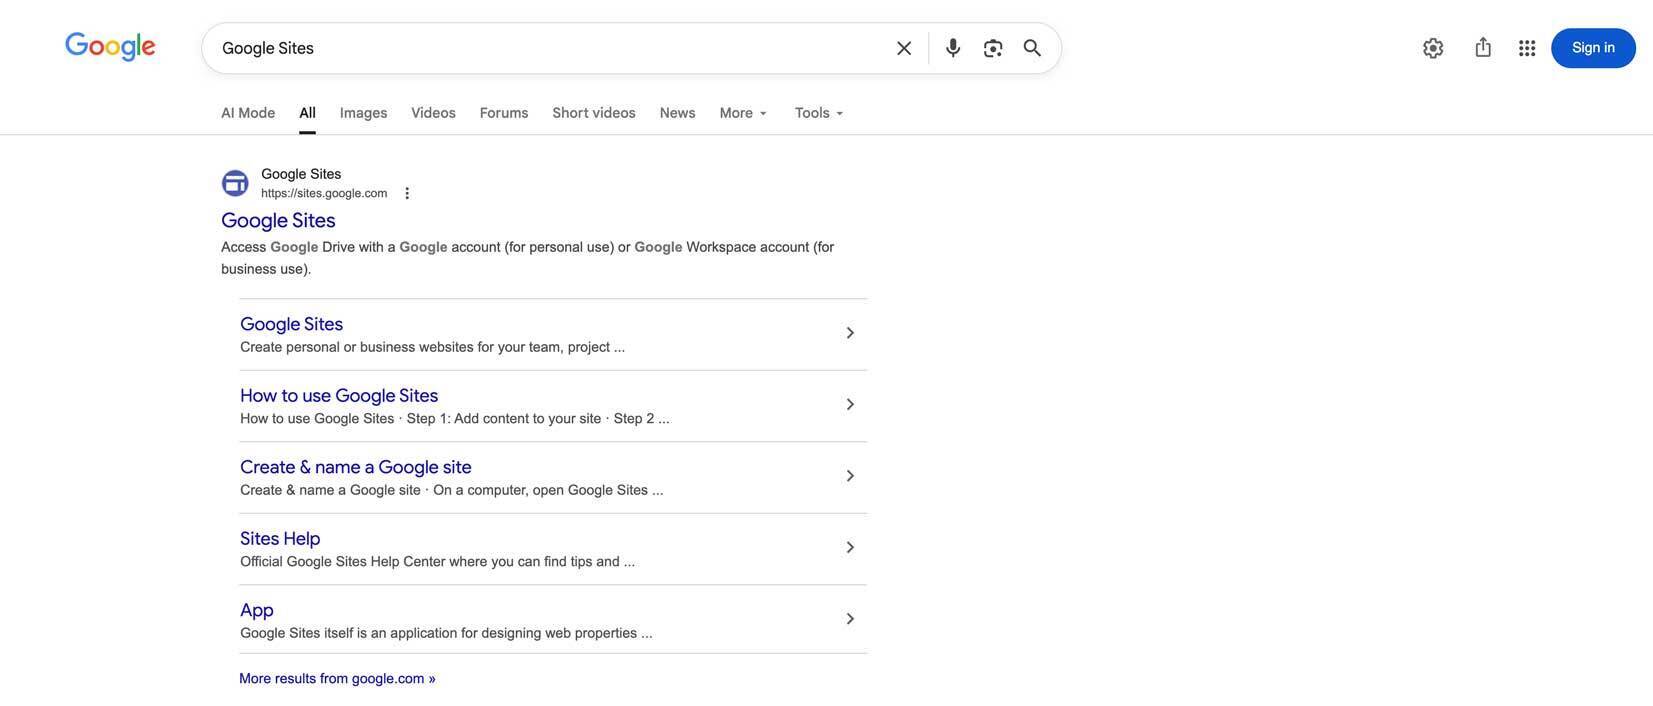
### 1. Access Google Sites Platform
Search “Google Sites” on your browser or go to https://sites.google.com in your browser. If you’re already signed in to your Google Account (Gmail), you’ll be taken to Google Sites Dashboard, else you’ll be prompted to sign in now.
If you don’t have a Google Account, you can create one easily for Free.
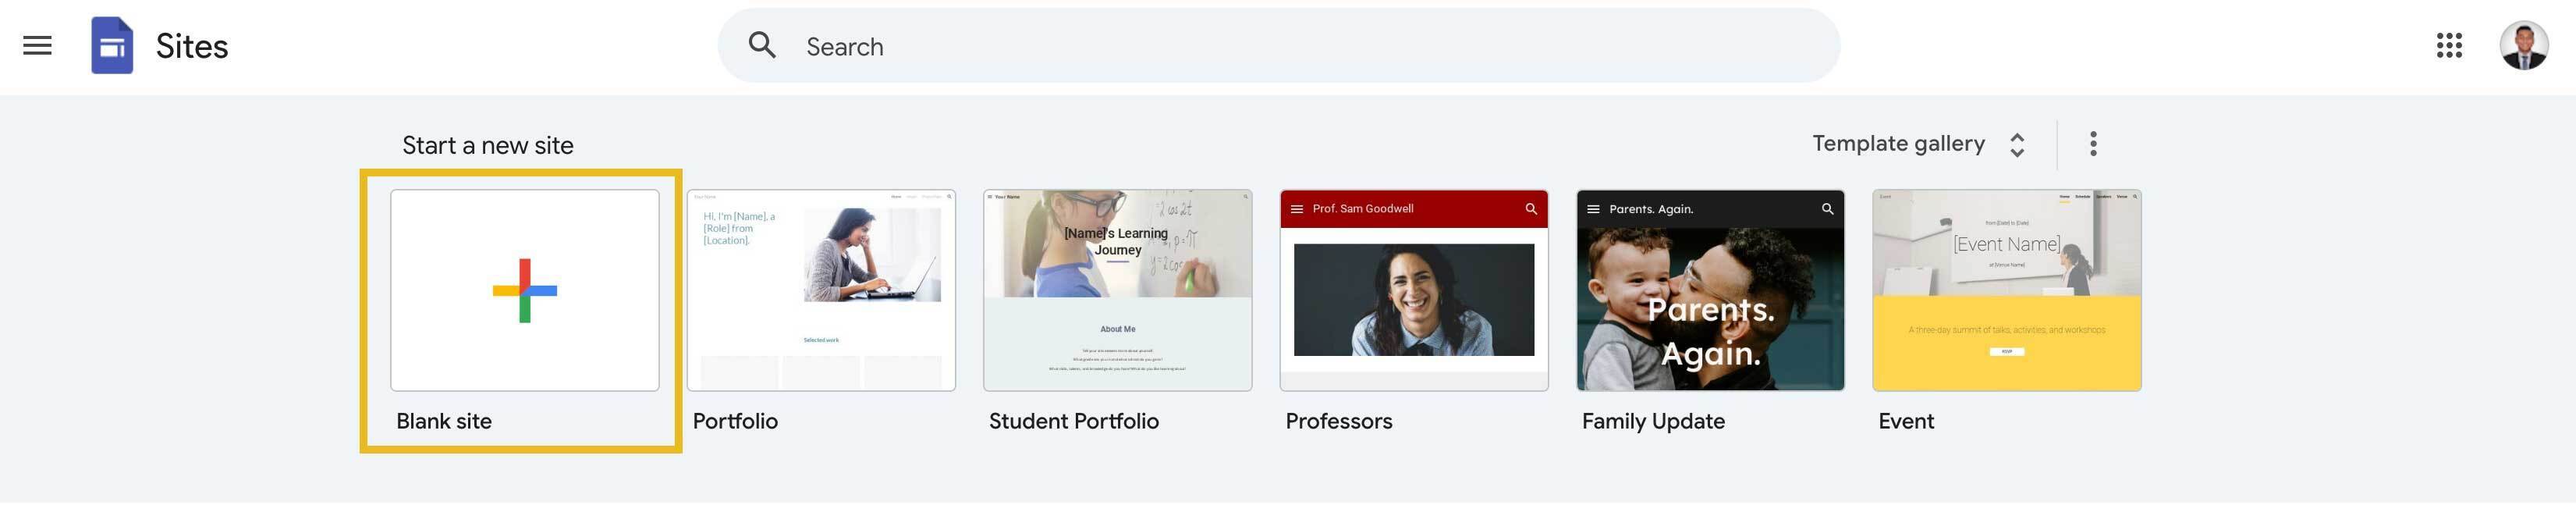
### 2. Start a New Site with Blank Page
Once you’re on the Google Sites dashboard, select “Blank Site” on Start a new site section to start designing your Link-in-Bio page from scratch.
**_Get Professionally Designed Premium Link-in-Bio Templates_**
[Click Here To Download](https://www.patreon.com/posts/link-in-bio-pro-155669144)
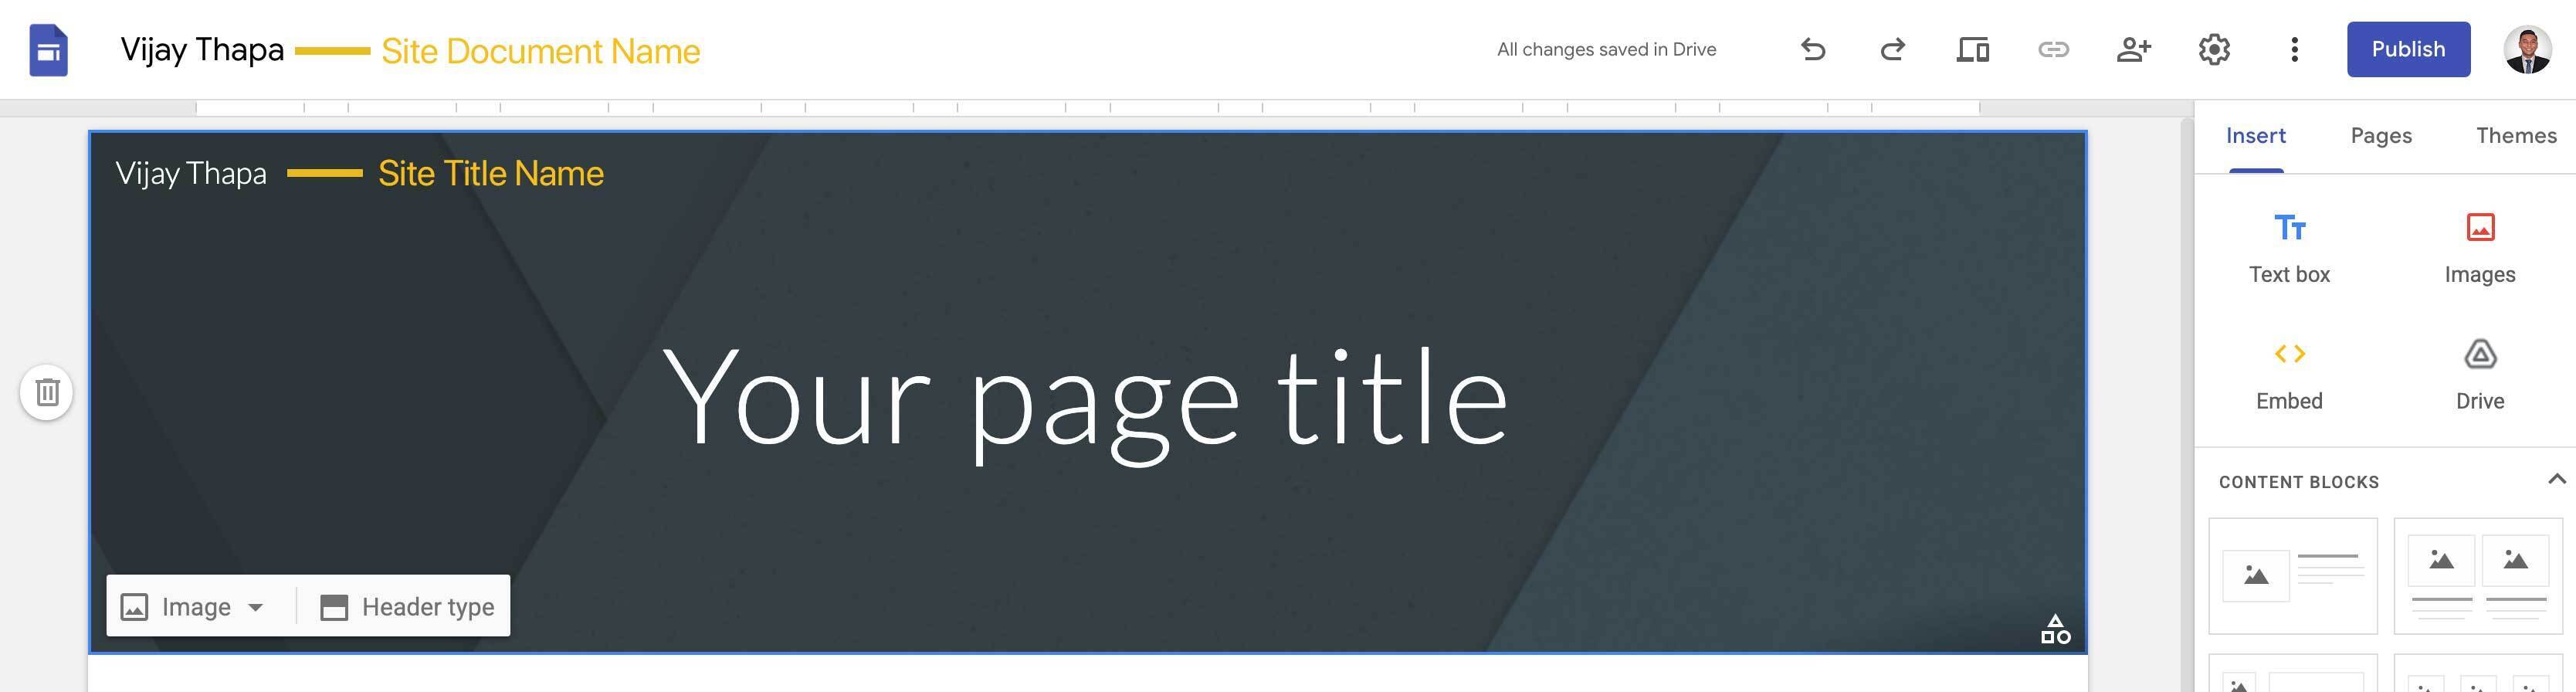
### 3. Name Your Page
Once the blank page opens, the first thing you need to do is to give the page a name.
The name can be your business name or your personal name.
From the top left, **change**
1. Site Document Name
2. Site Title Name
### 4. Design Your Link In Bio Page
Once you’ve updated the Site Titles, follow the steps below to design your Link-in-Bio page
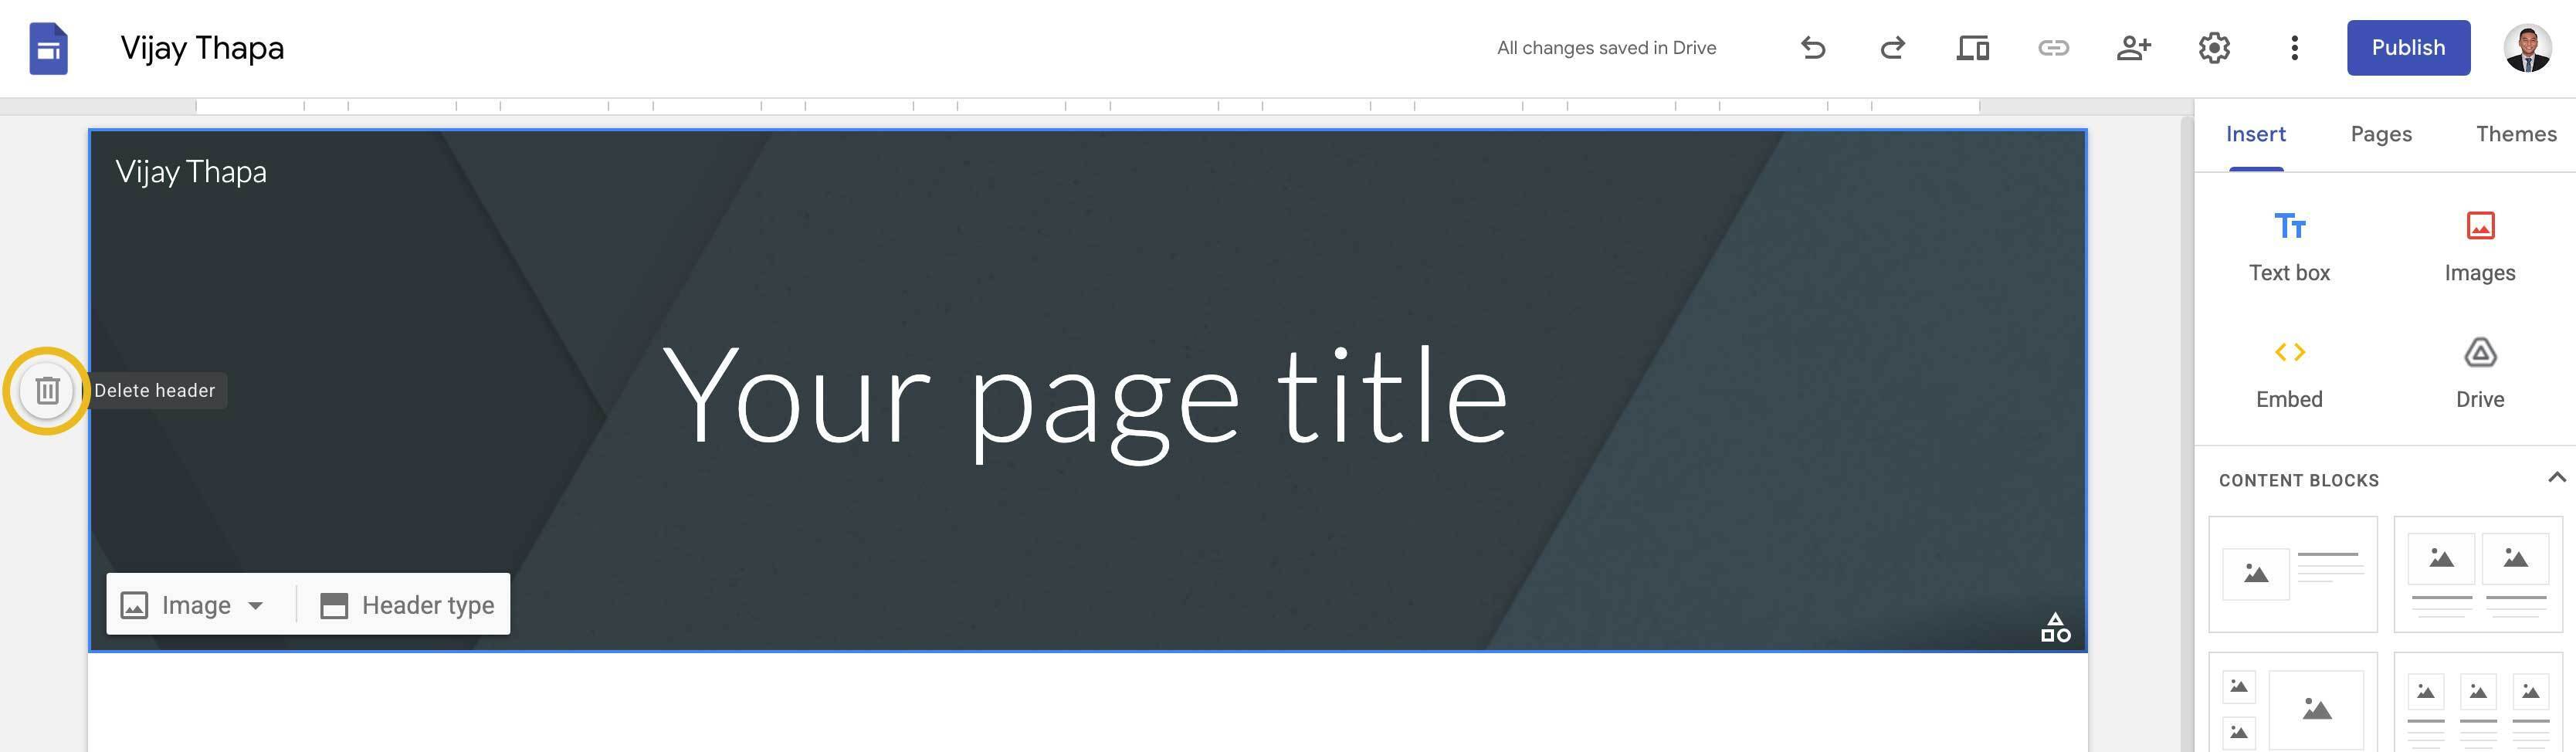
#### 4.1. Remove Header
To remove the header, first click on the empty section of the header section.
Then click on Delete (bin icon) on the left.
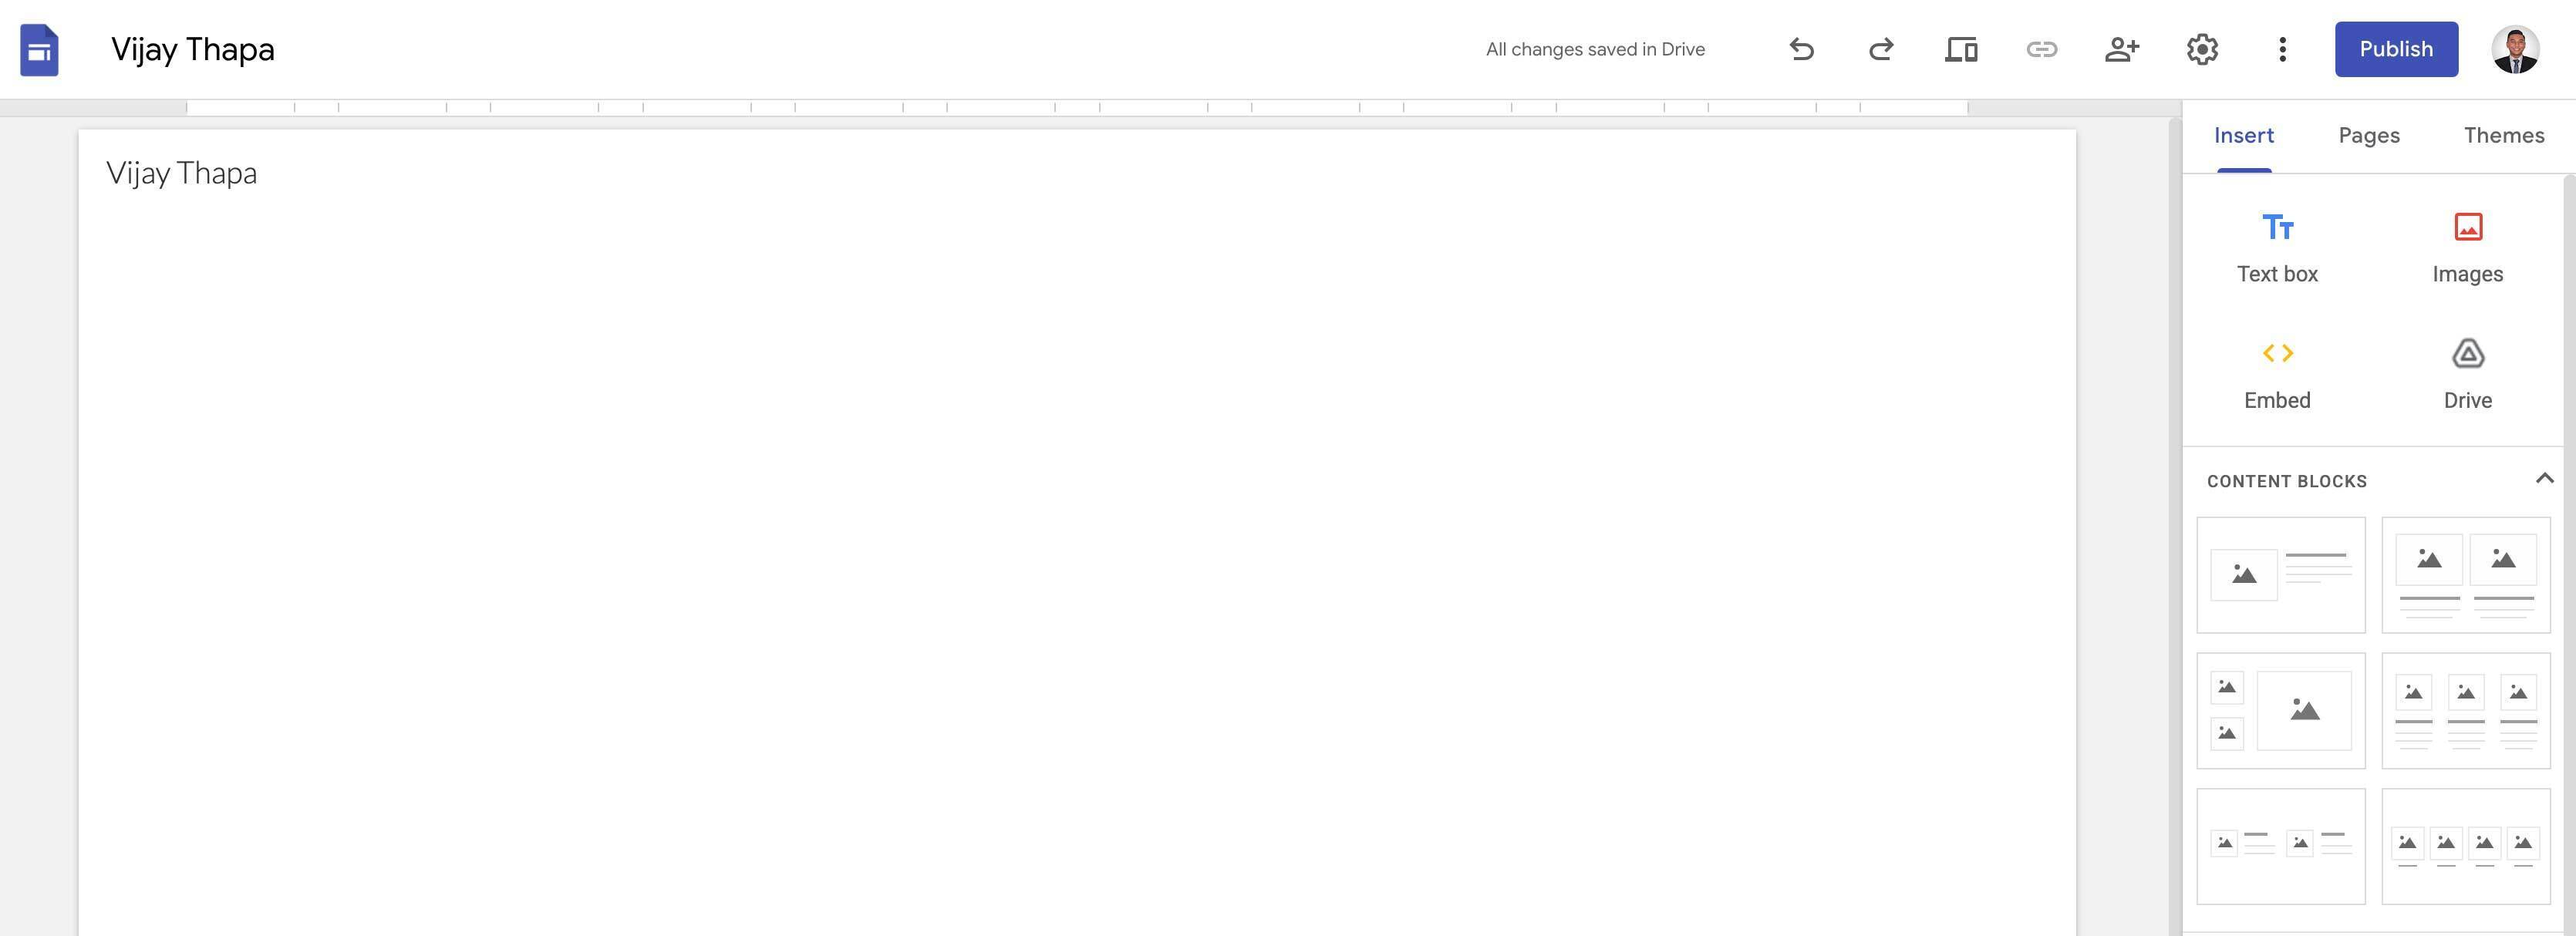
Once the header section is deleted, you’ll be left with a blank canvas as shown below.
#### 4.2. Add Text Box for Title and Short Description
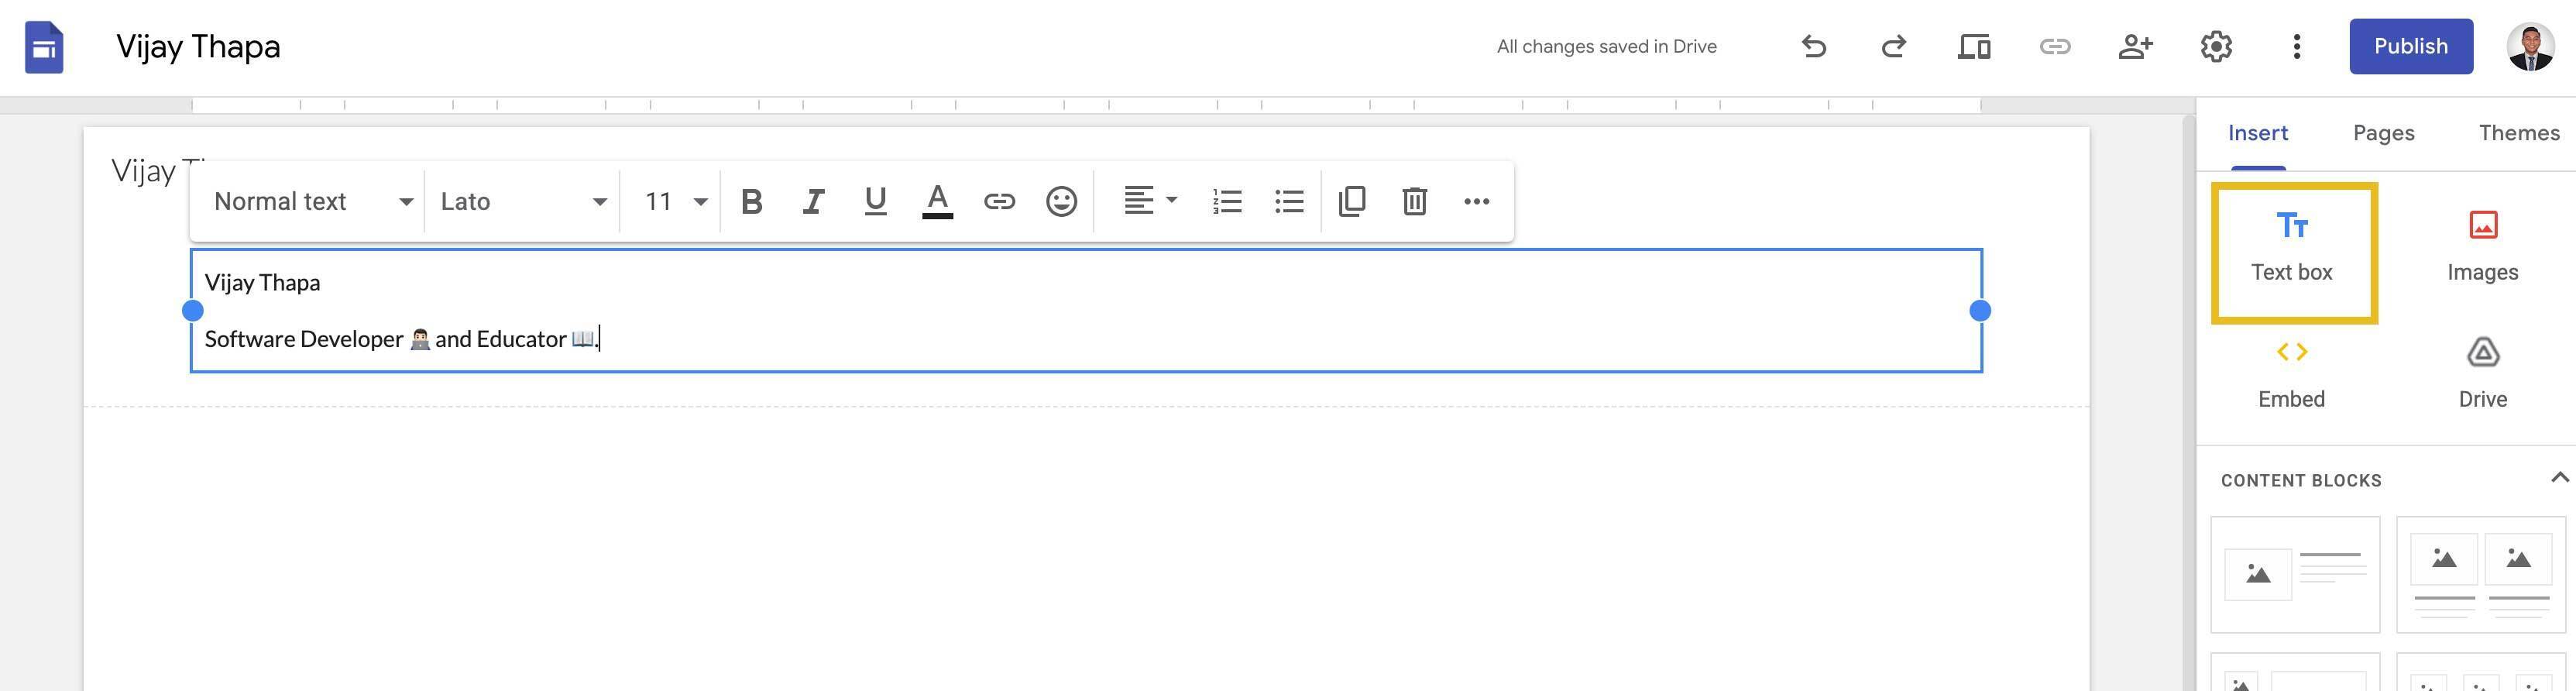
Click on **Text Box** from the right side Tool bar section which adds an empty Text Box on our blank page.
Then **Add Title on First Line and a Short Description on the Second Line** as shown in the image below.
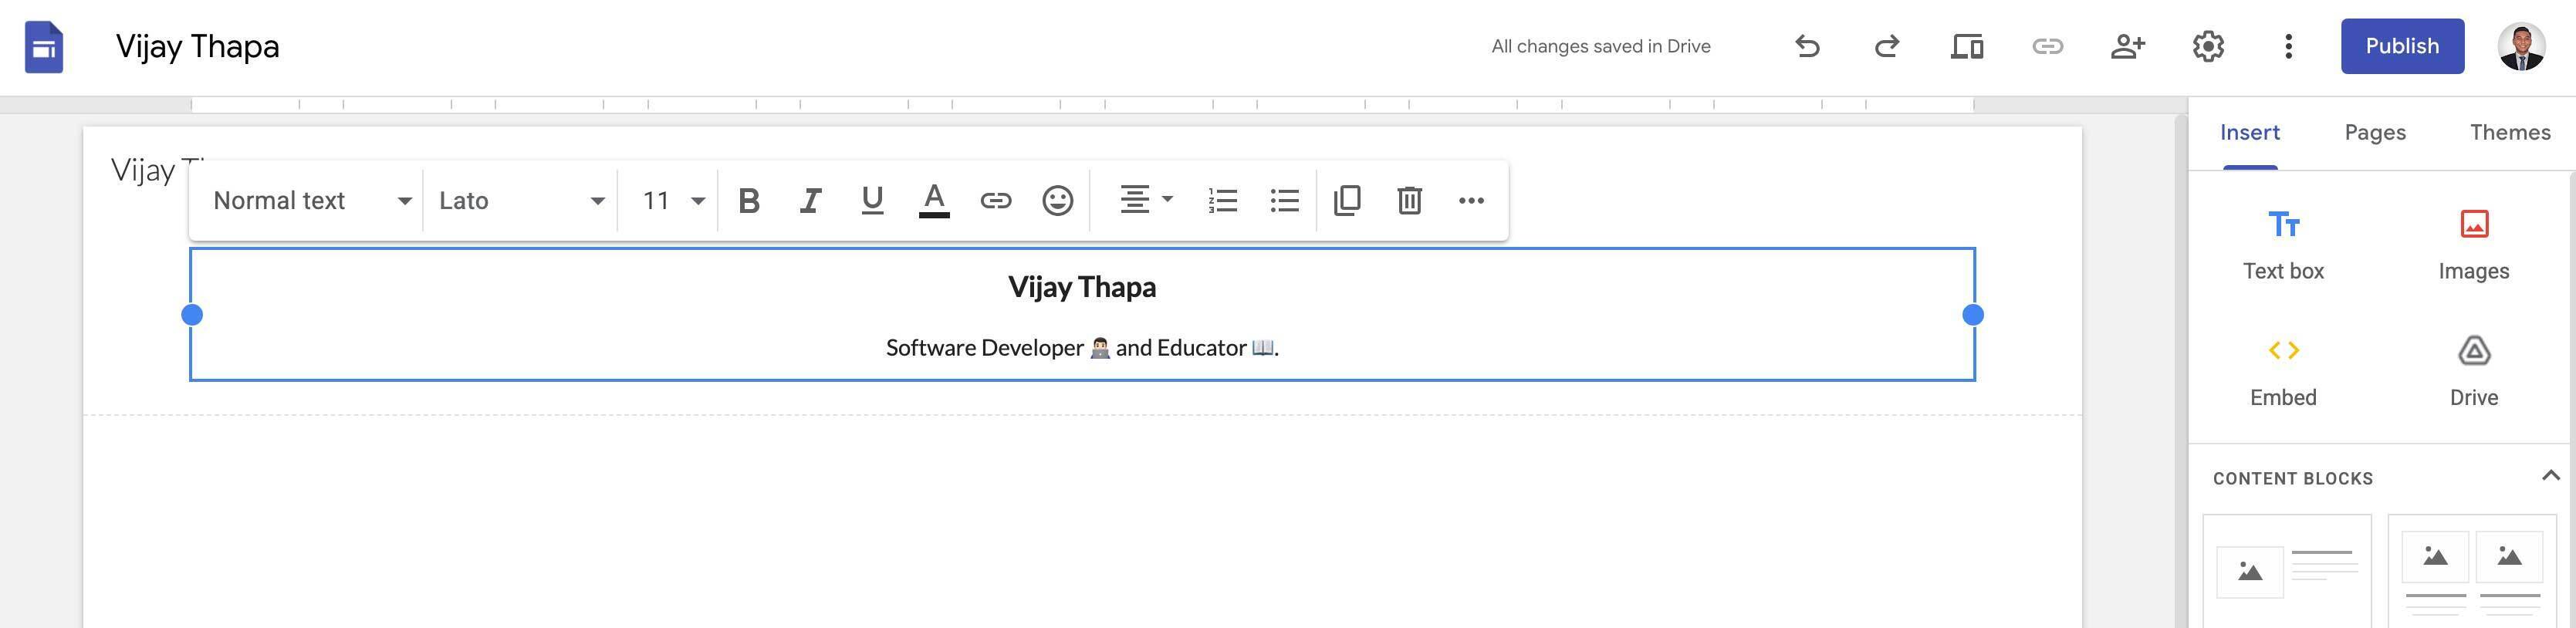
Now **format the texts**.
Select all texts and select **“center alignment”** to bring all the texts to center.
Select the title (Your Business Name or Your Name) and **make it bold, also increase the font size to 14**.
**Change the line height to 1.5.** _(Select 3 dots icon … -> Line and Paragraph Spacing -> Custom Spacing -> Line Spacing = 5)_

#### 4.3. Structure The Link In Bio Layout
Now, from the ends of the Text Box, drag inwards to give the page “Link In Bio” design as shown in the image below.

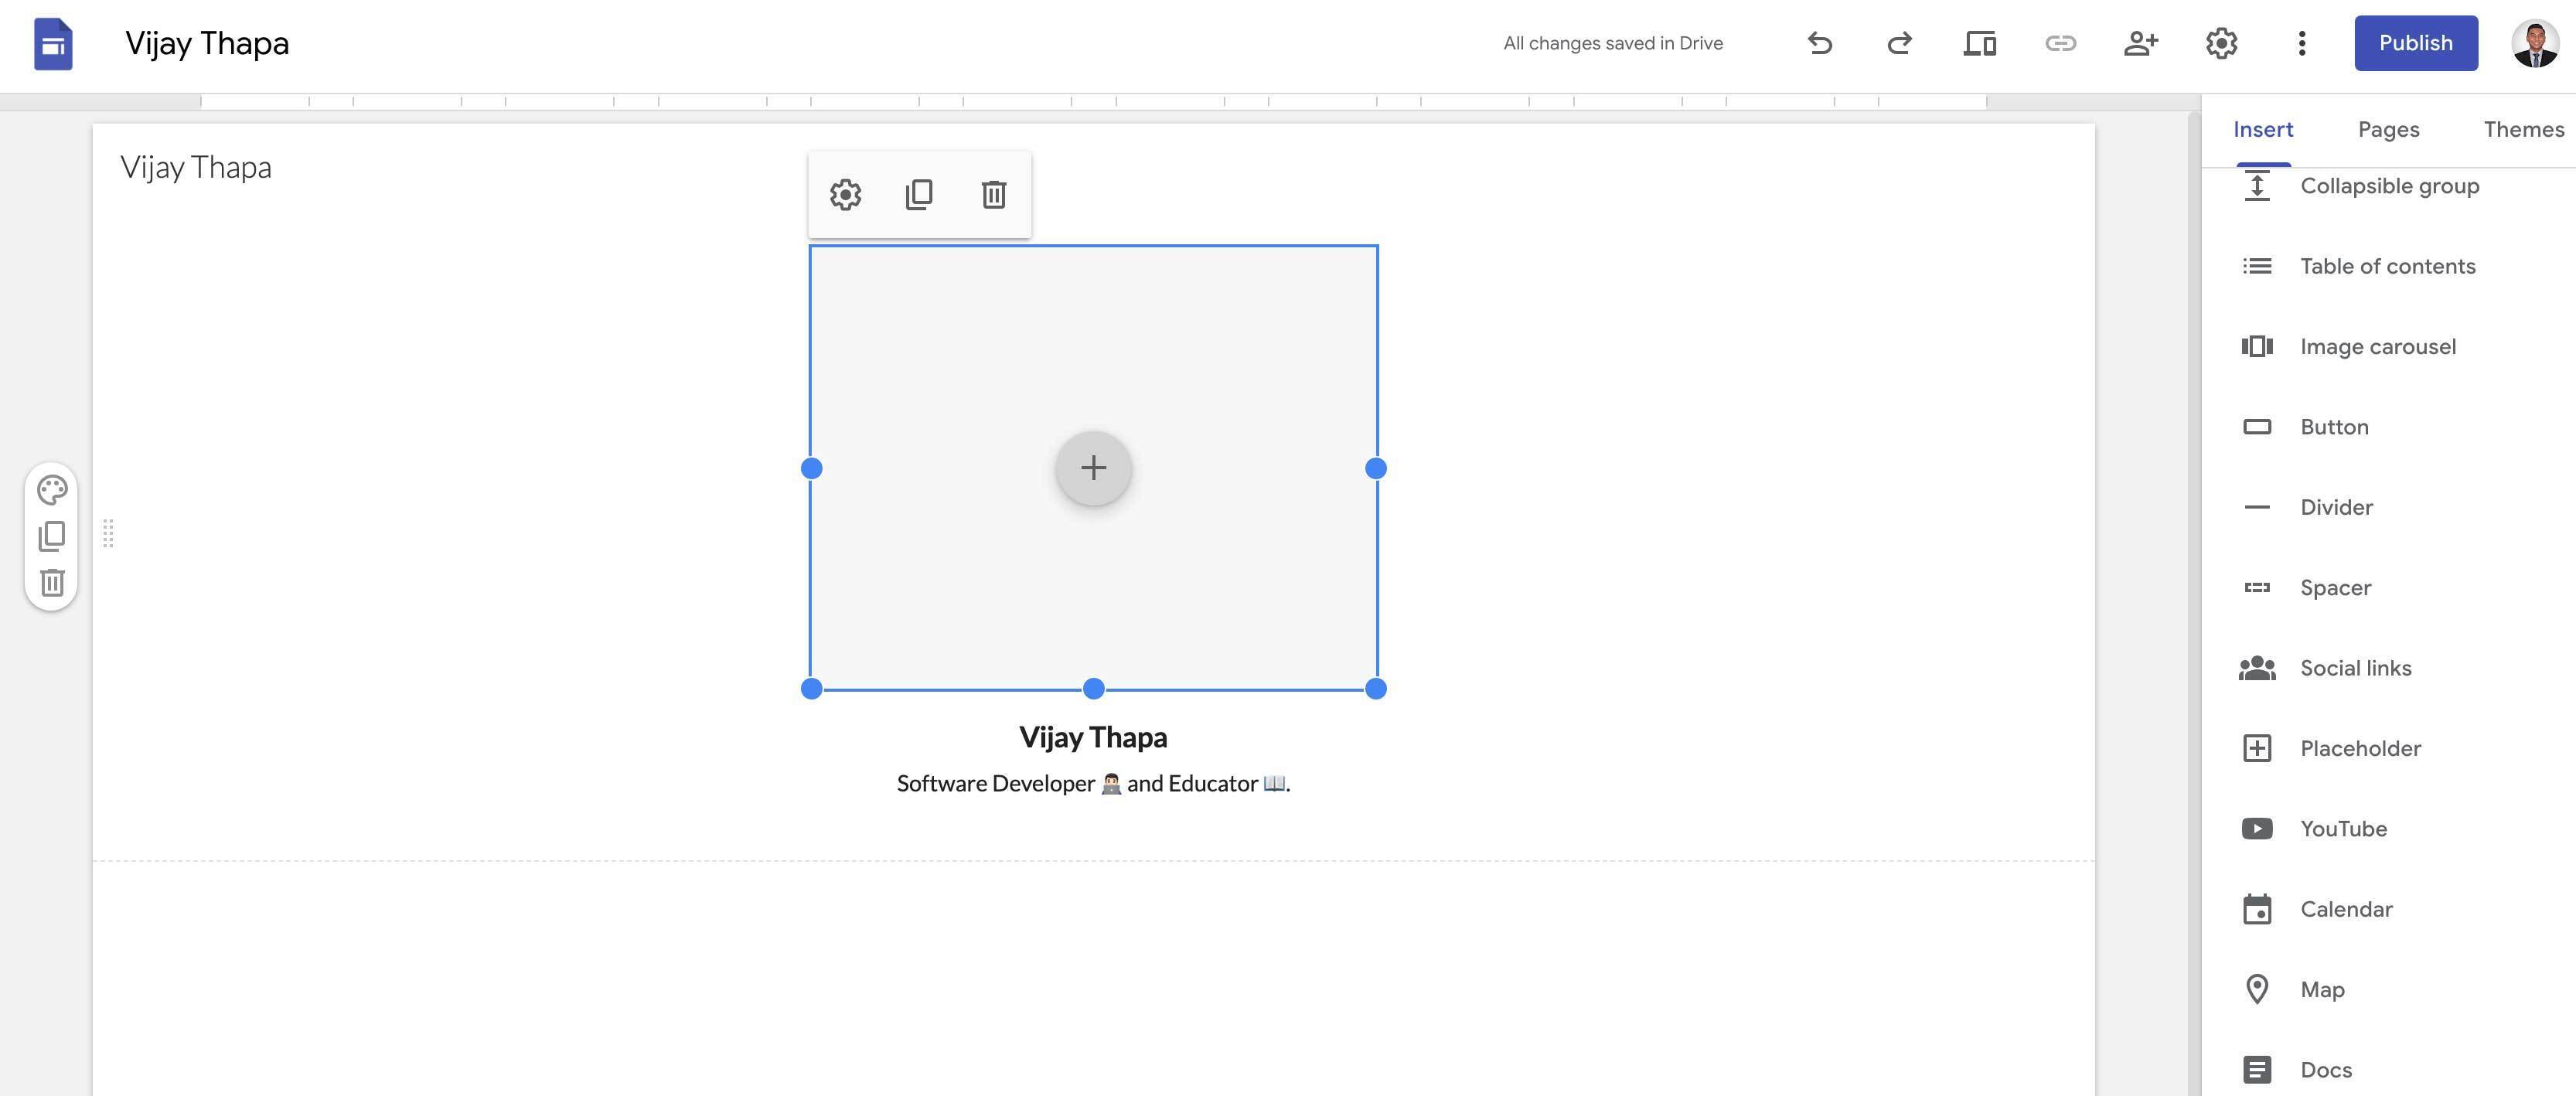
#### 4.4. Add Image Placeholder for your Logo or Profile Picture
Now, scroll to the bottom of the toolbar and click on Placeholder to add it to our design.
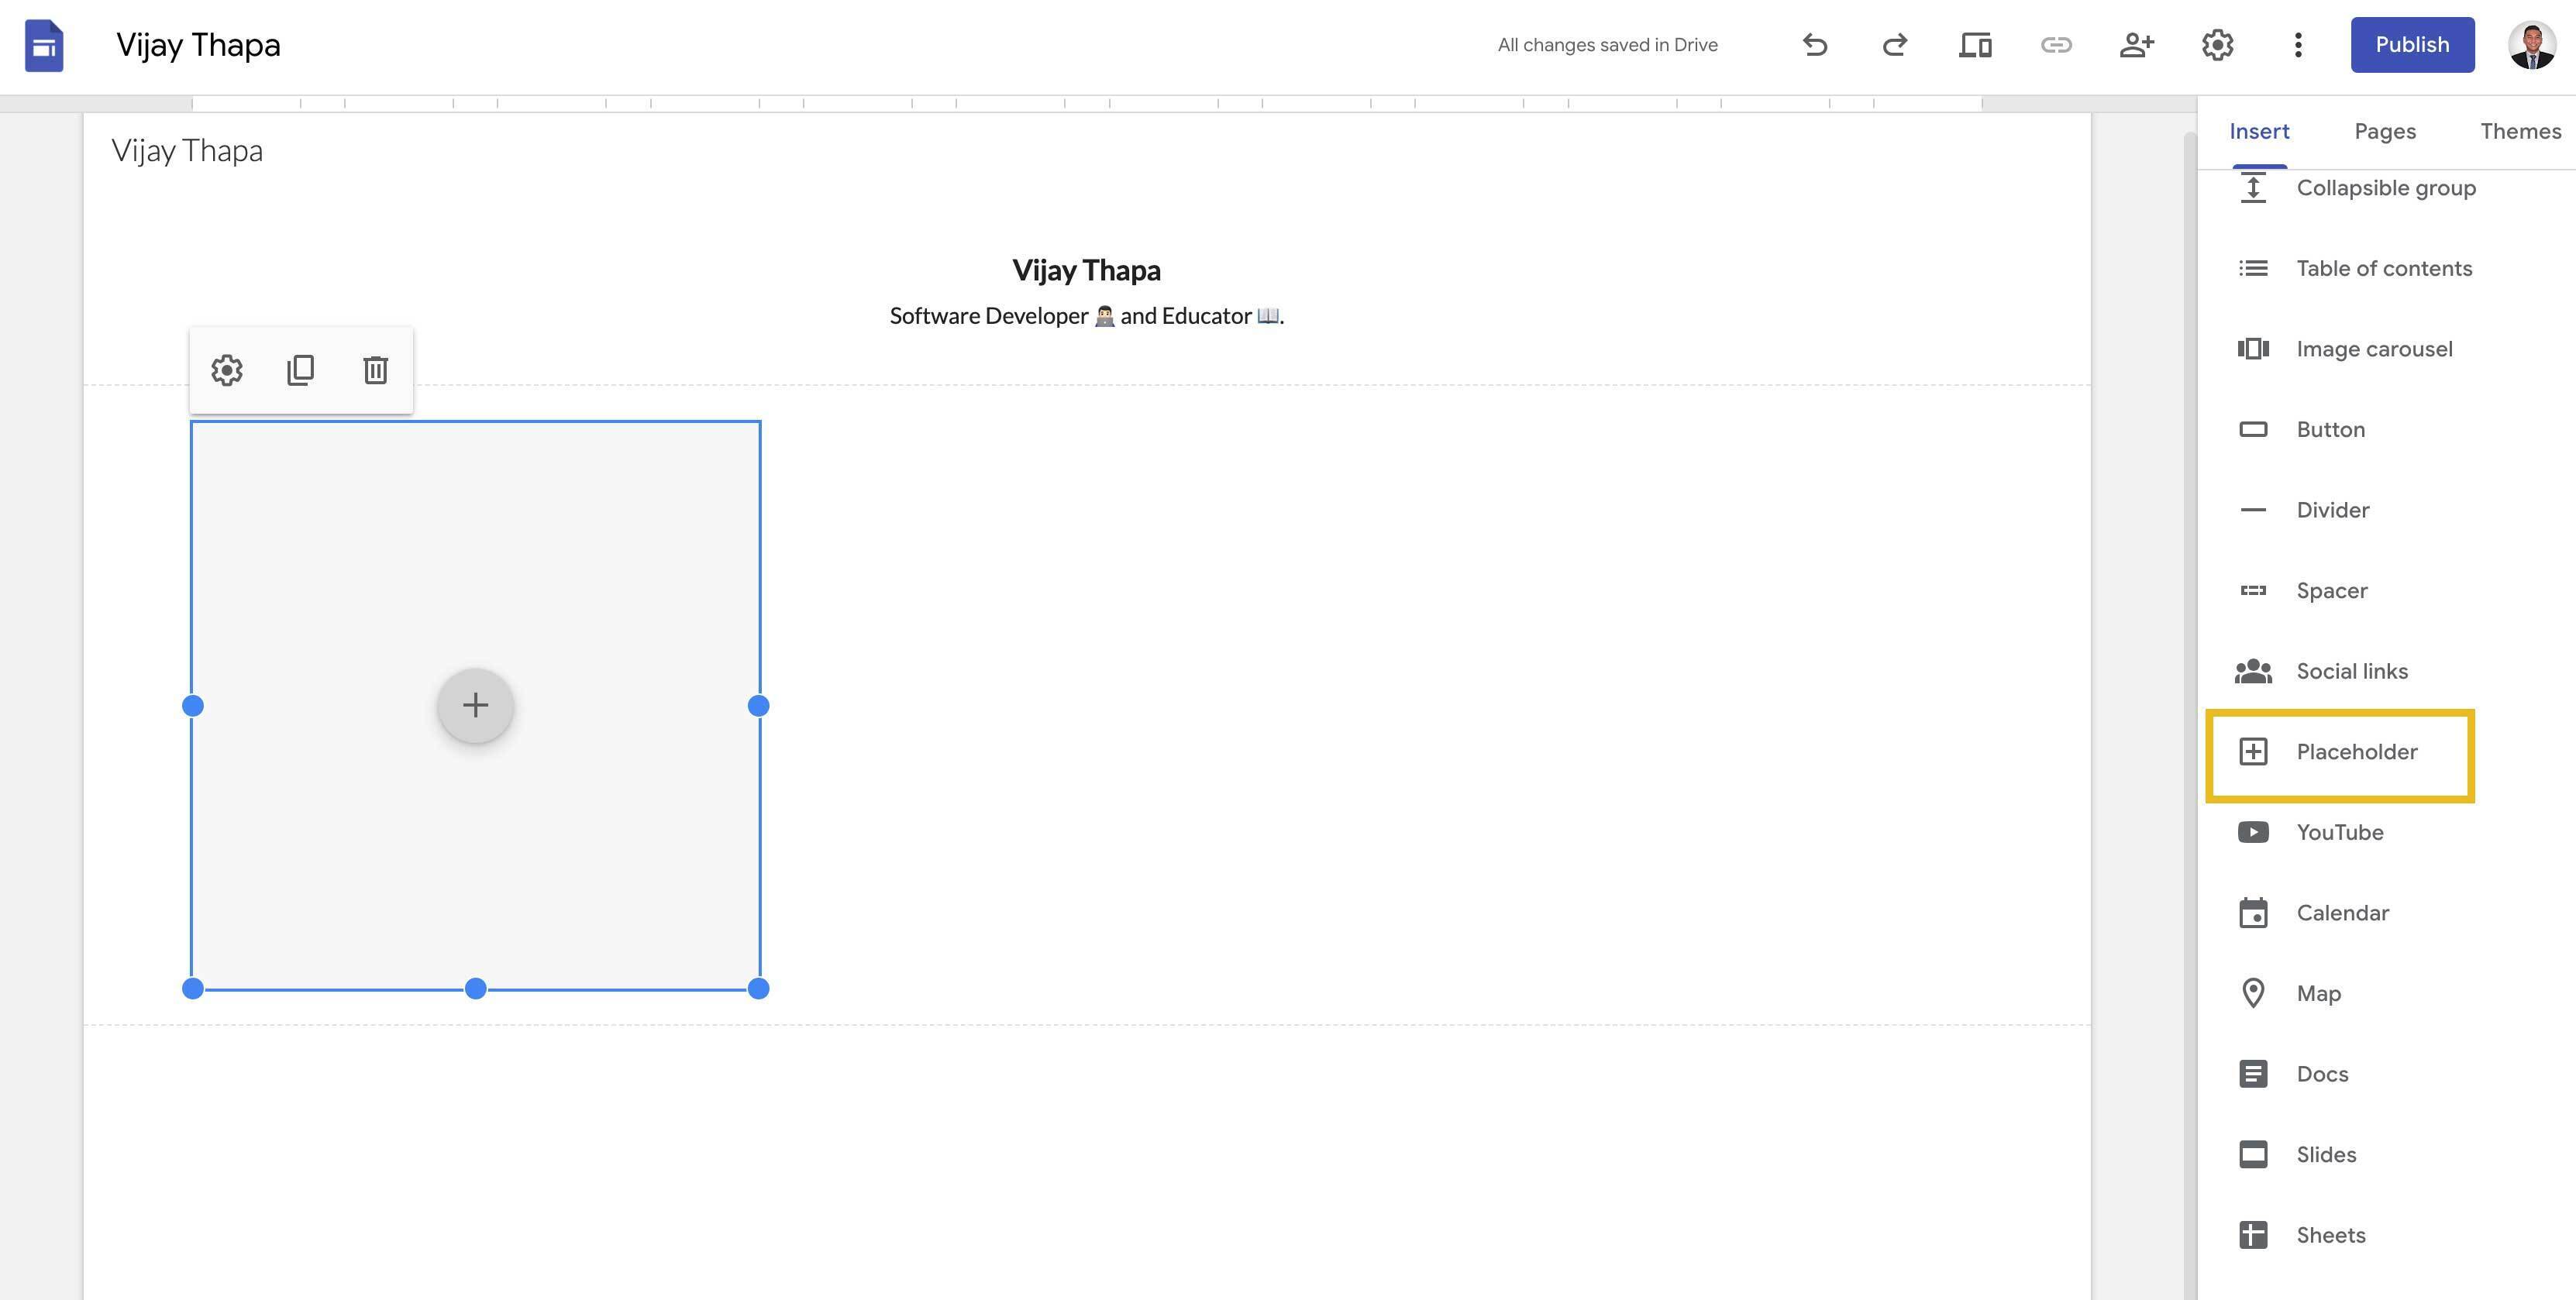
Then, drag the placeholder to the top of Your Texts (Title and Short description) and decrease the size by dragging inwards from the dots of the placeholder.
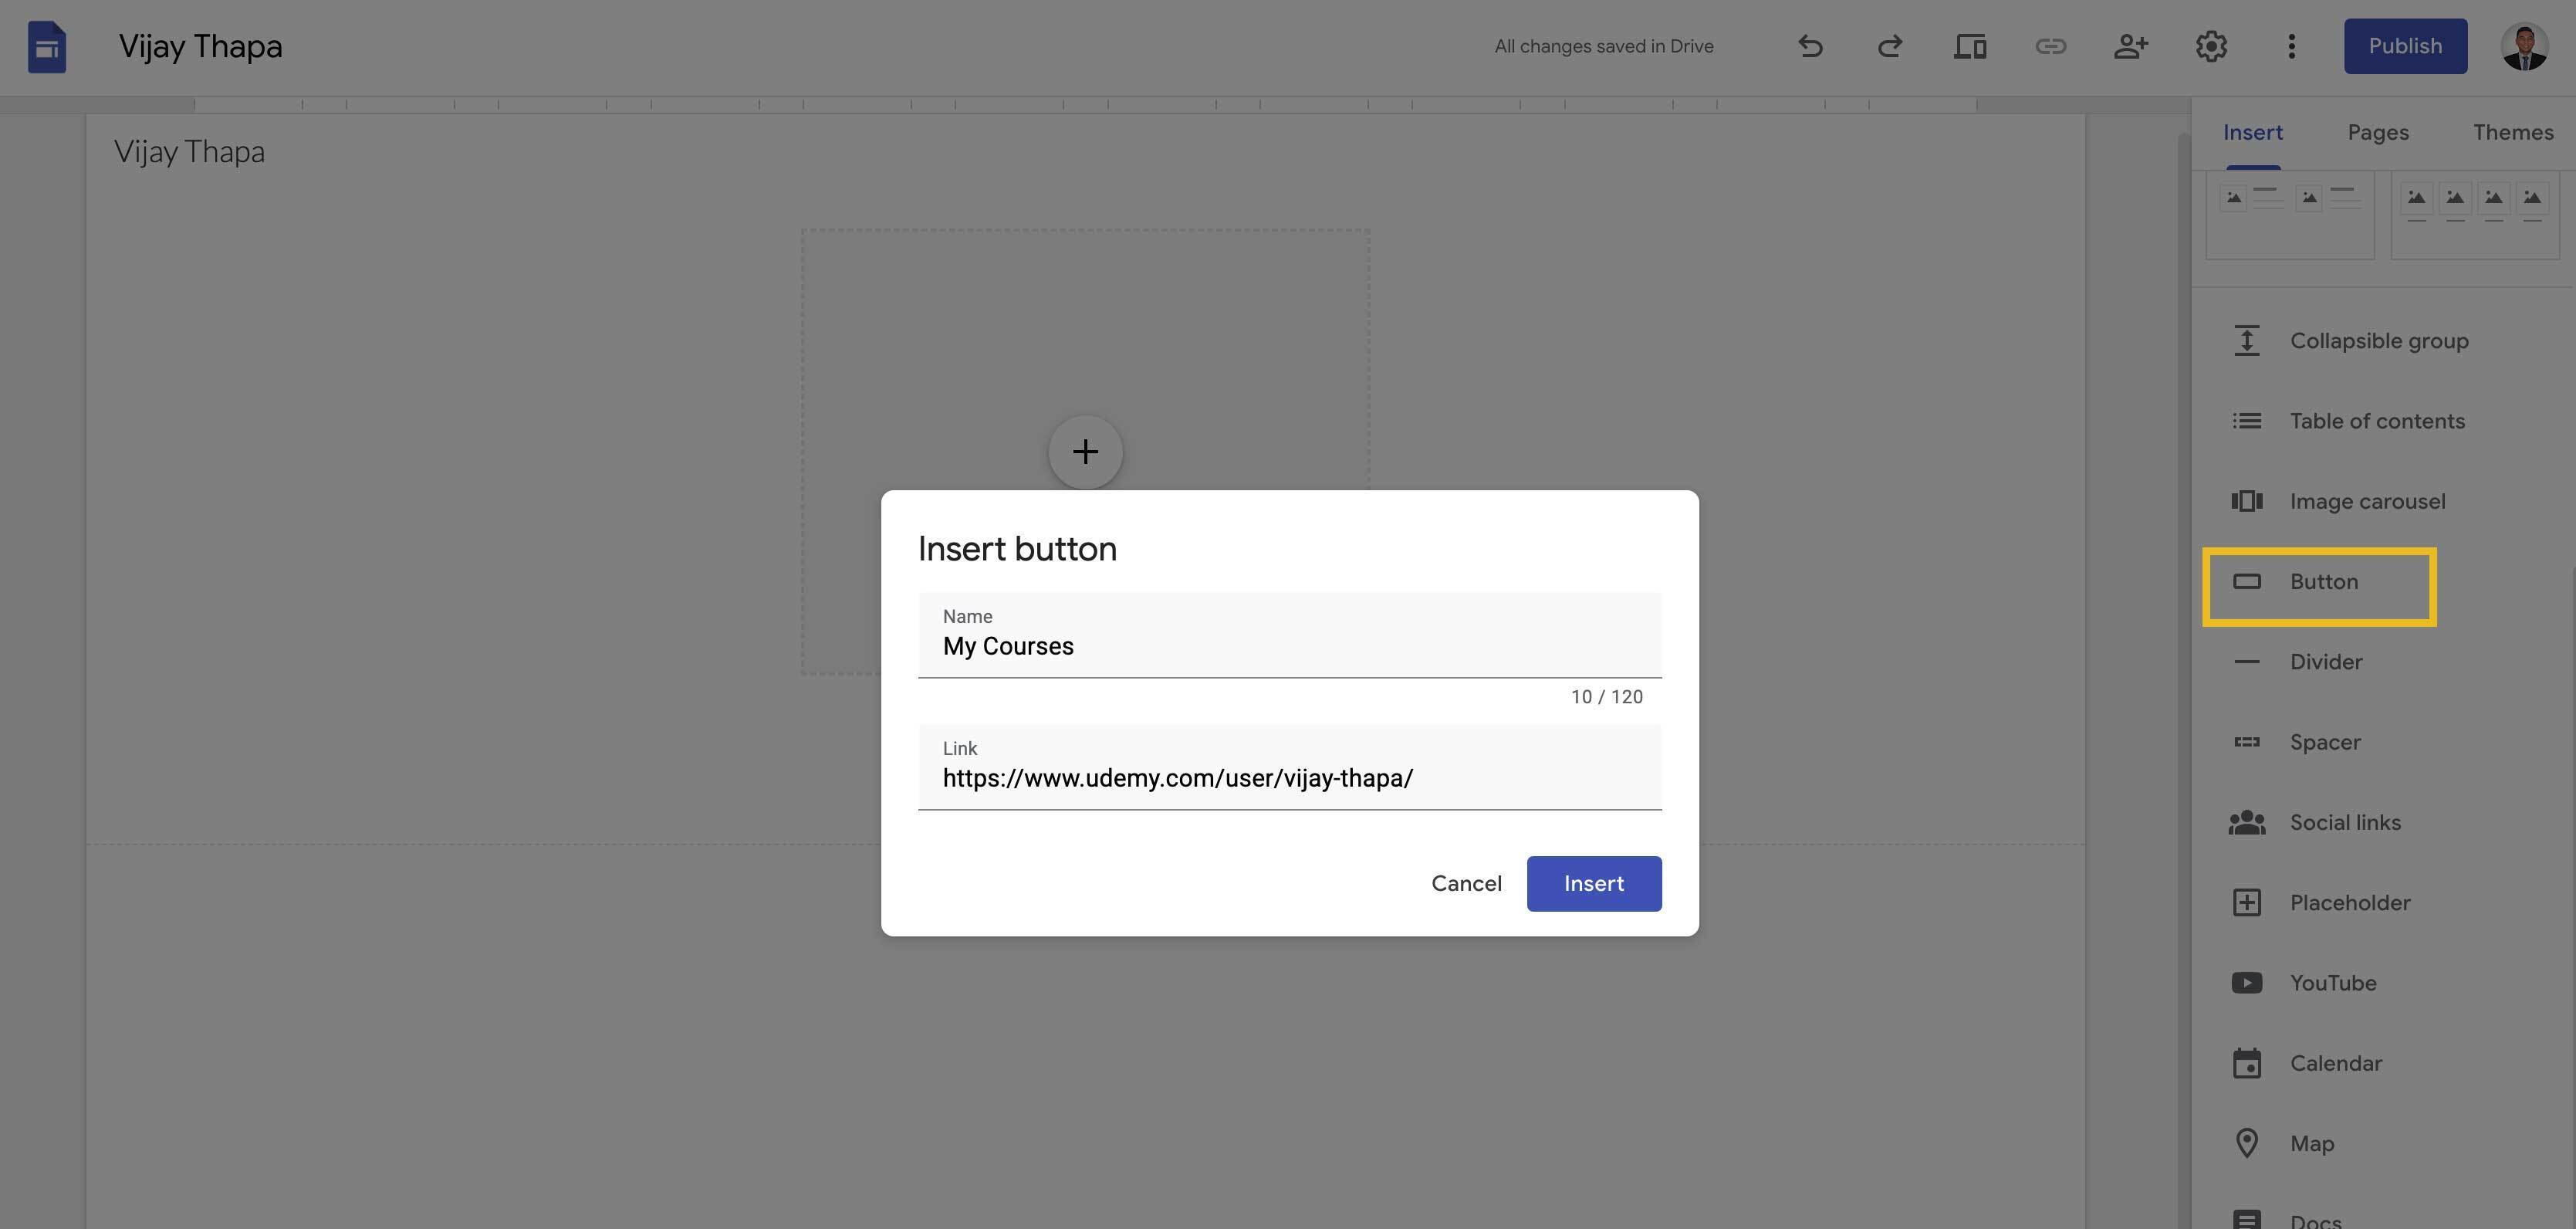
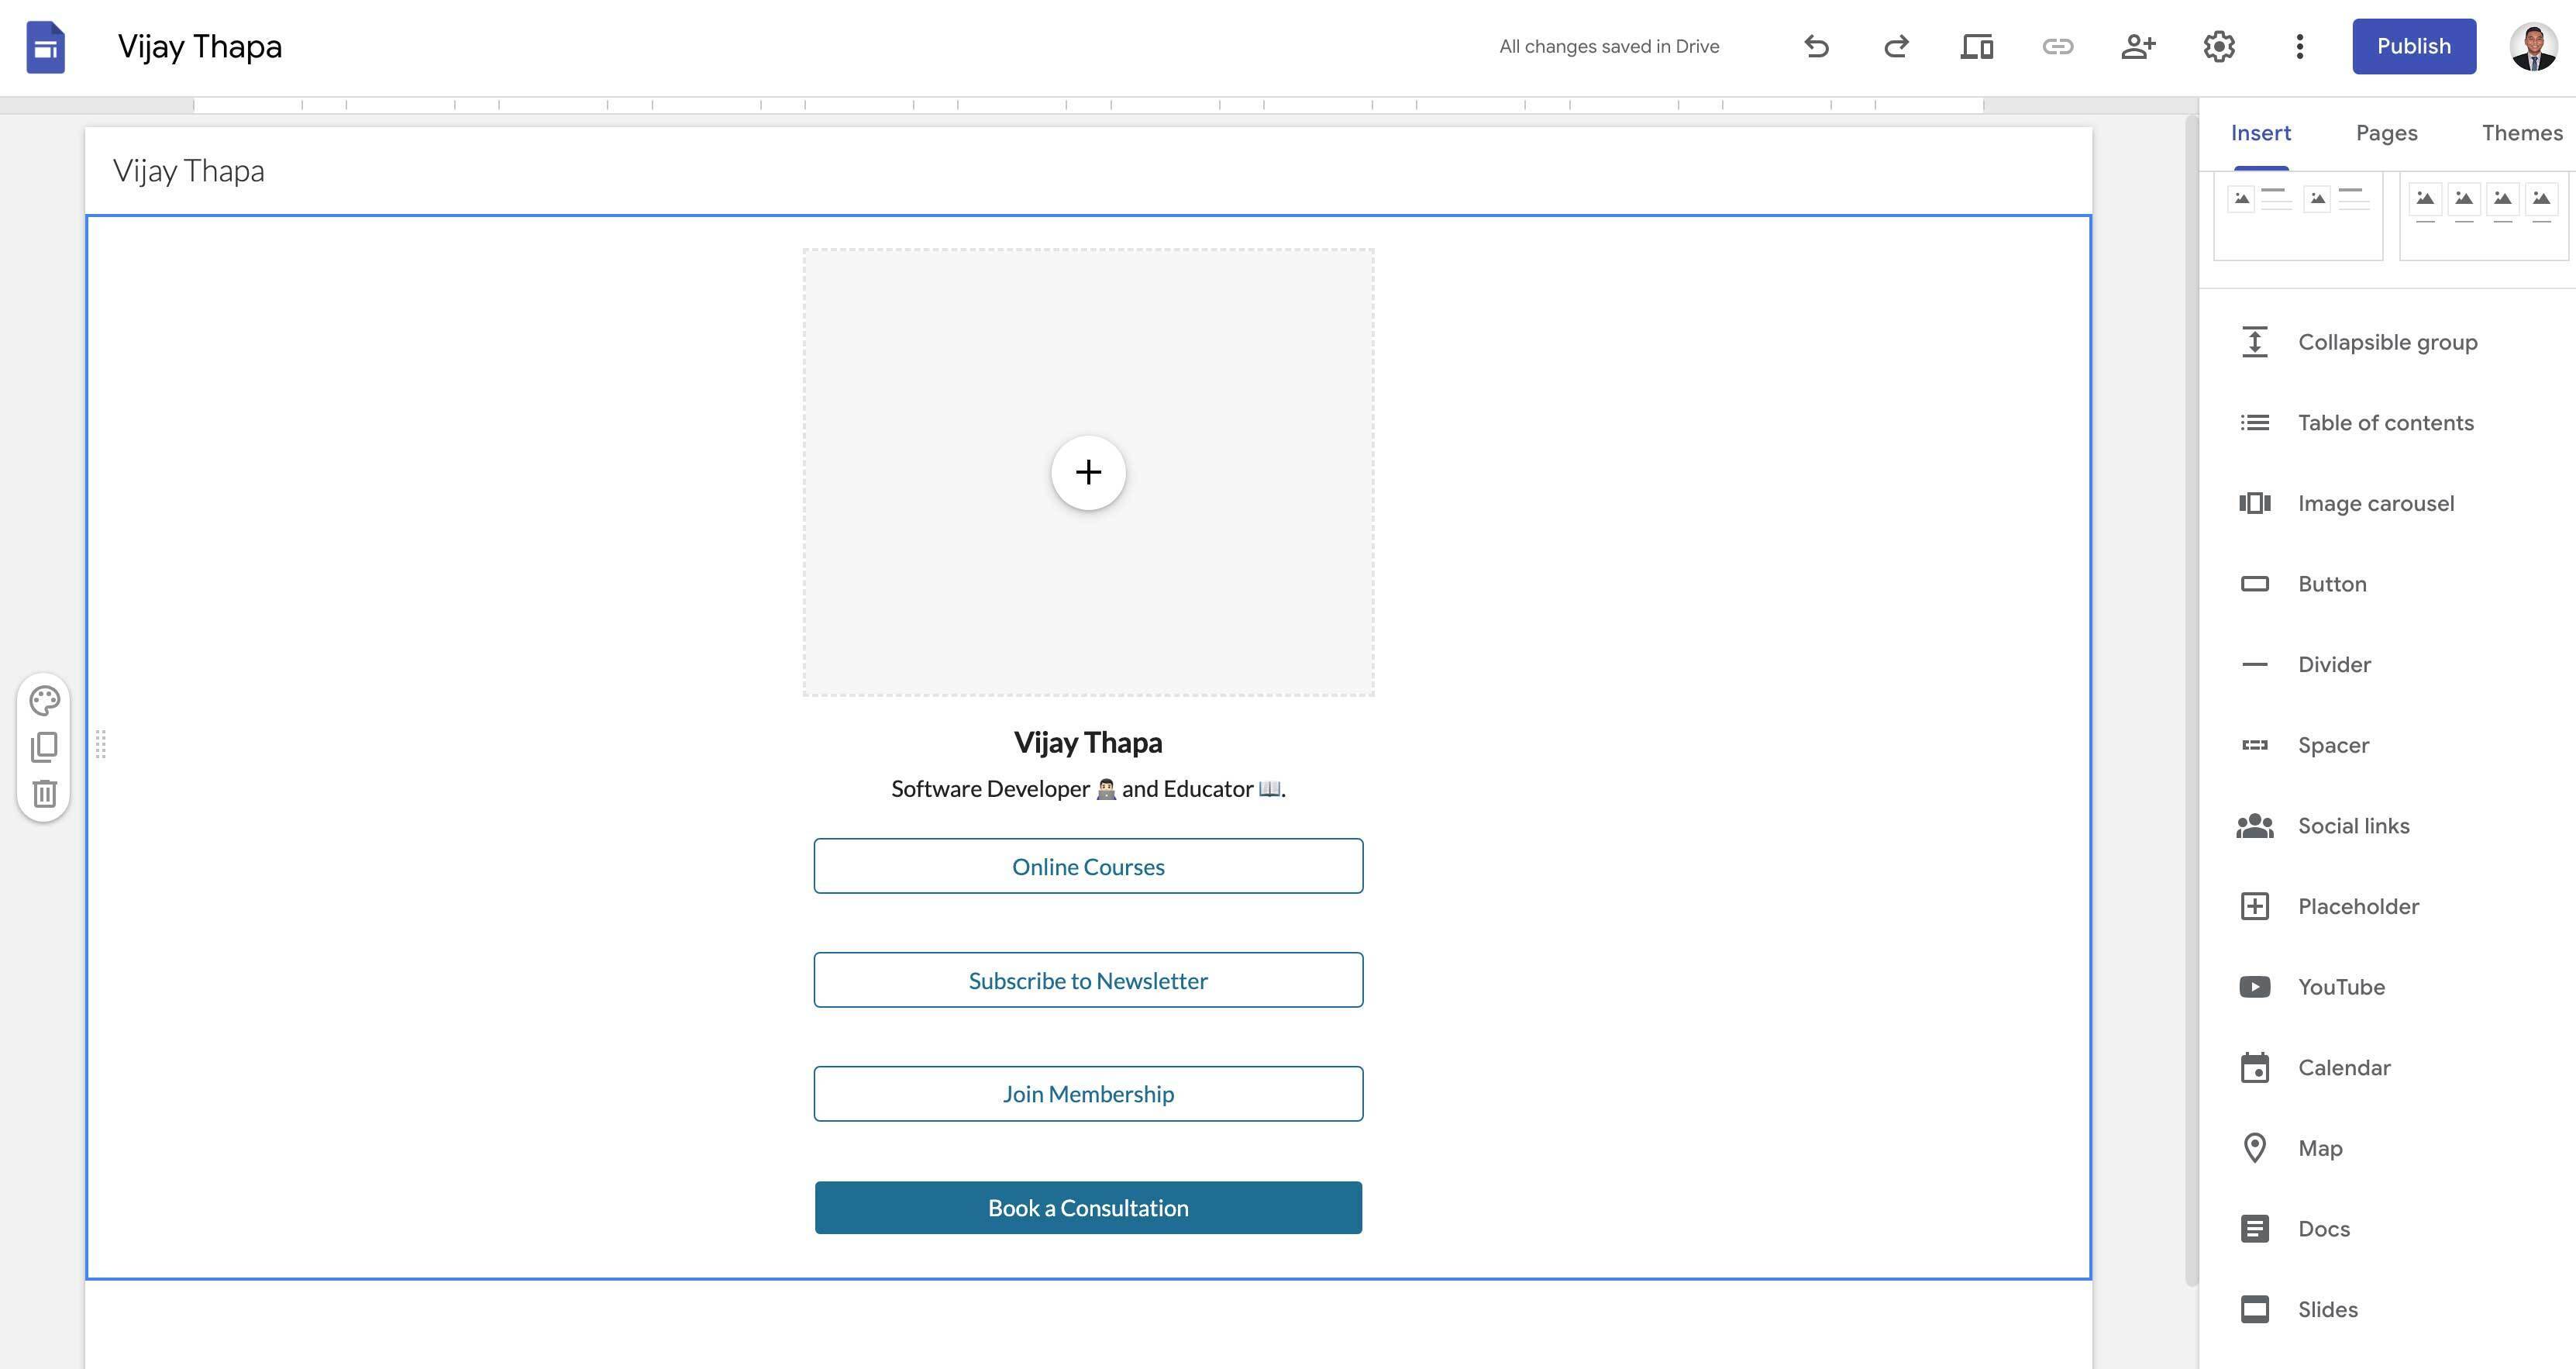
#### 4.5. Add Buttons for Links and Customize
Now, from the tool bar section, scroll and select “Button” which will ask you to fill Button Name and Link. Once you add those details and click on insert, it adds a button on our Link-in-Bio design.
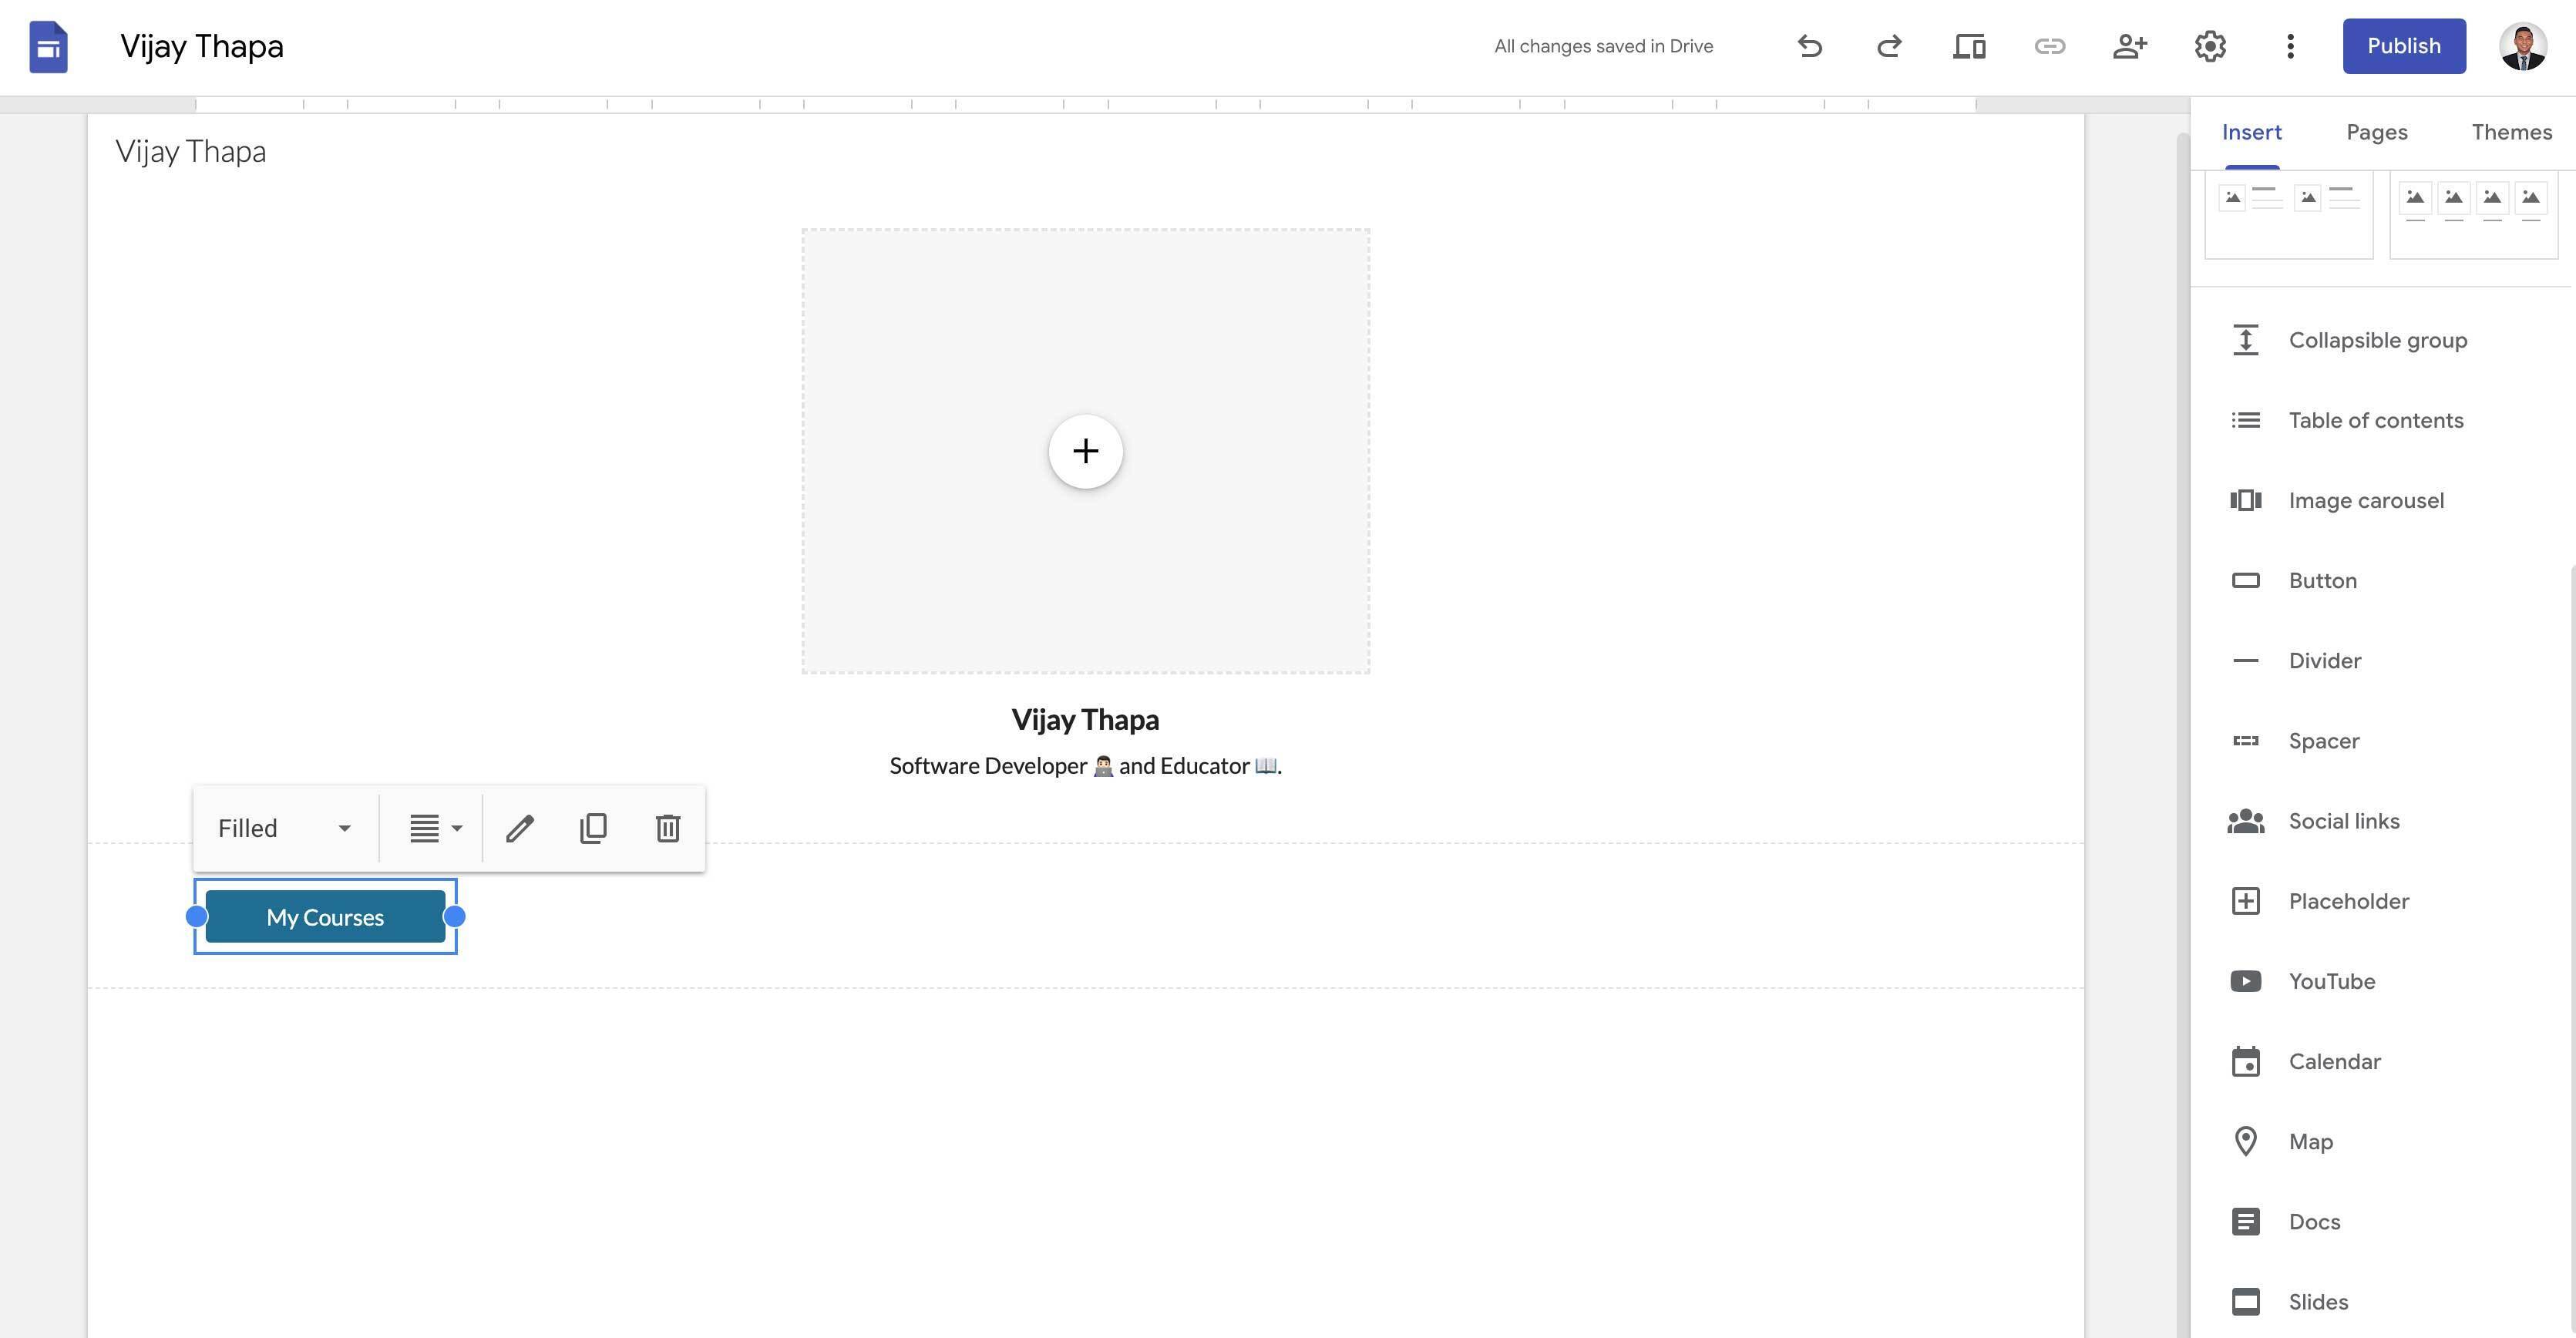
Then drag the button just below the Title and Short description text as shown in the image below.
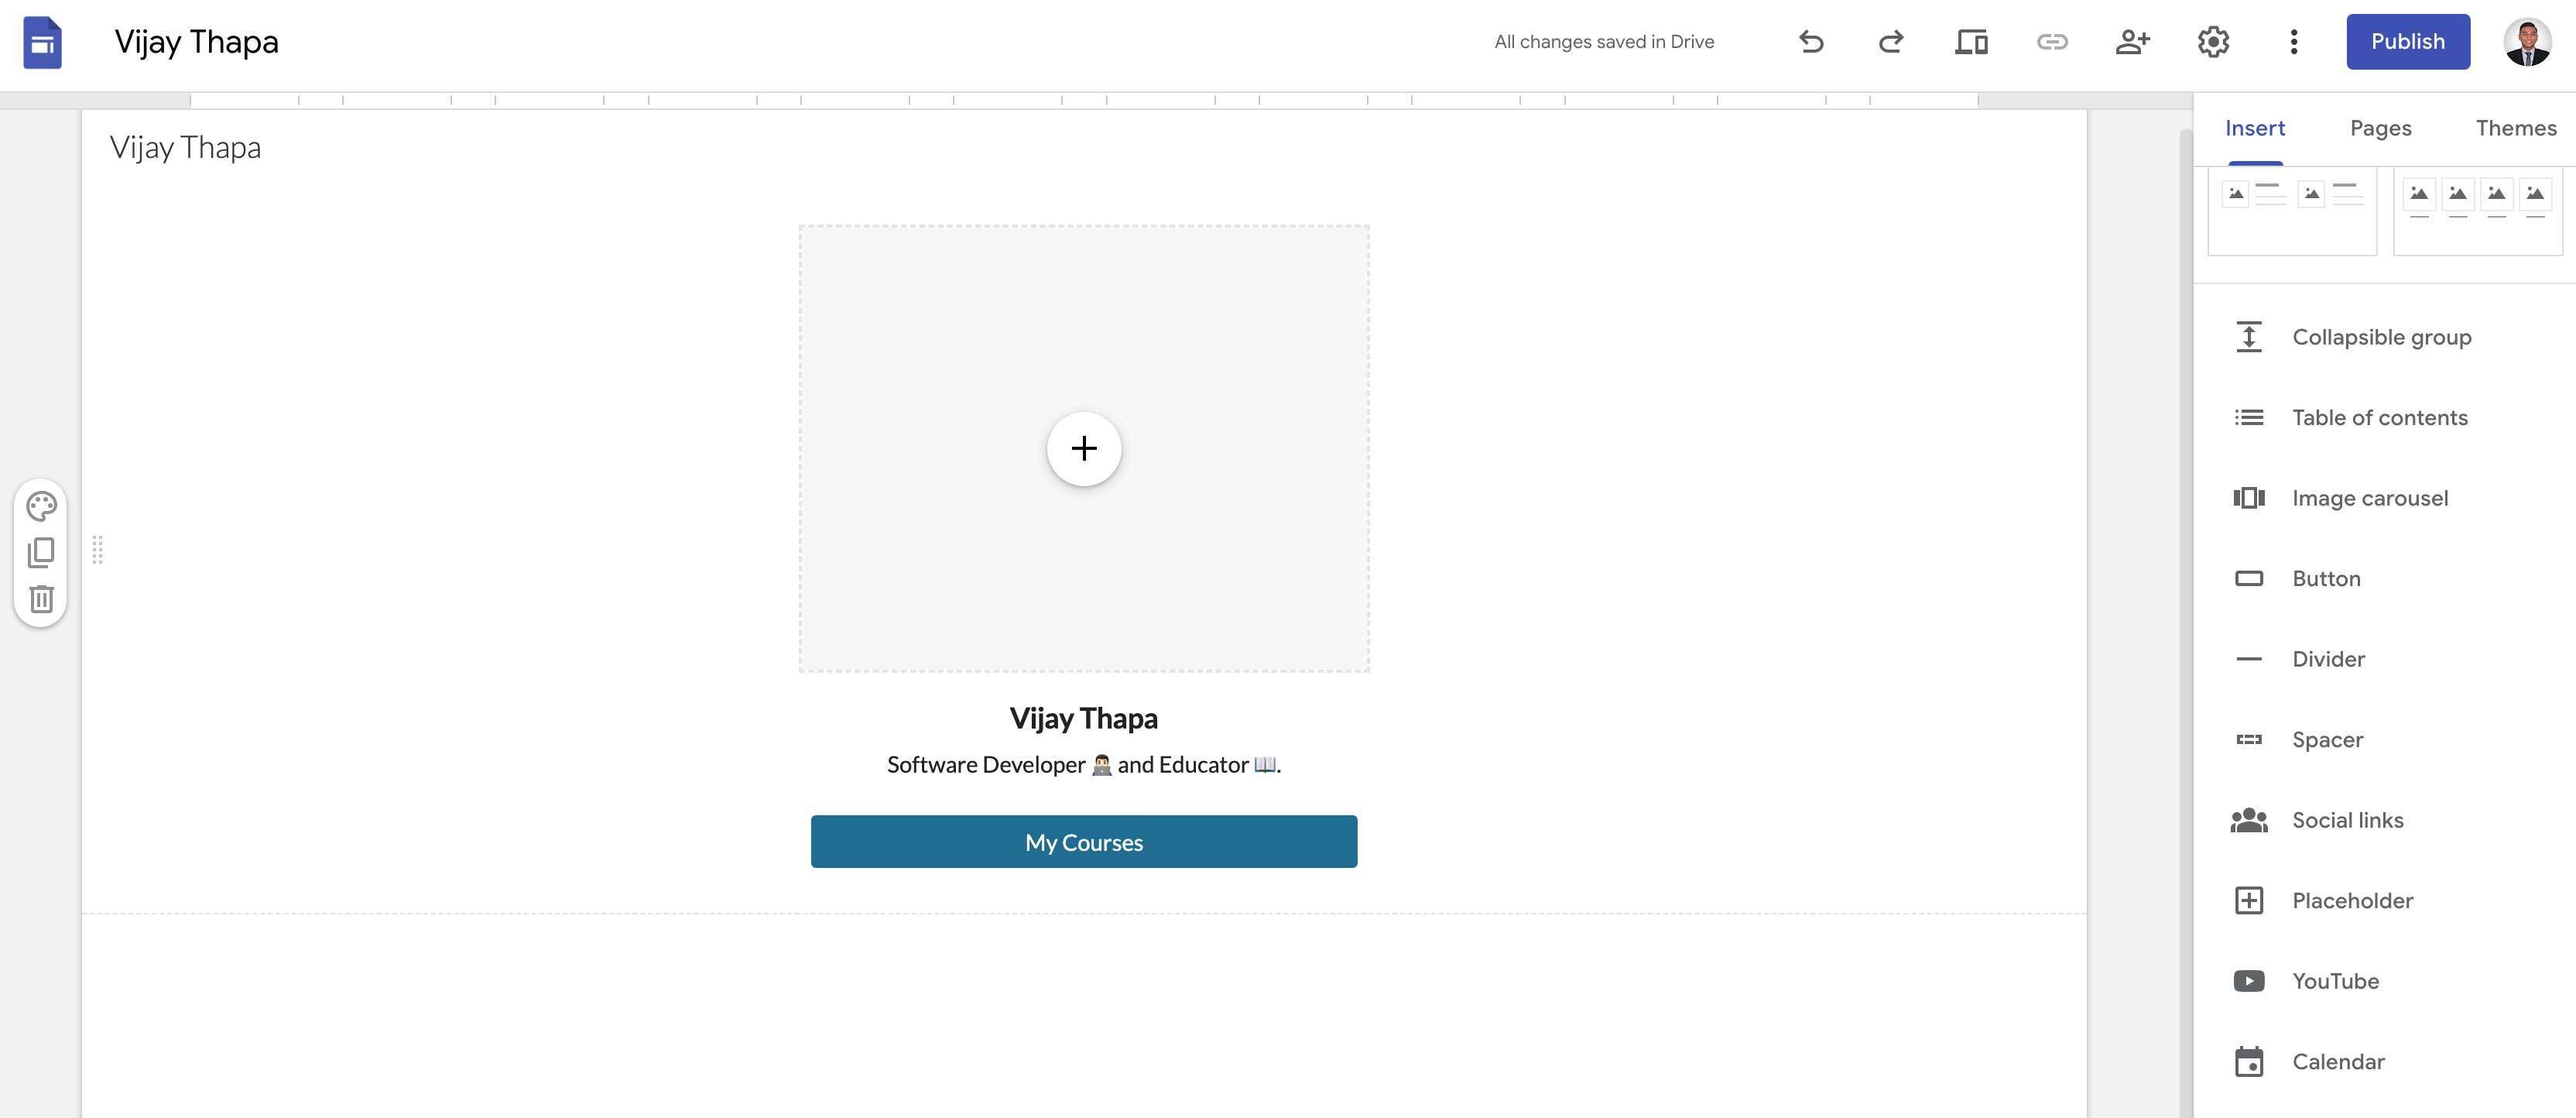
Now, repeat the above process to add as many buttons as you like to add all of your important links which will look like the following.
_Note: To add more buttons quickly, you can just select one button and click on the duplicate option (which is a square icon between pencil and bin icon) then change the links and text by clicking on the pencil icon._
**Change Button Design**
You can make the important one filled and the other just outlined to attract the visitors to not miss clicking on the most important links (these can be your store link, lead form links, etc.).
To do this, just select the button and click on button style (default is Filled) then change it to either Outlined or Text.
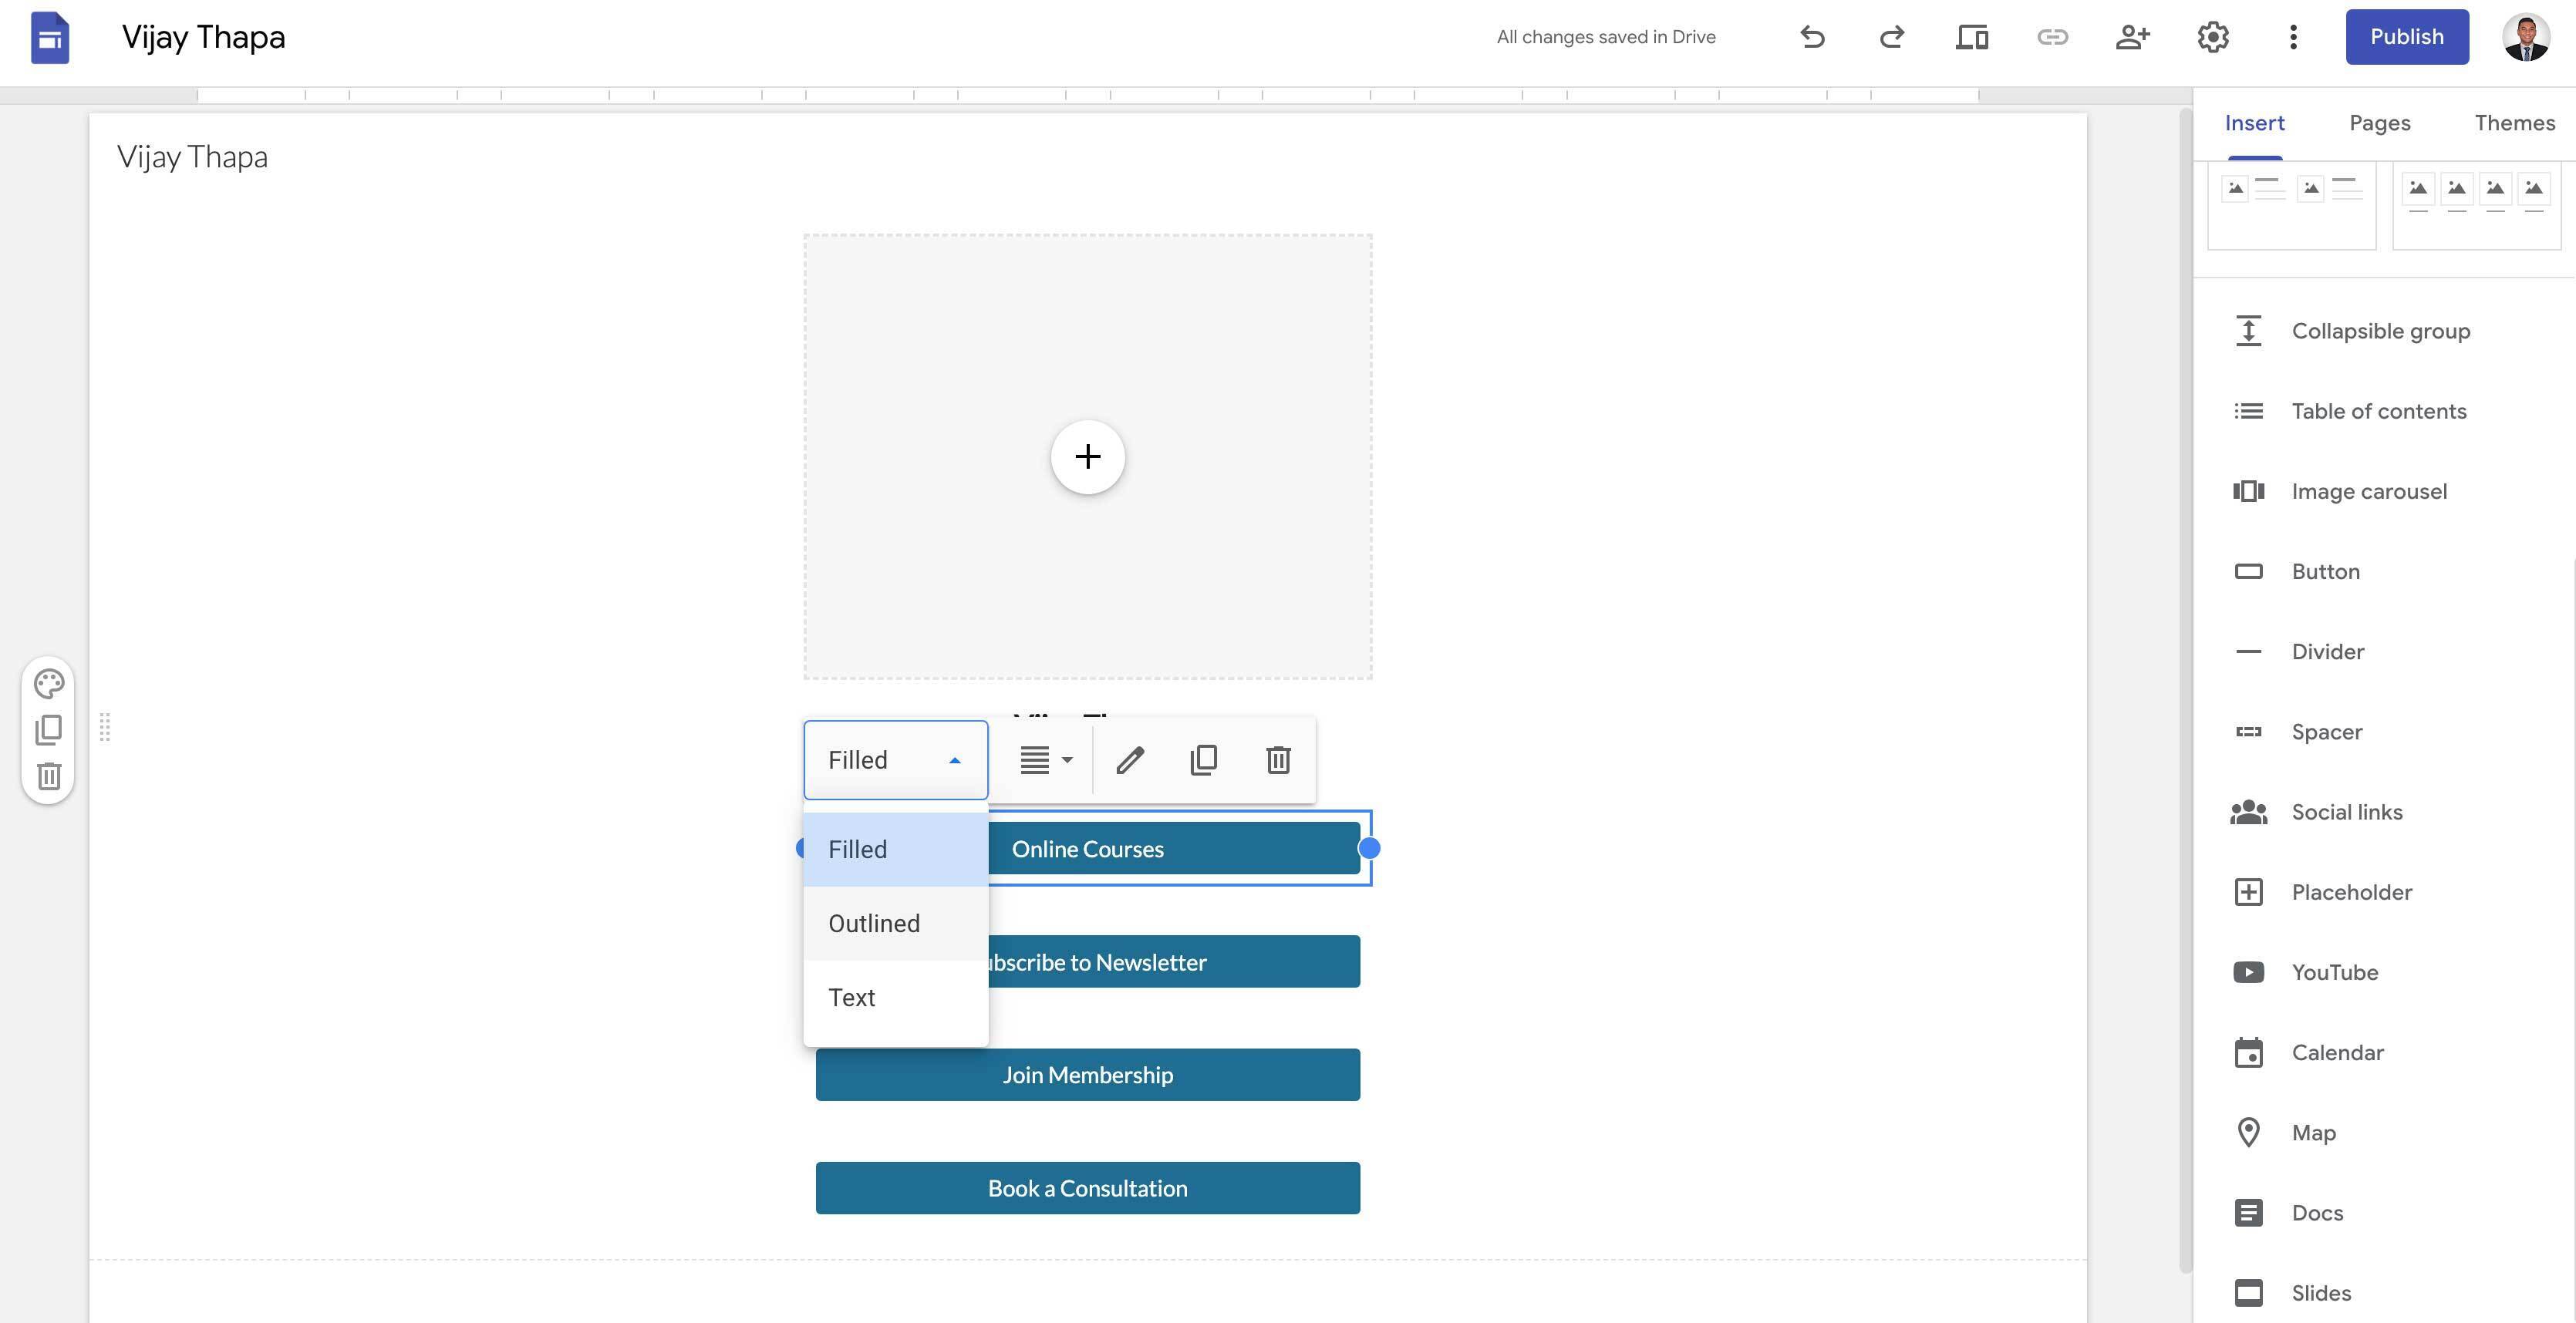
Once you change the button style it can look like following
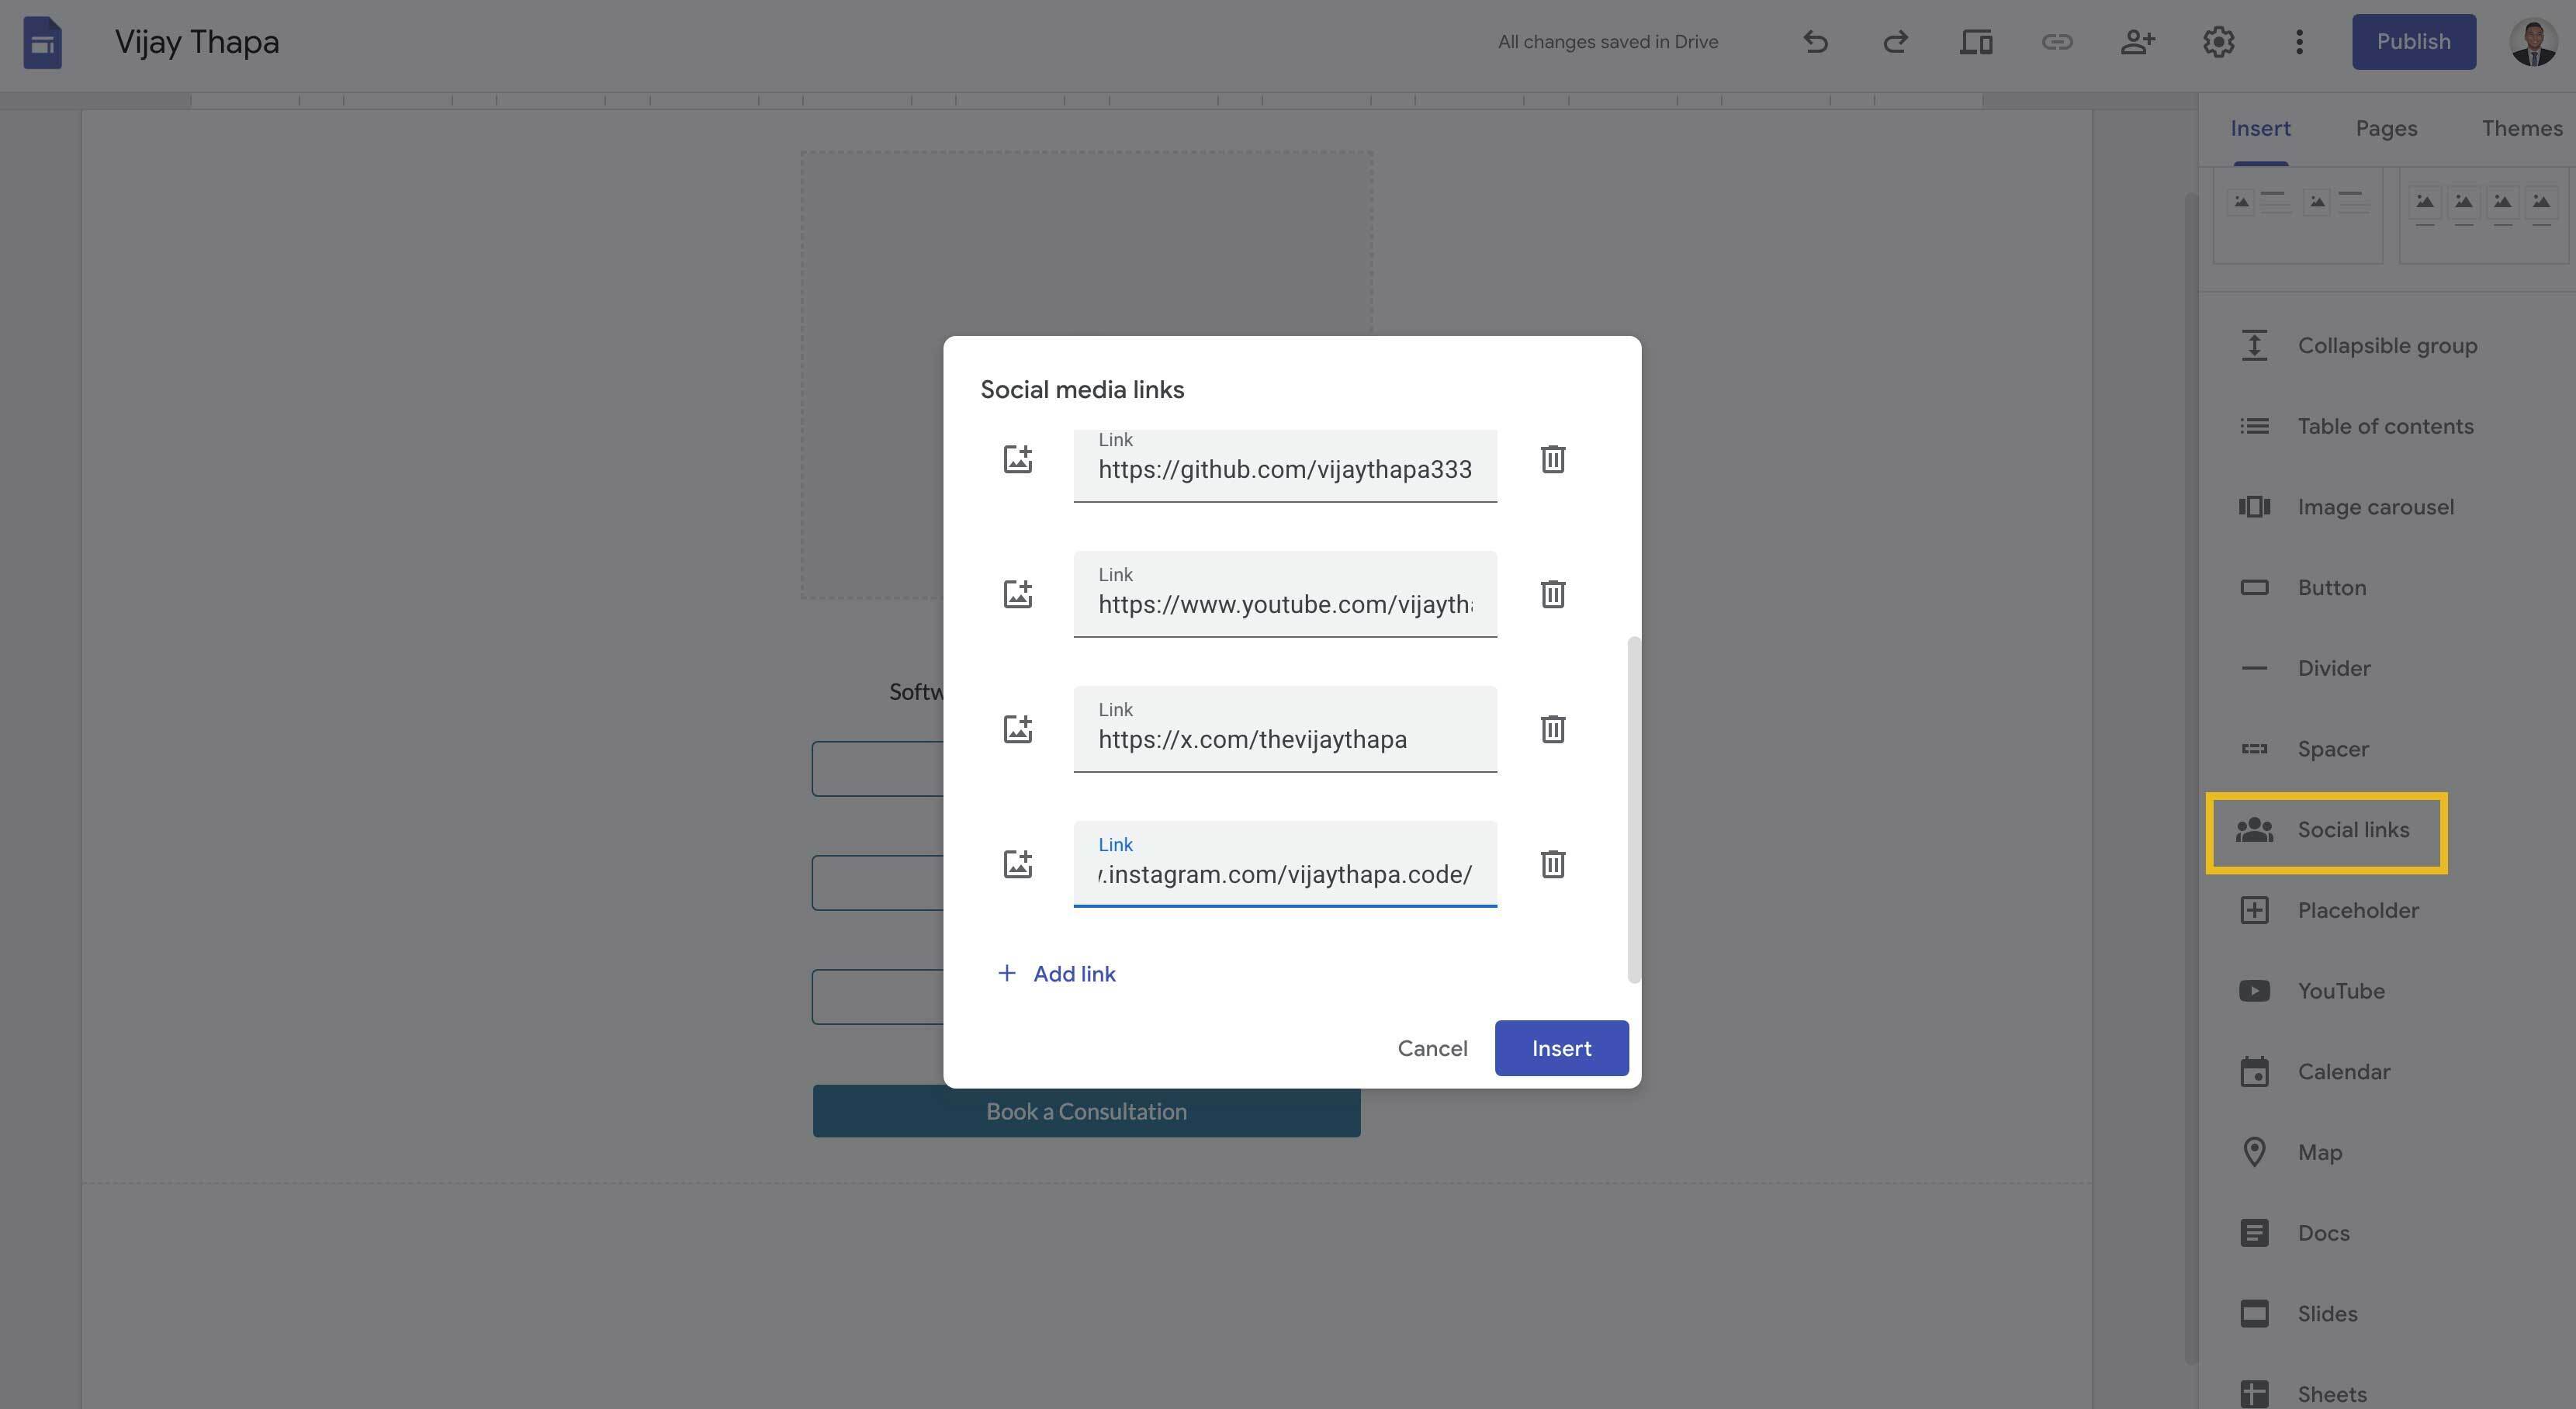
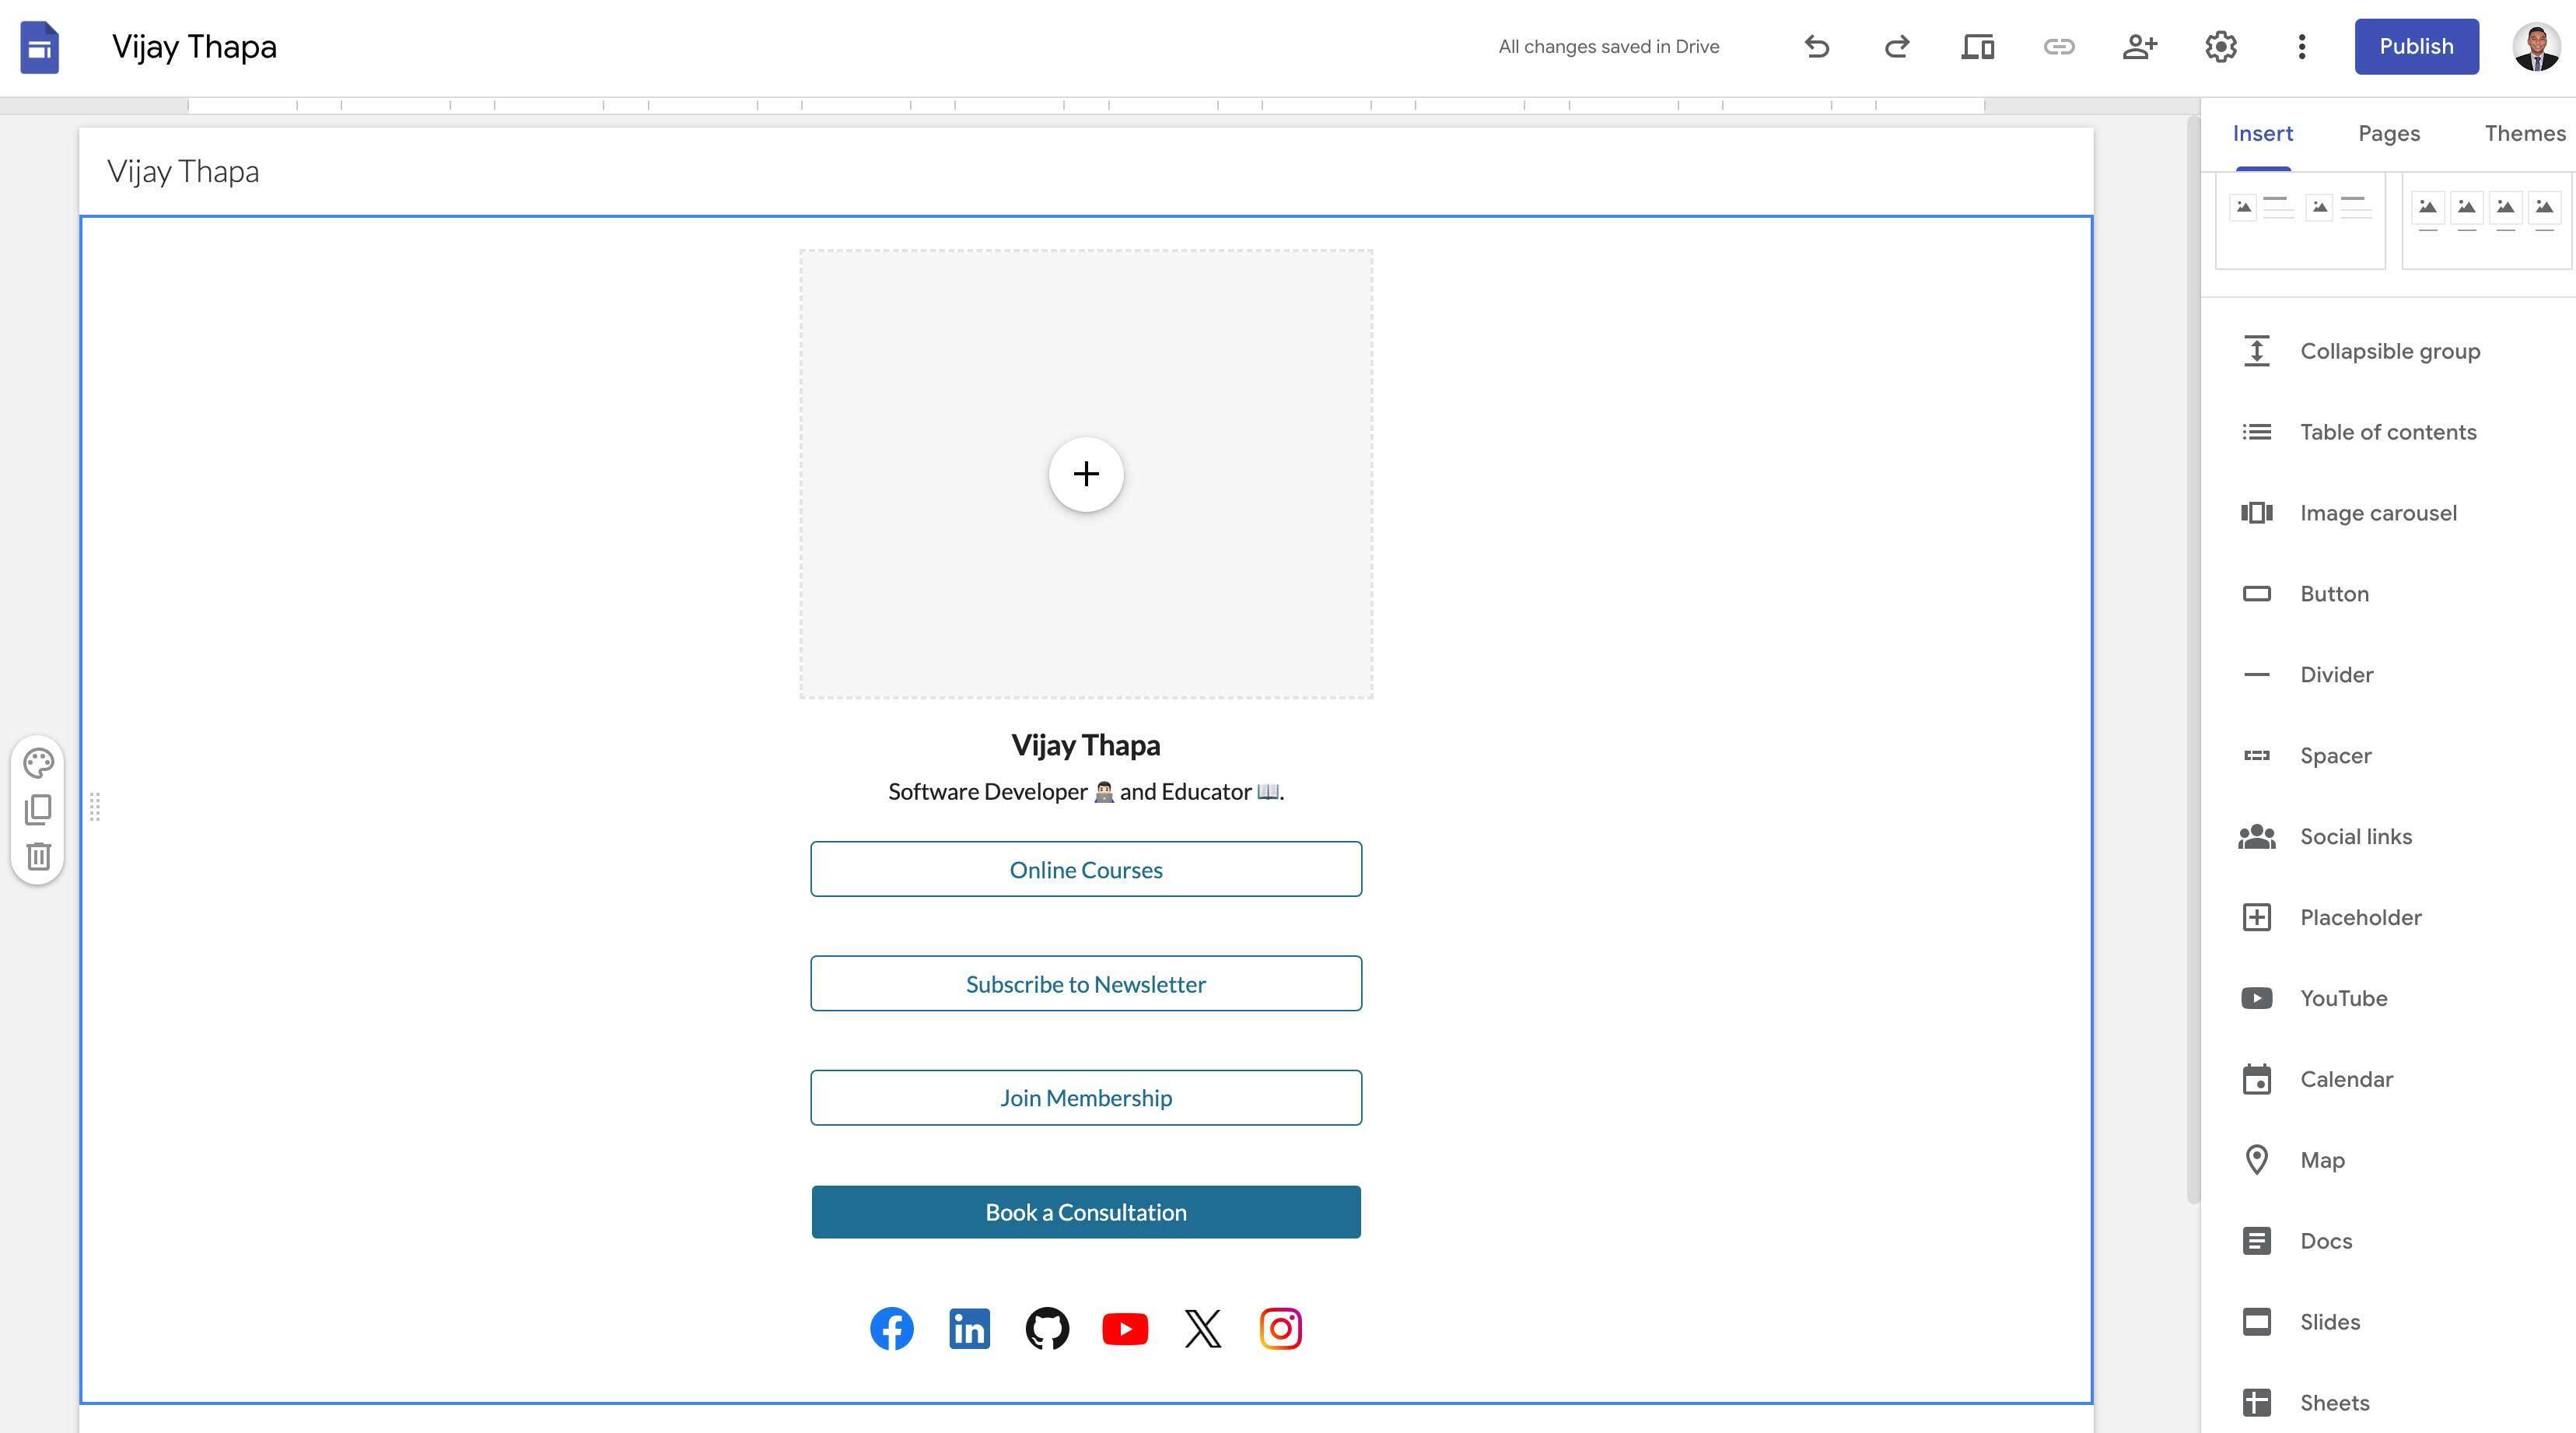
#### 4.6. Add Social Icons for Digital Profile
Now, to add social links, scroll on the tool bar and select **“Social Links”**, then you’ll have to add all of your social media links as shown below and click on insert.
_Note: To add more social media links, click on the Add Link on the left bottom._
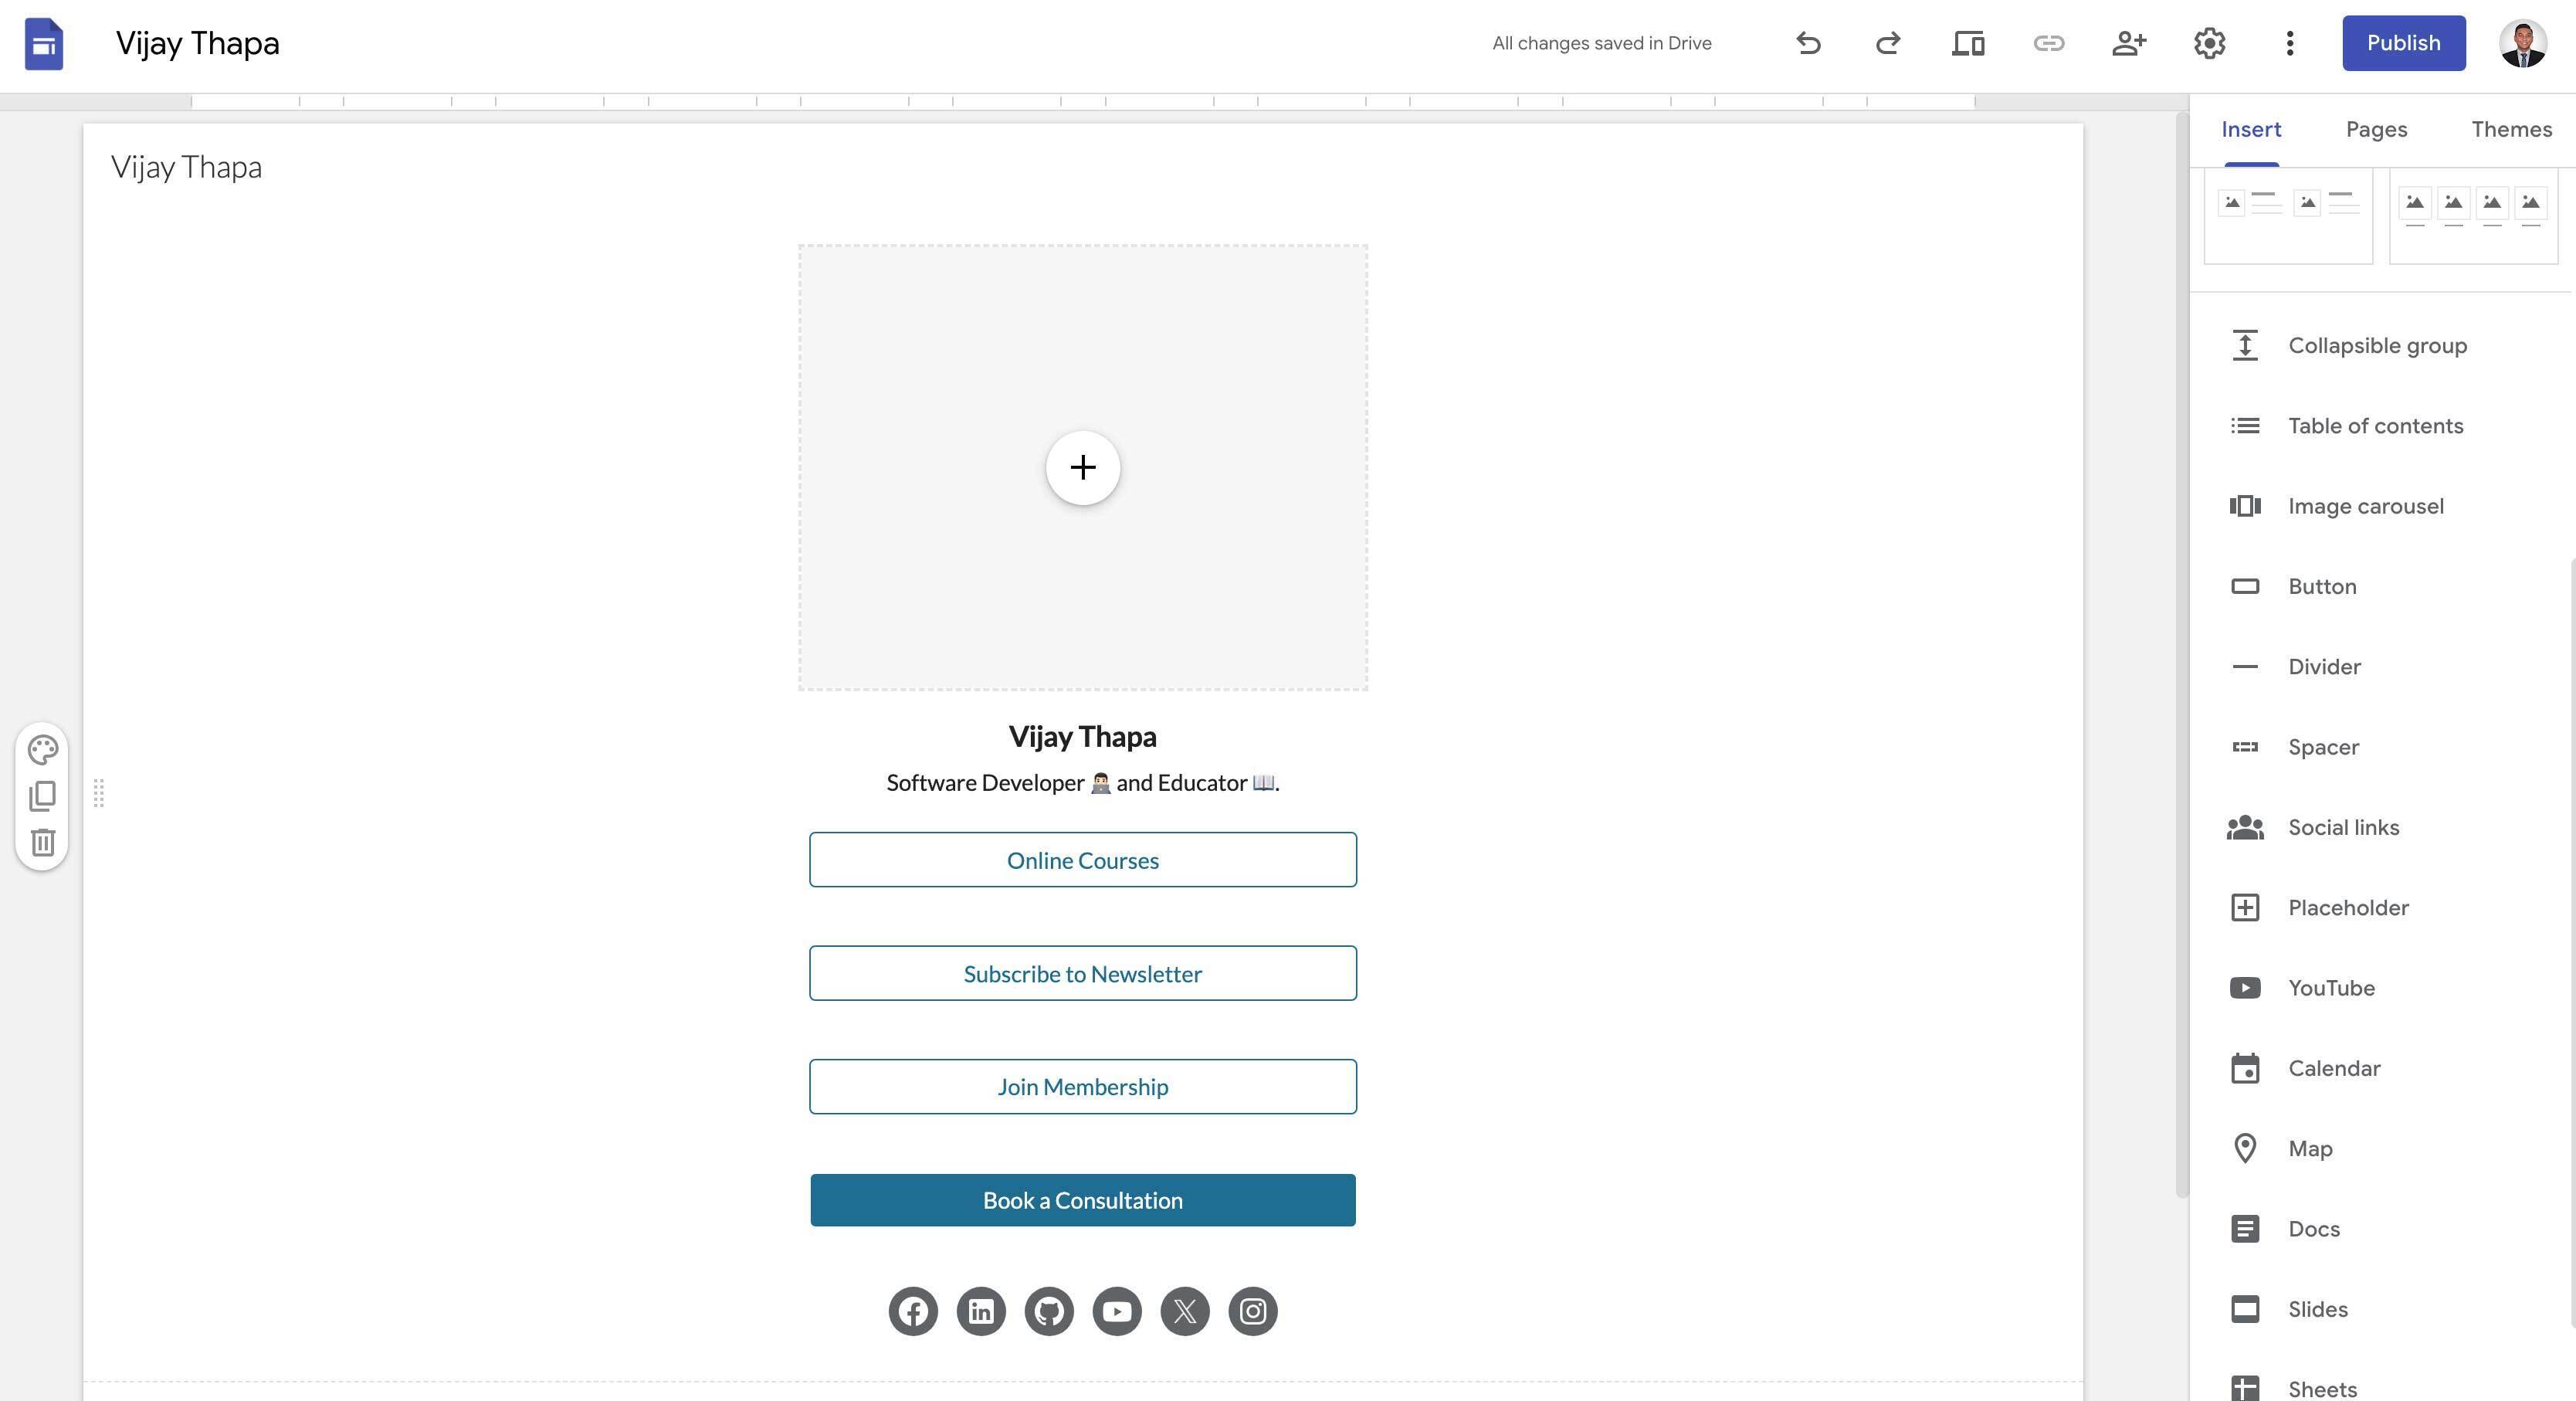
Once you add all the links the social links will be added to the page.
Then you’ll have to drag it up to the bottom of all the buttons we added in our link-in-bio design.
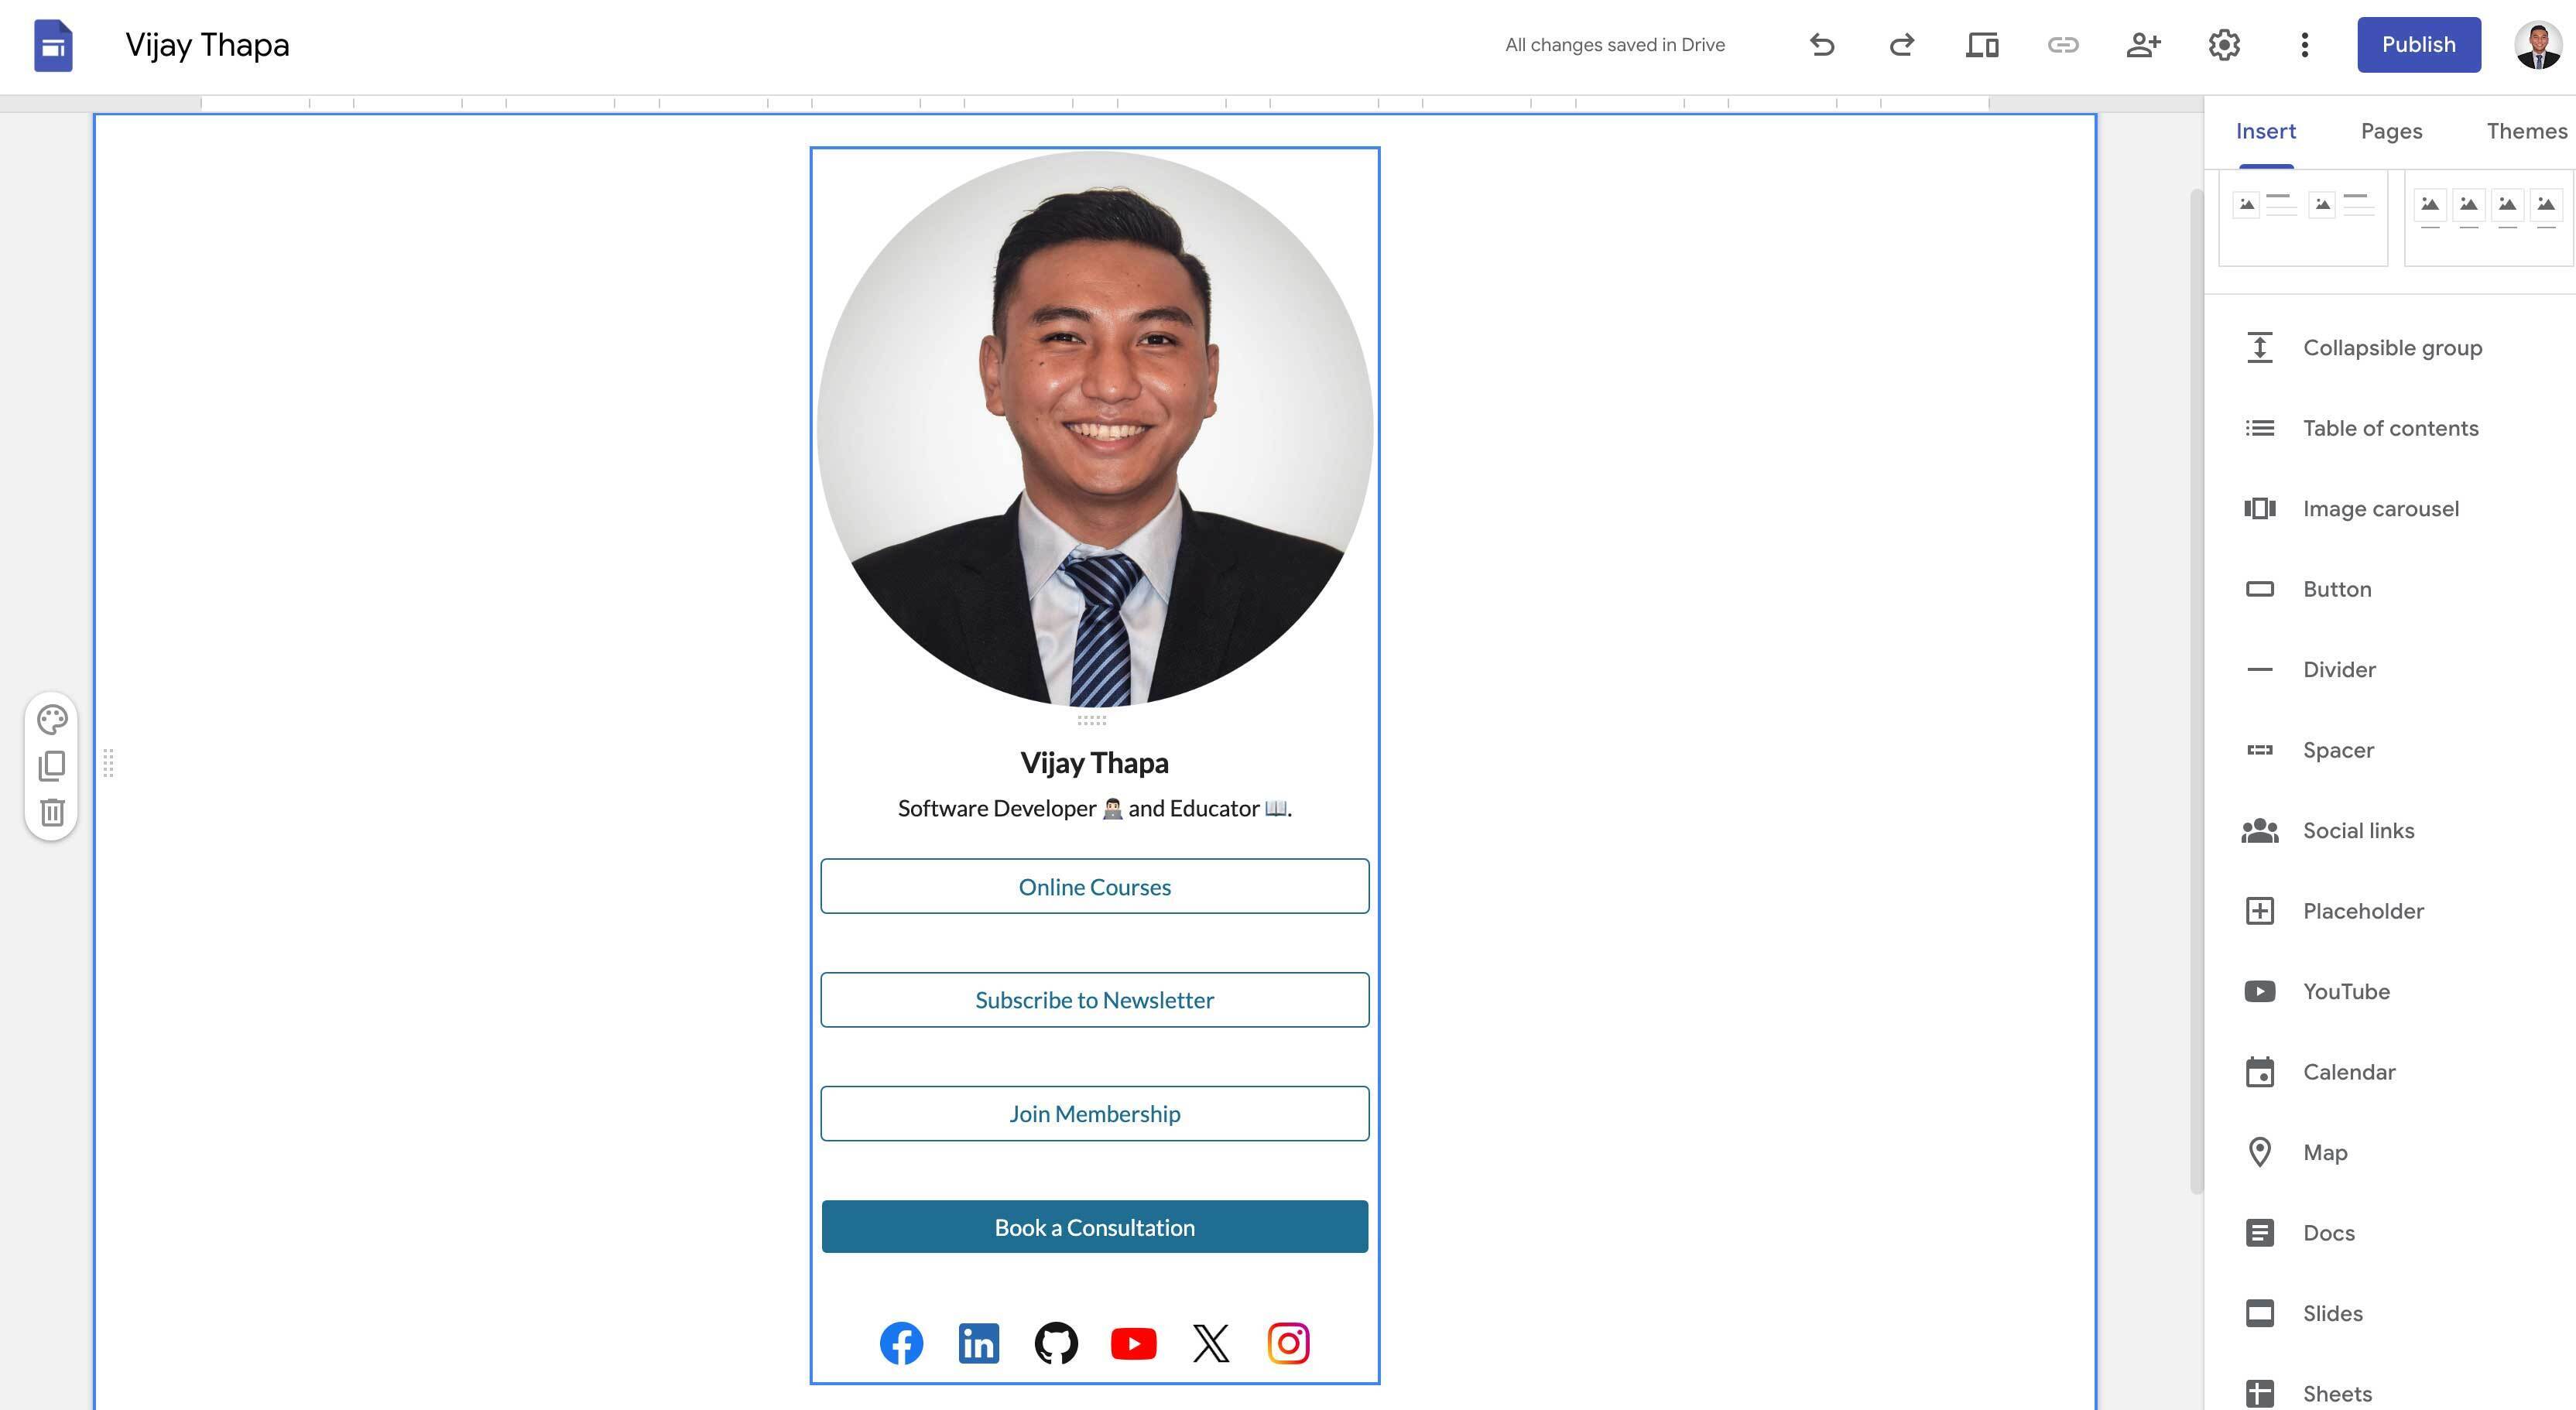
The final design should look like this
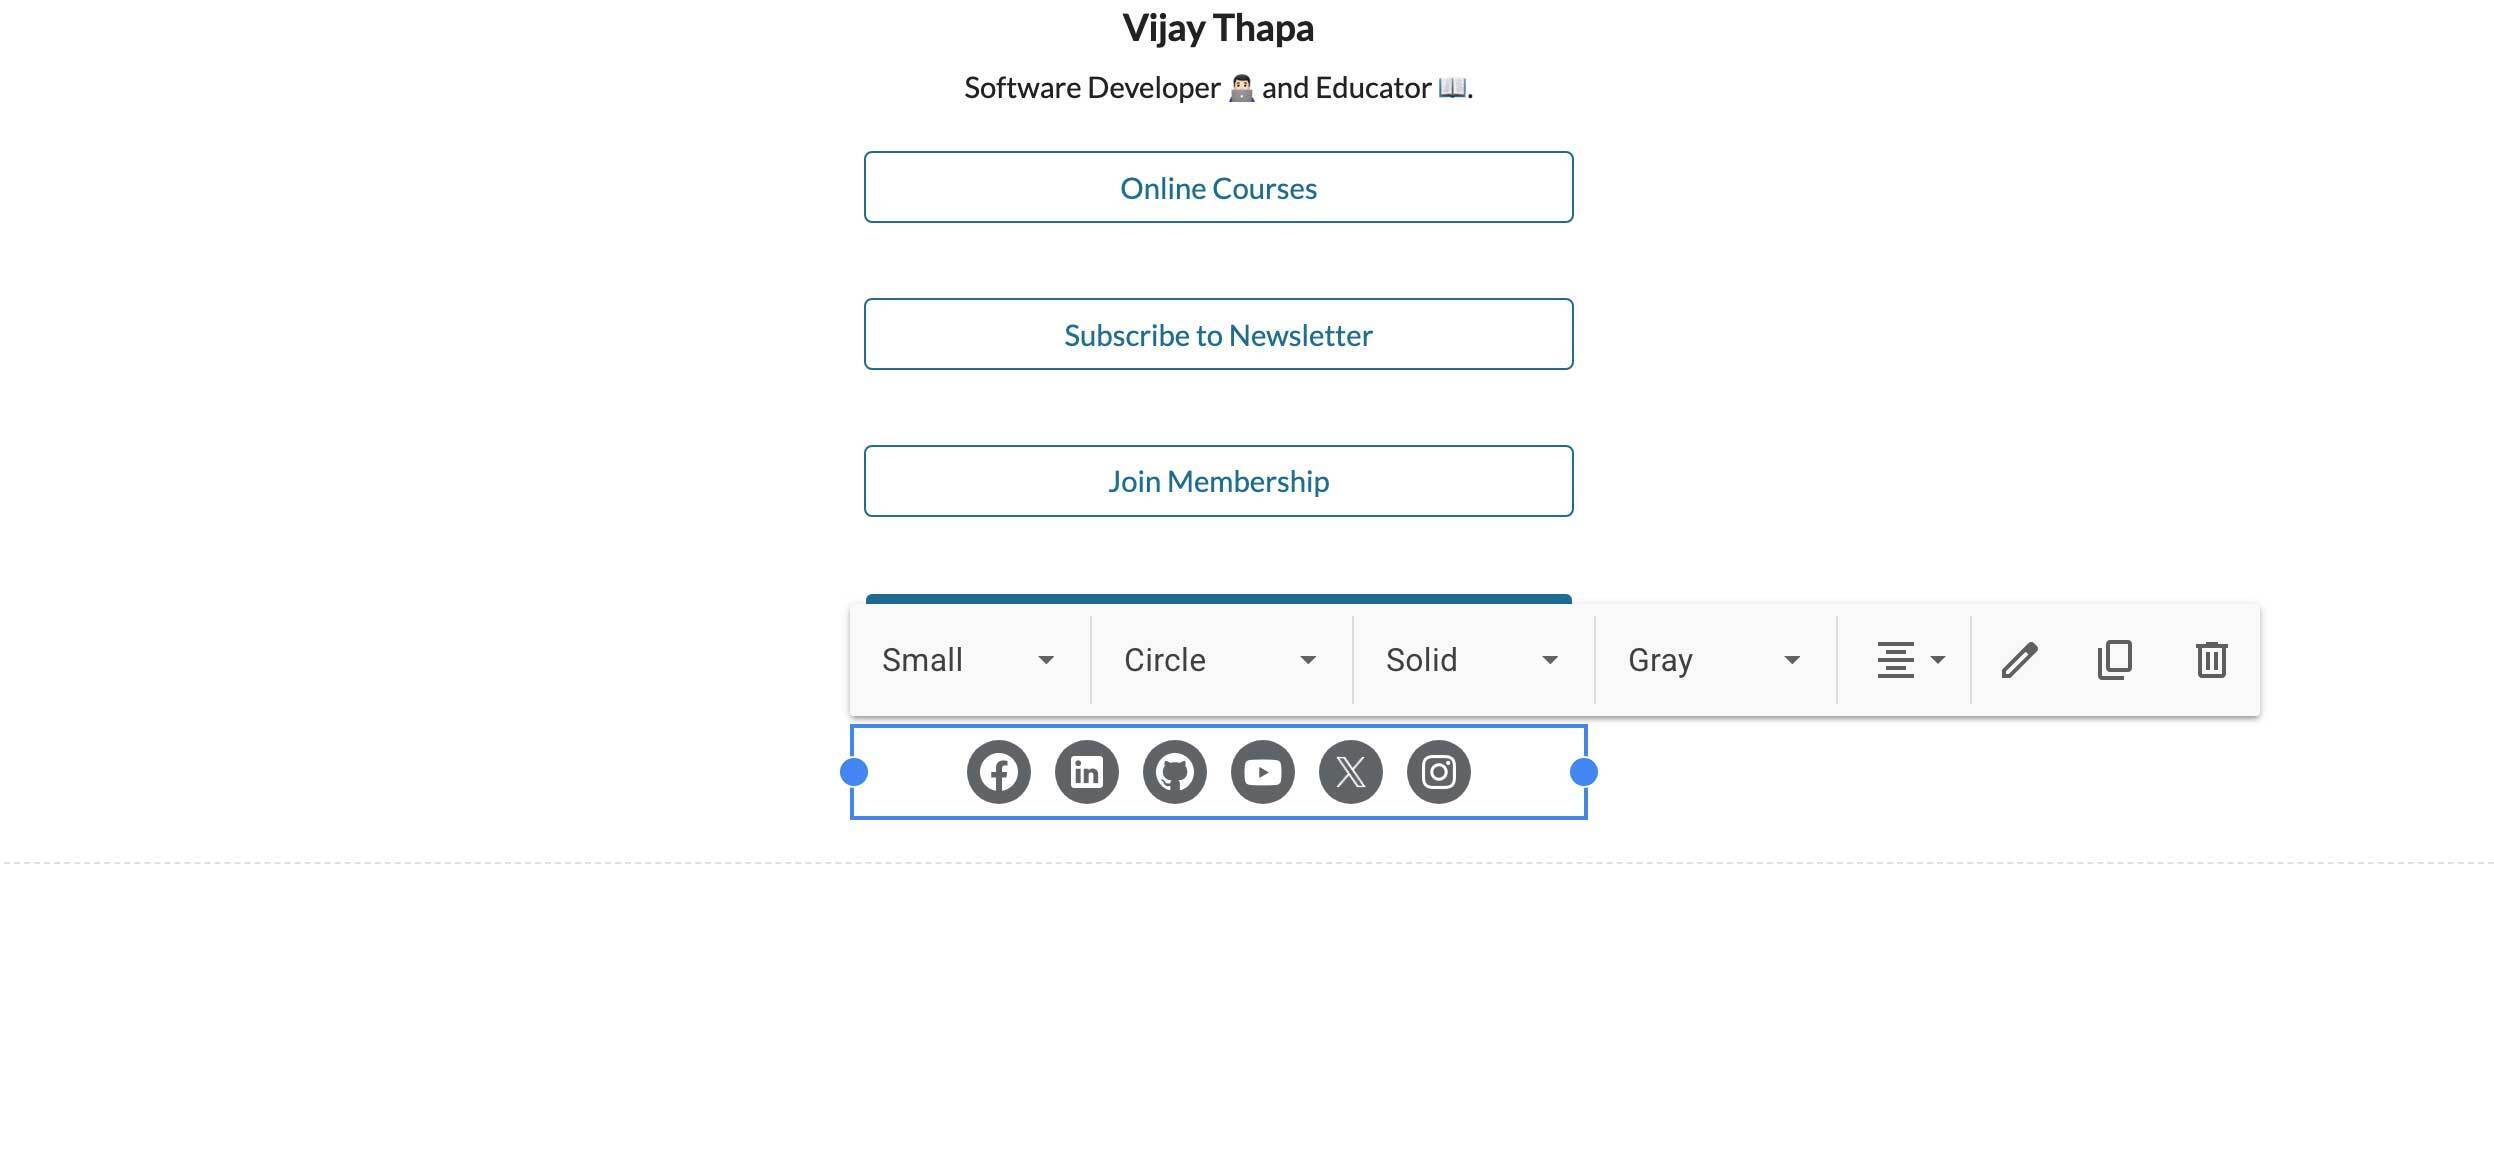
You can also change the design of the social media icons.
To do that, just select the Social Links and change Icon Size, Icon, Shape, Icon Style, Icon Color, Alignment, etc. as per your liking.
Also you can change the links by clicking on the pencil icon.
### 5. Brand Your Page
#### 5.1. Add Your Logo
To add a logo, go to the left top section of the page (Site Title) then click on Add Logo button as shown in the image below.

Now, click on the upload button and select your image or logo to set it as logo.
Also fill the Alt Text option with your name or your business name. It’s really important for SEO (Search Engine Optimization - Google Ranking). After uploading the logo and adding Alt Text, you can close the window, all the information is automatically saved.
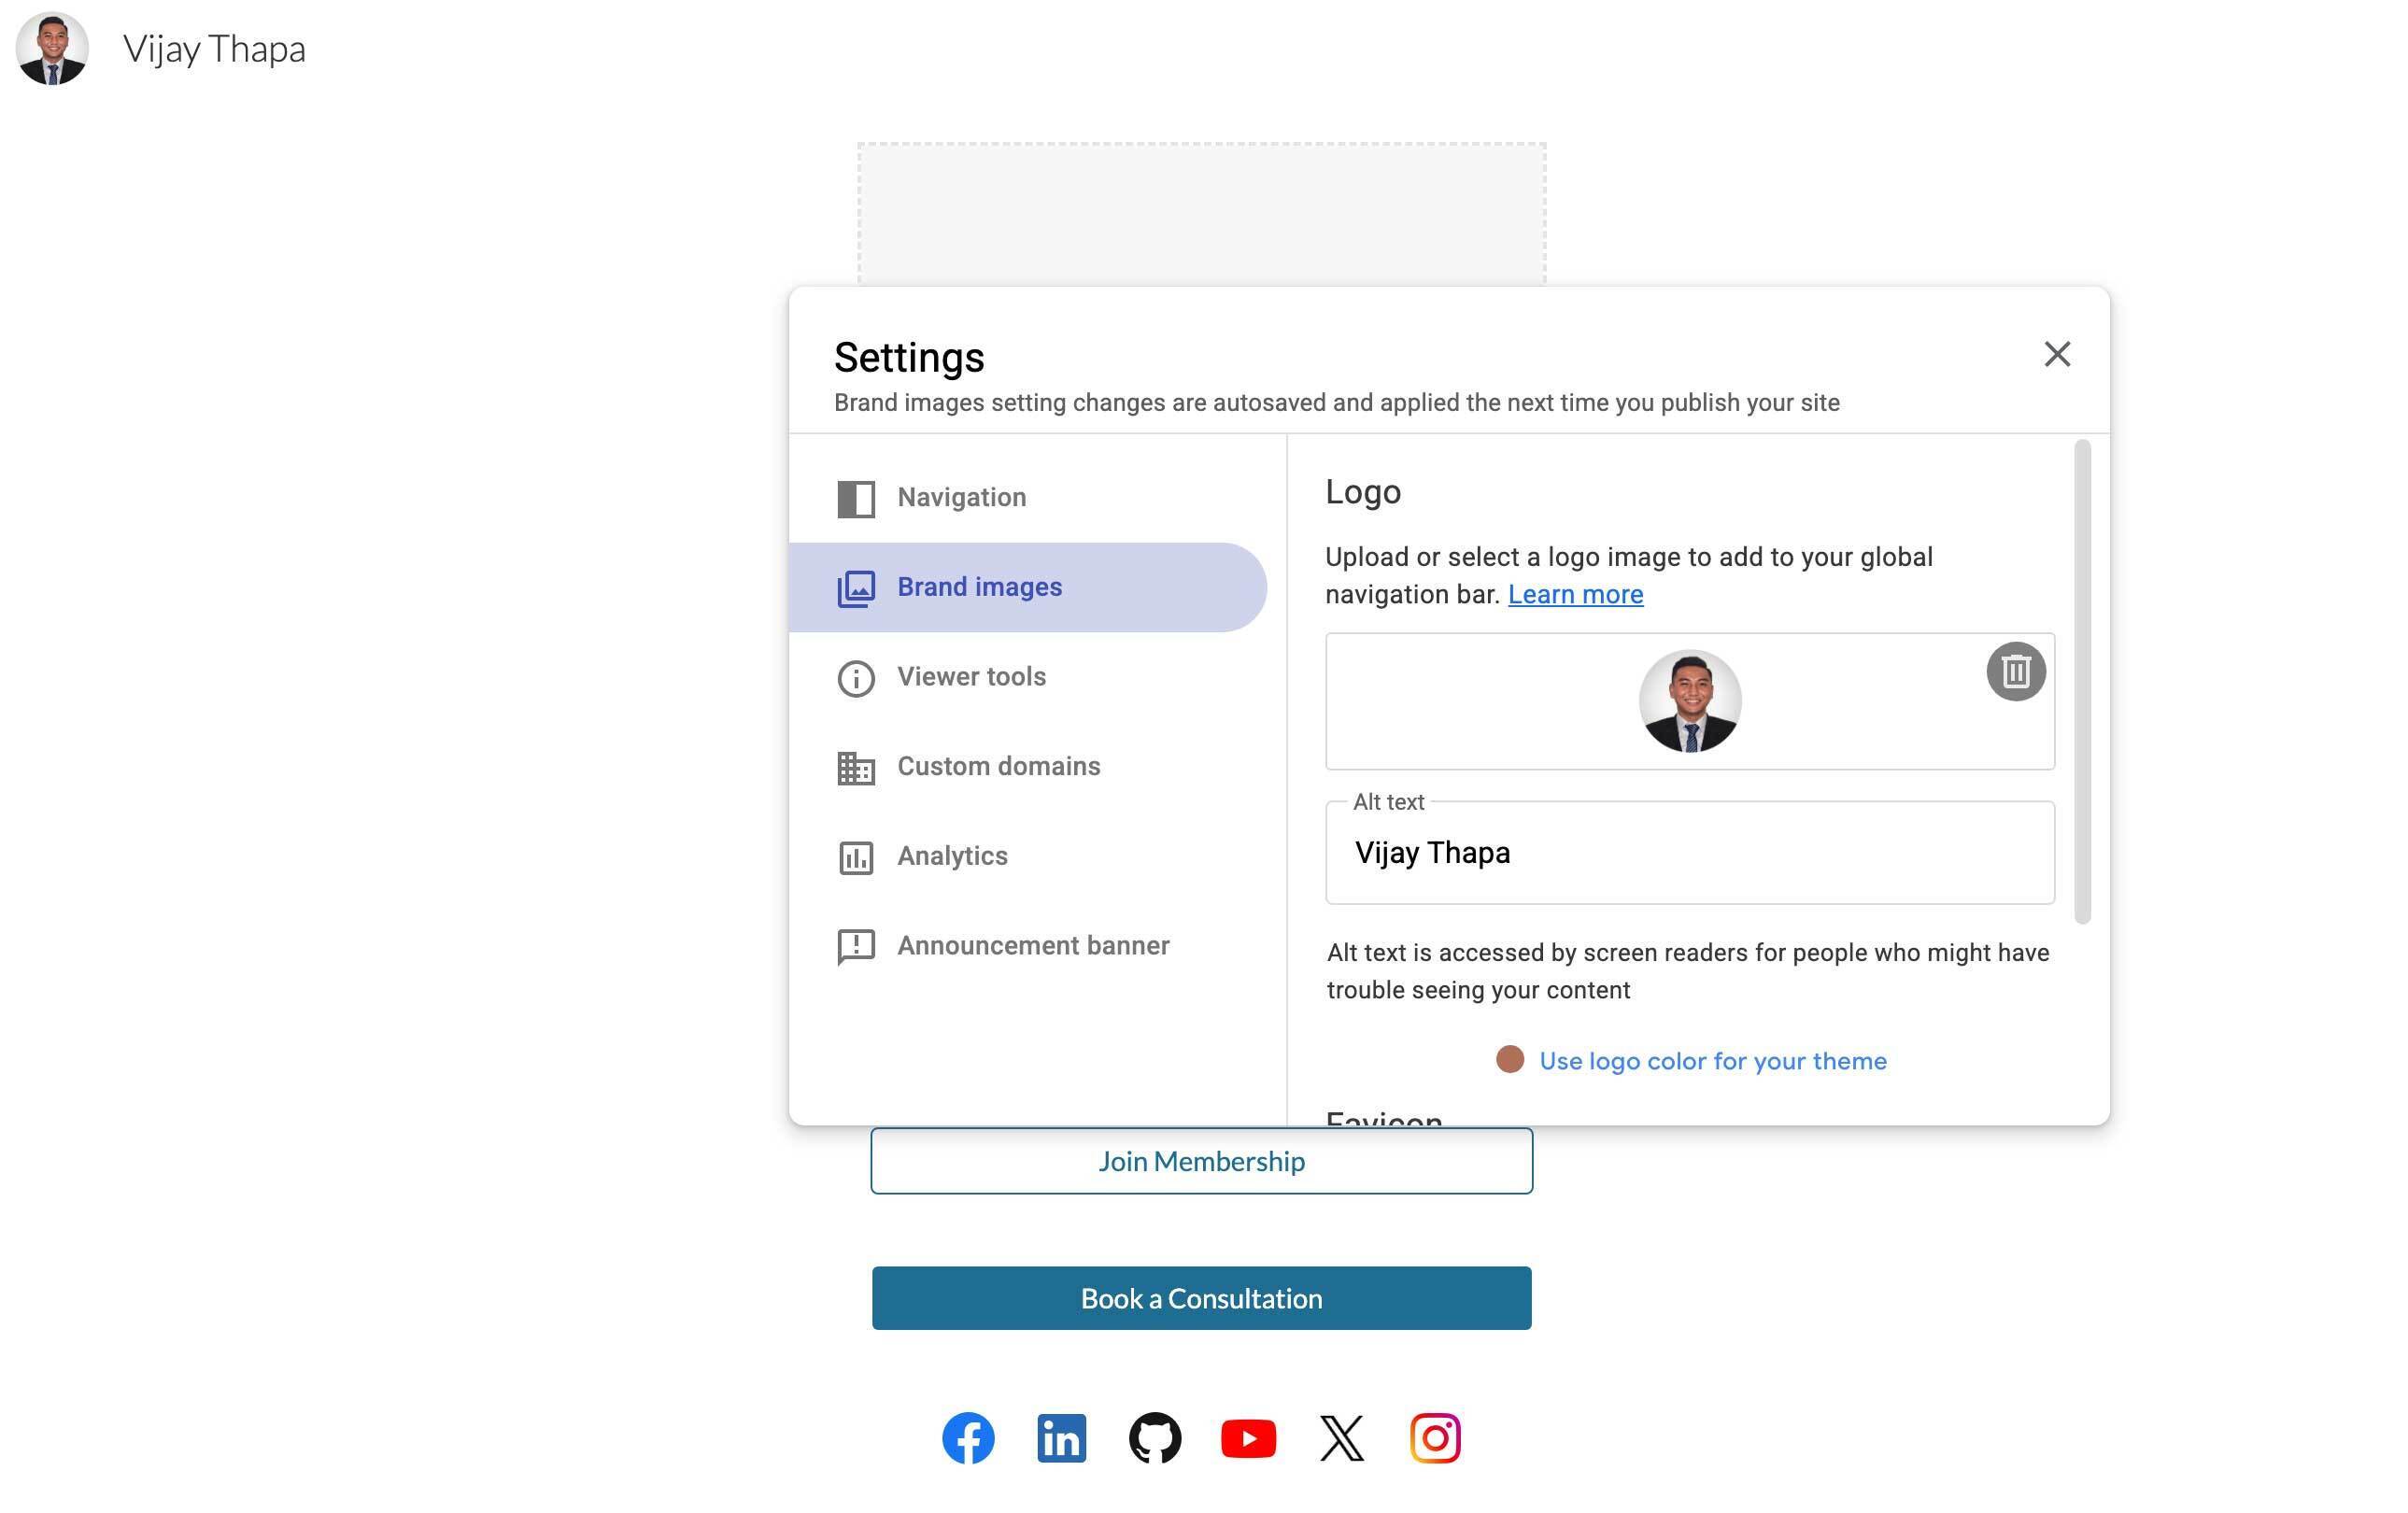
Also at the bottom, it automatically recommends the color for your link in bio page, from the logo or image you’ve uploaded. You can either select any of the colors or continue using default colors. This is optional.
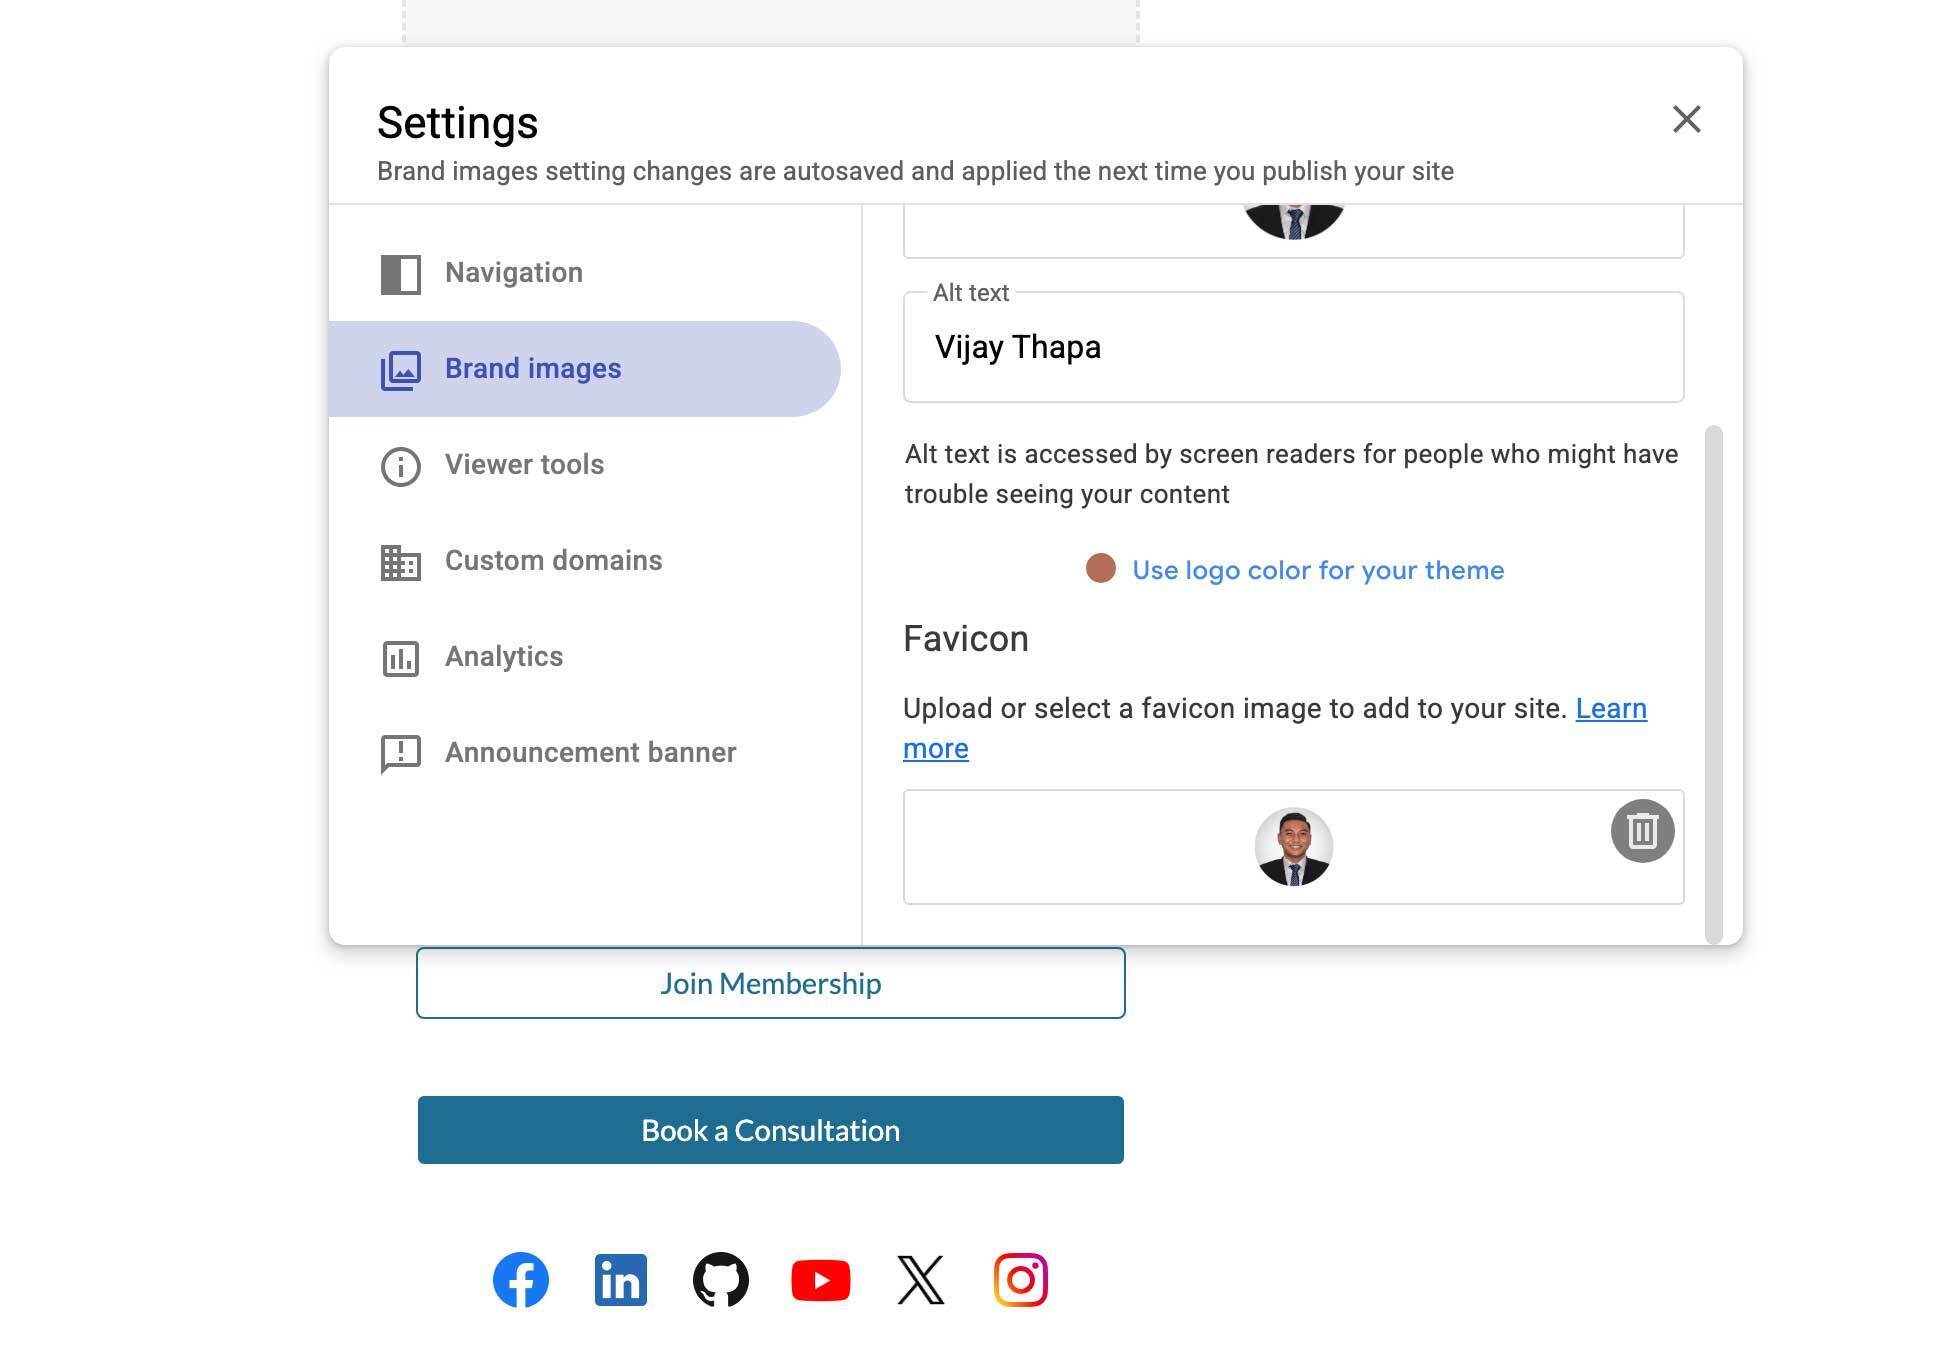
#### 5.2. Add Favicon
After you’ve added the logo, there is an option to add Favicon if you scroll down. You can upload the same image or logo here.
This is shown at the top of the tab in your browser. After uploading the image, you can close the window, it is automatically saved.
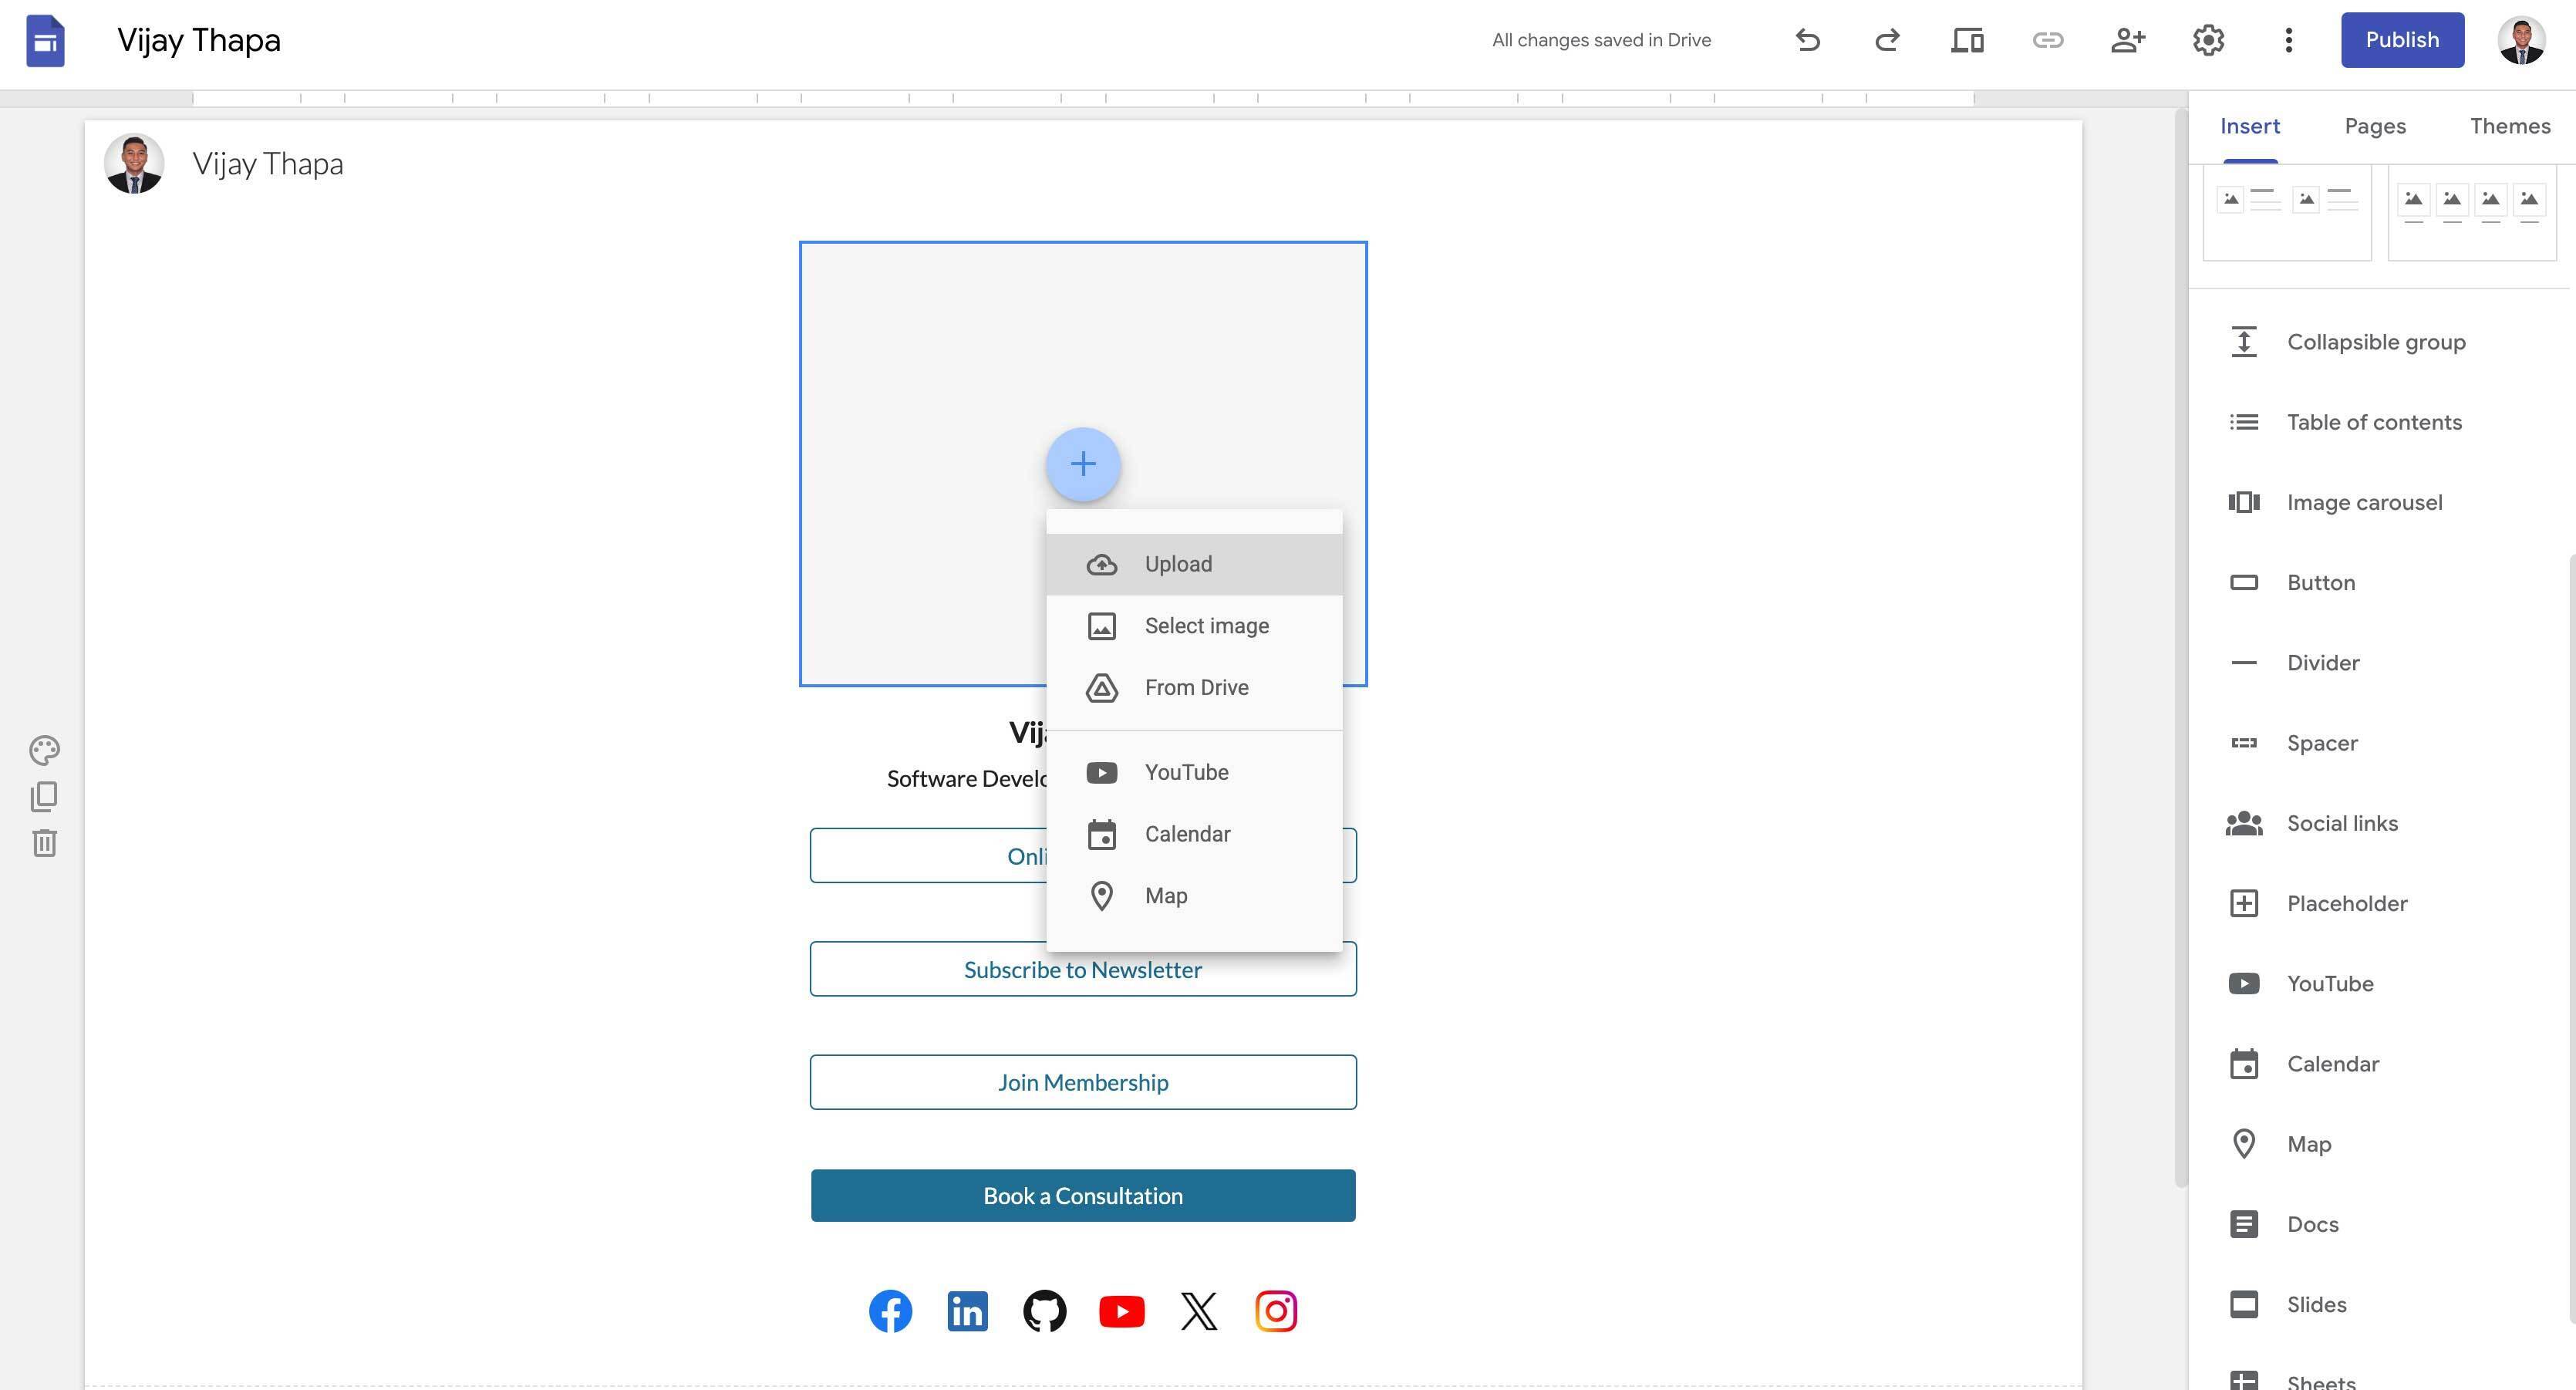
#### 5.3. Add Your Image on Your Main Profile
Now, to add the image or logo on the main profile of our Link in Bio page, just click the “+” icon of our placeholder, then upload the image (logo).
### 6. Publish Your Link In Bio Page
Finally to publish the page and make it publicly visible that can be accessed from anywhere in the world on the internet, you just need to click the Publish button on top right and add the Web Address you prefer.
Note: It automatically suggests the name based on the name of your Site Title or you can add the name you prefer. Then click Publish Button.
My this Link-in-Bio page link is https://sites.google.com/view/vijaythapa/home
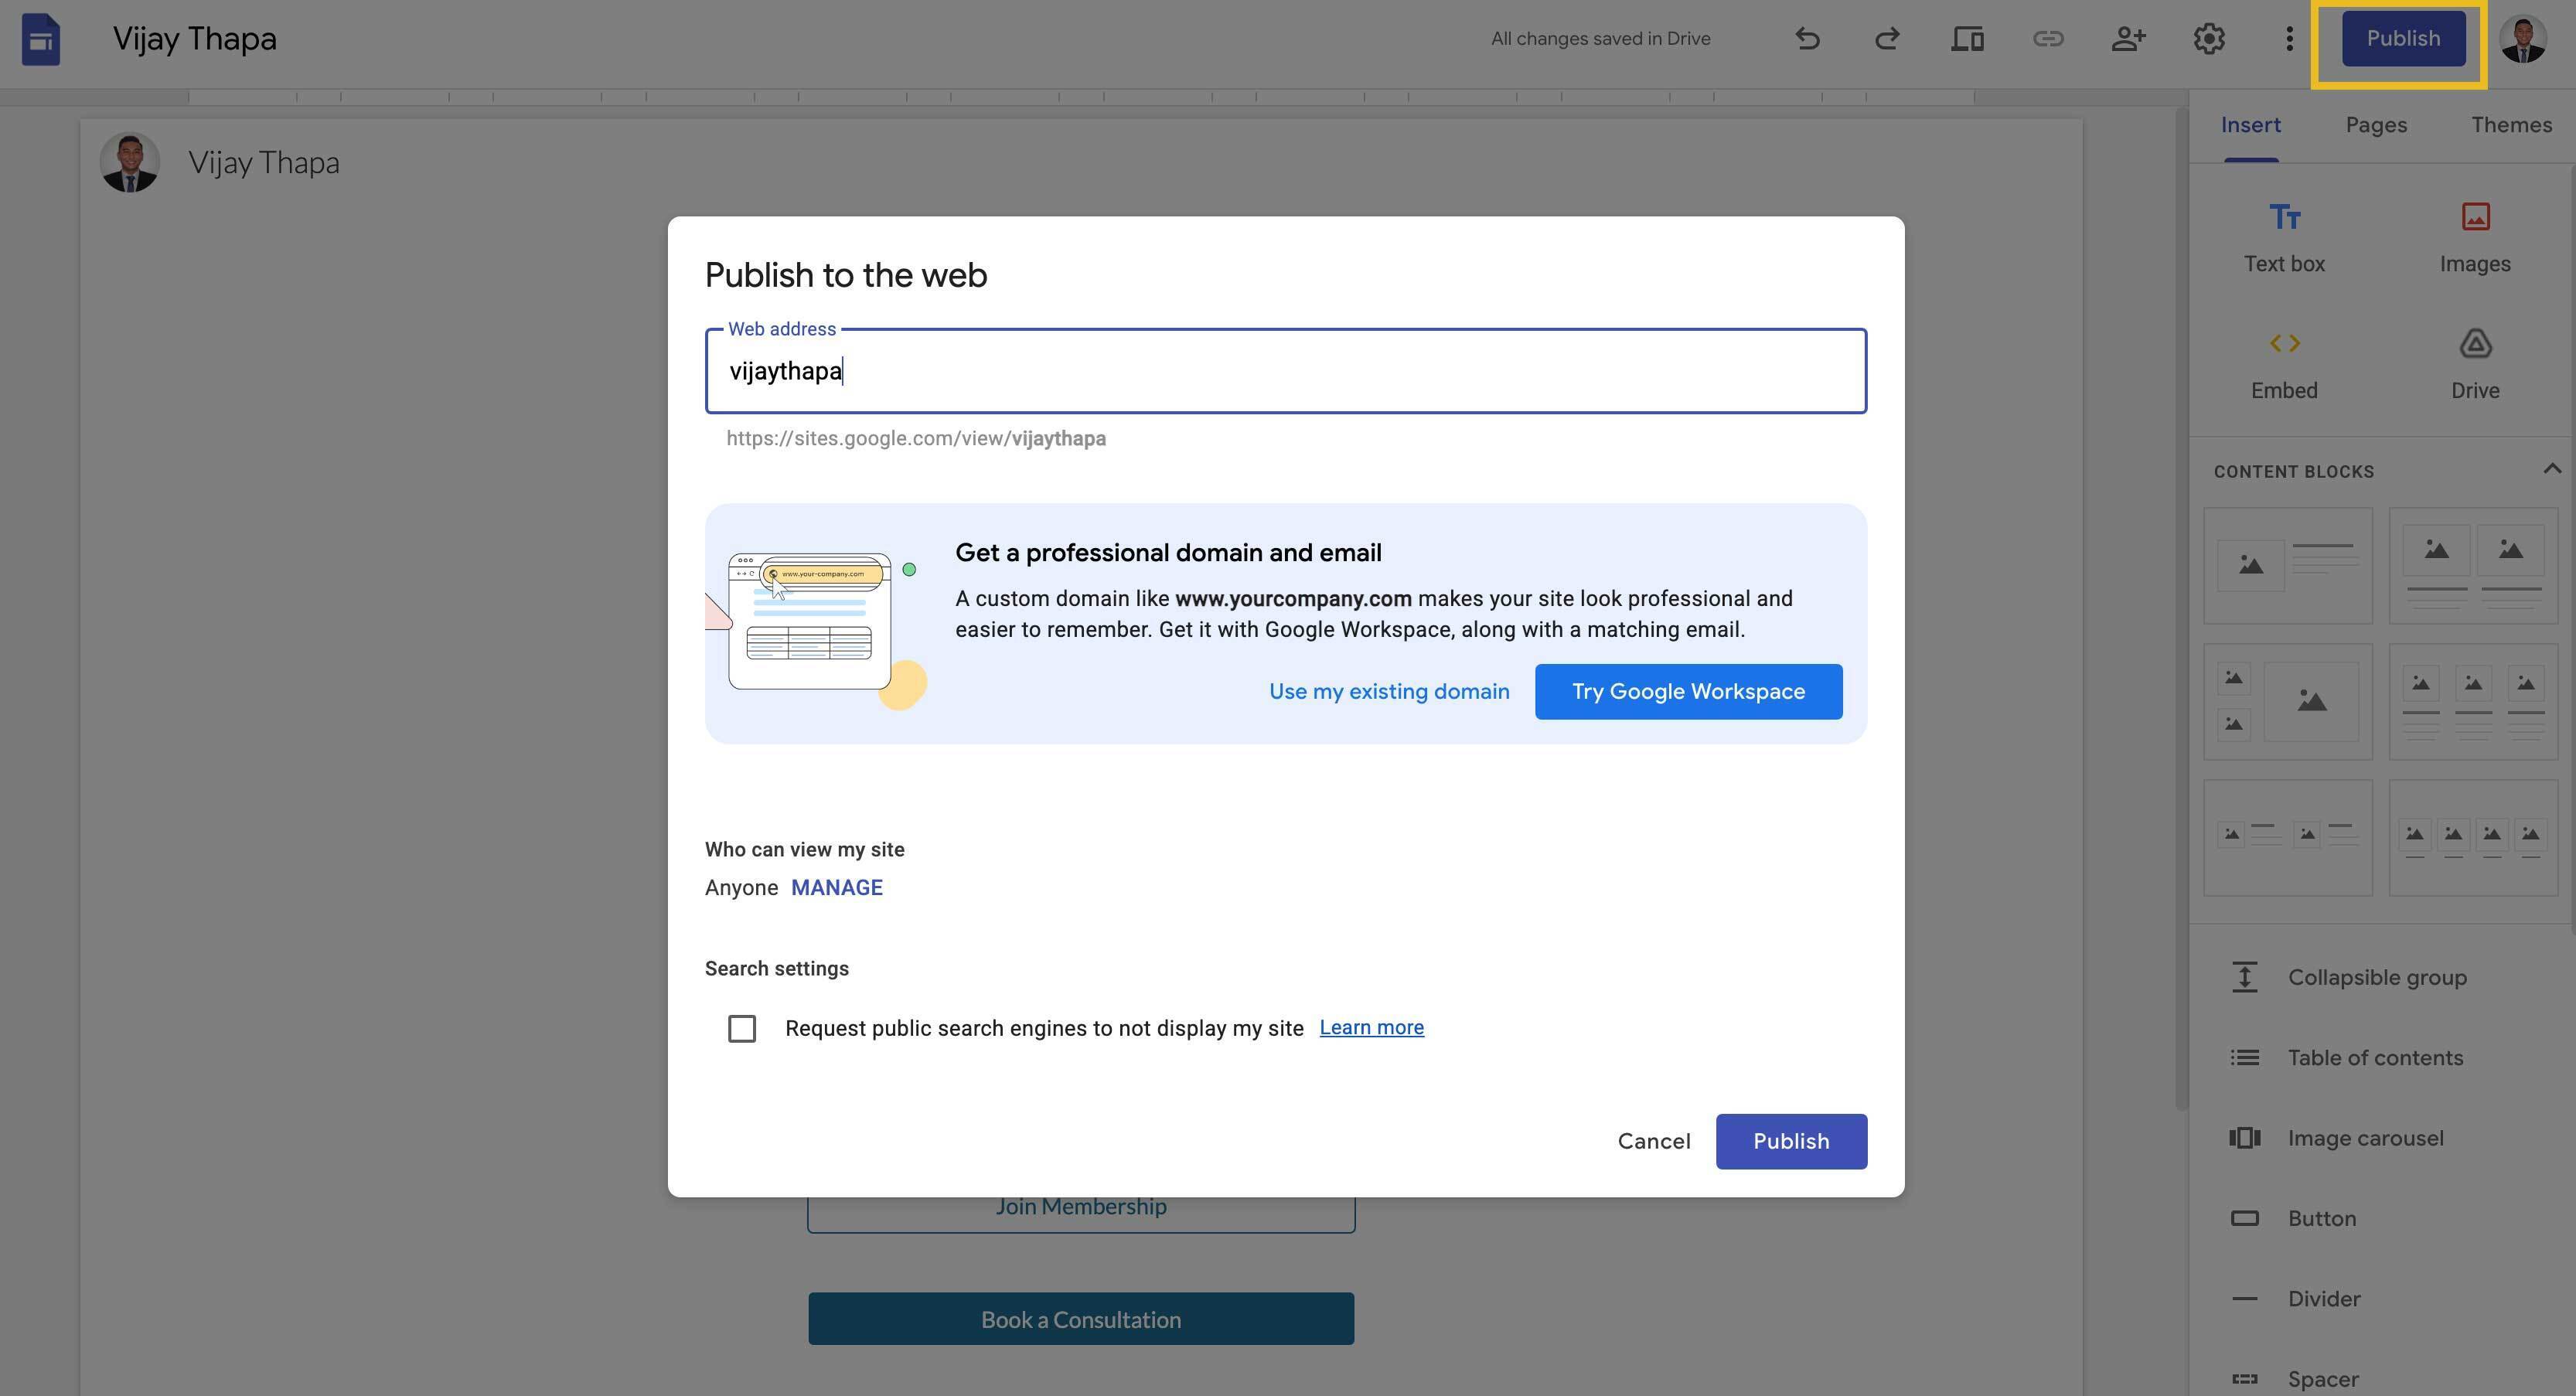
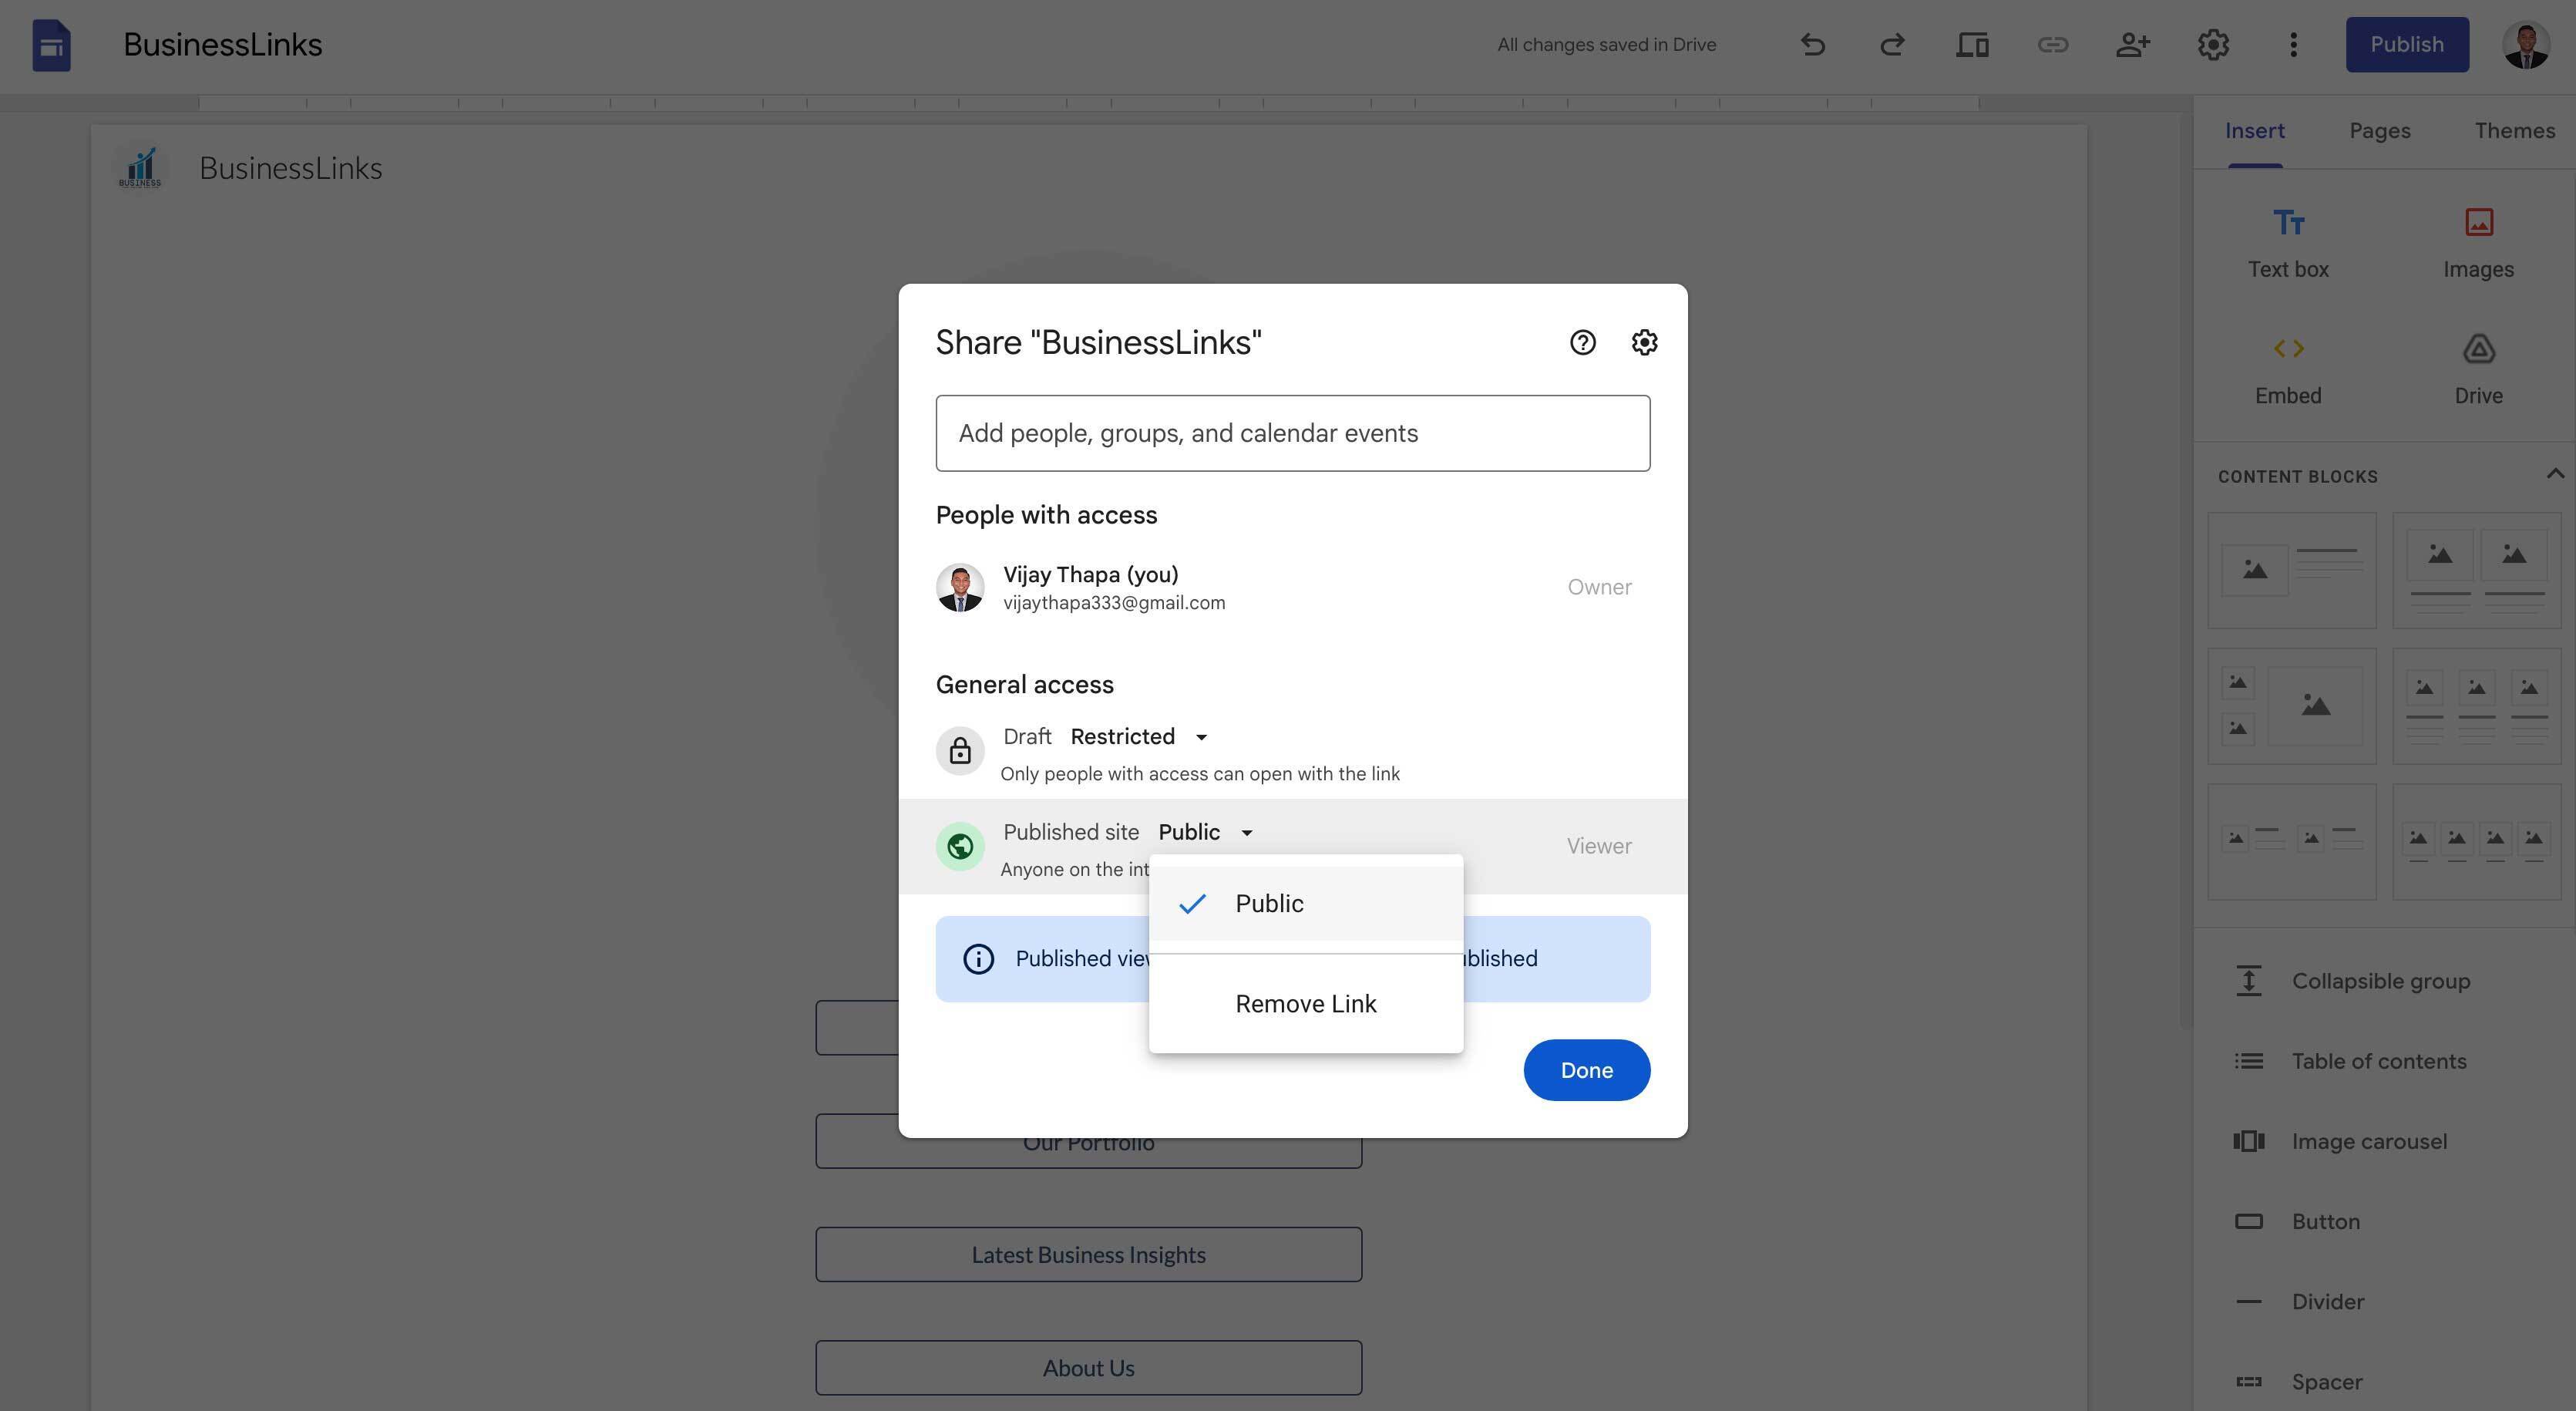
Sometimes you may need to manage the visibility while publishing the page i.e. **"Who can view my site"** should be set to Anyone.
For that, click on **MANAGE** link on the left button of the publish pop-up window and set to Anyone for Published site option.
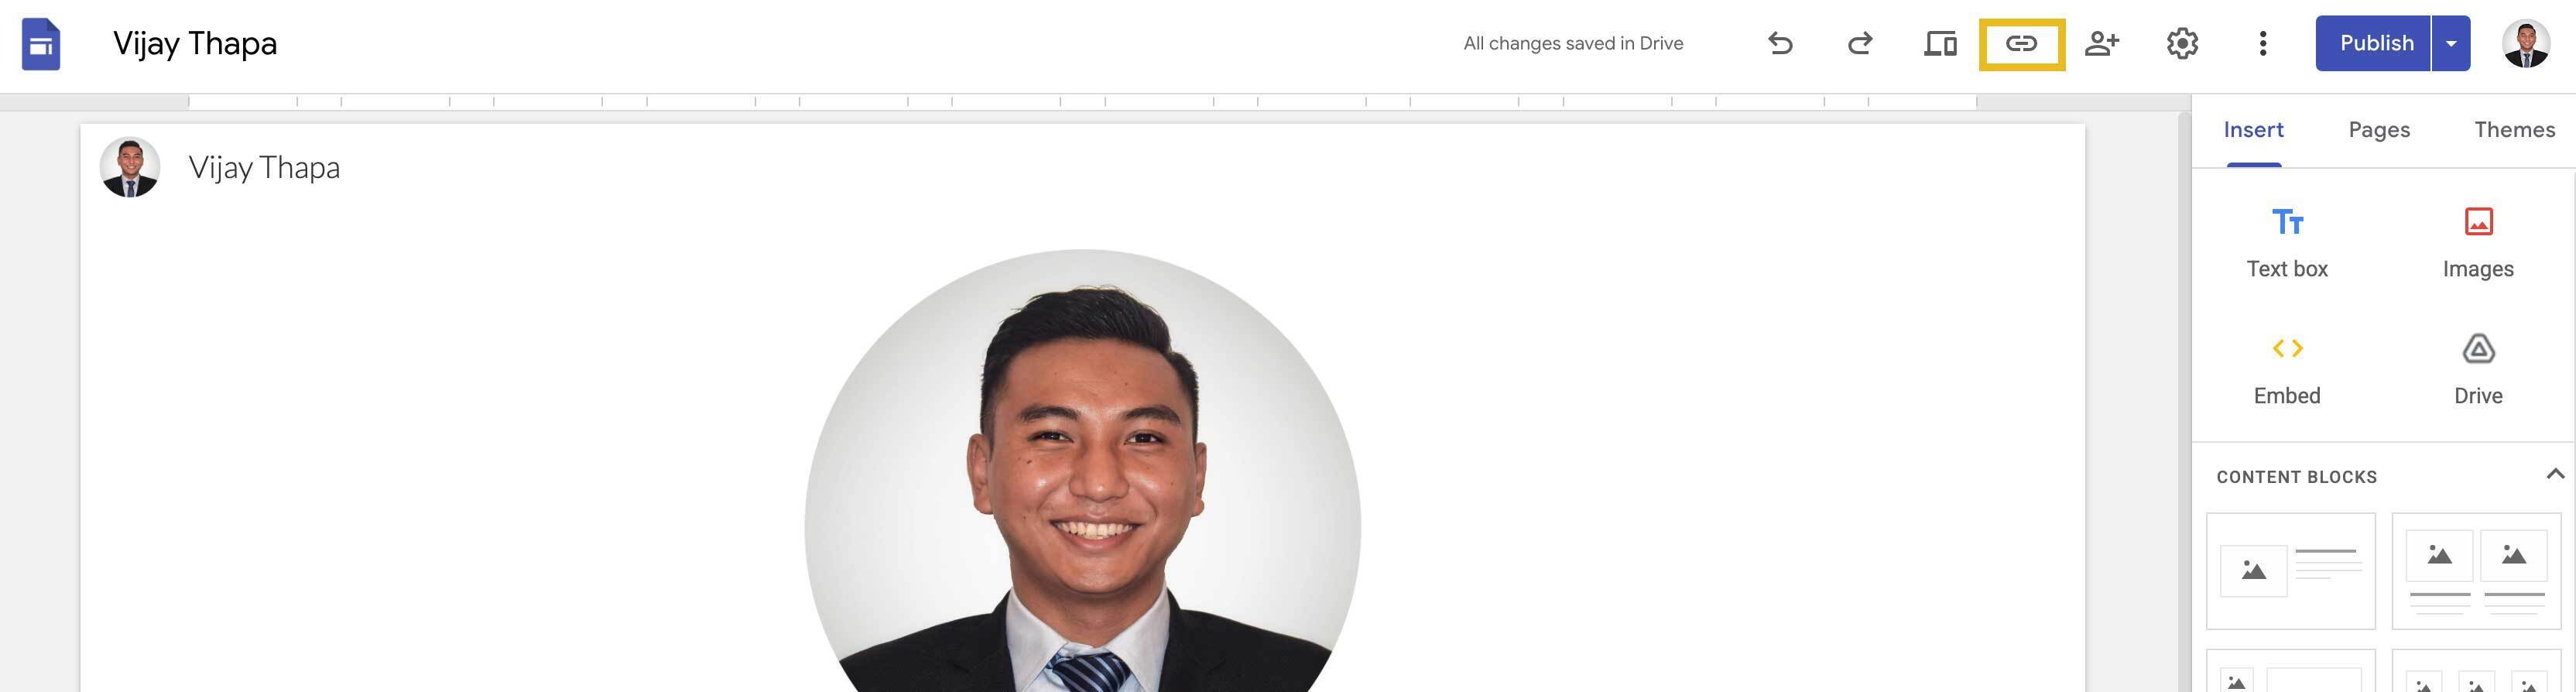
You can access your link by going on the top tool bar and clicking on the link icon as shown below
### 7. Bonus: Display Announcement Banner
If you’re offering special offers or discounts to your followers and want to let them know, then an announcement banner is the feature you need whether on the “Link in Bio” page or on your website.
And you can easily add this feature on this “Link in Bio Page”. Just follow the steps below
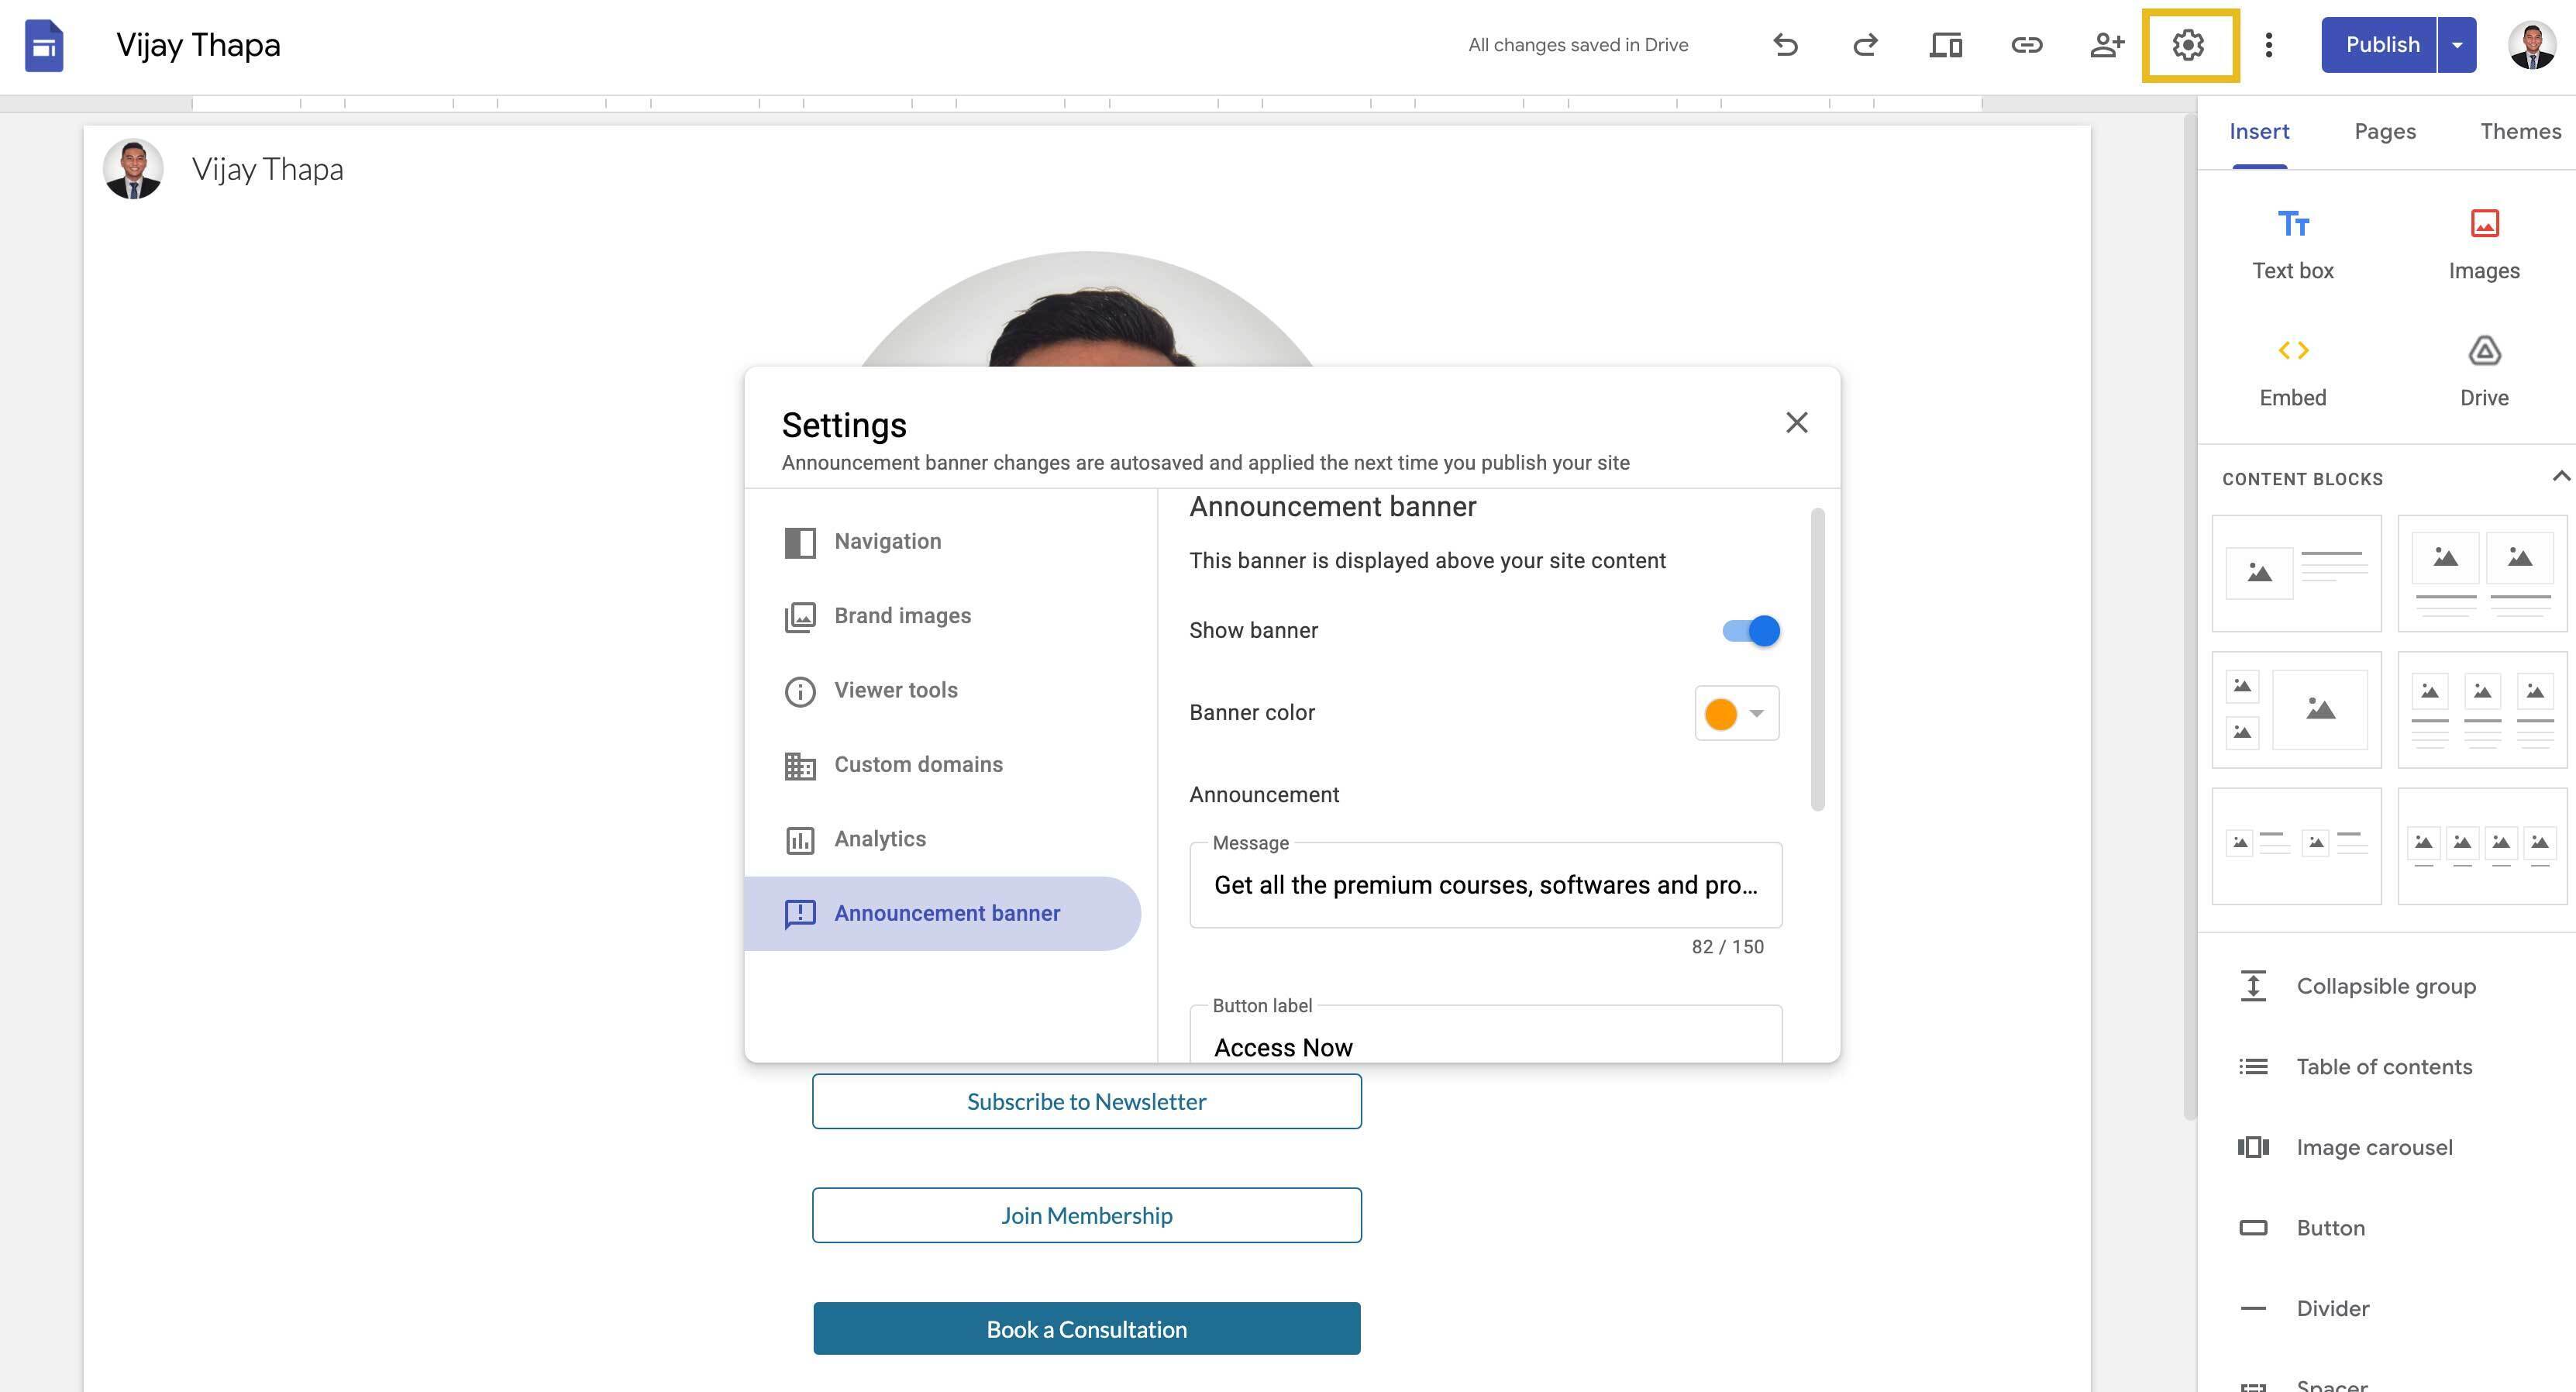
1. Click on Settings / Gear icon at the top.
2. Toggle On the Show banner option.
3. Select a Banner Color.
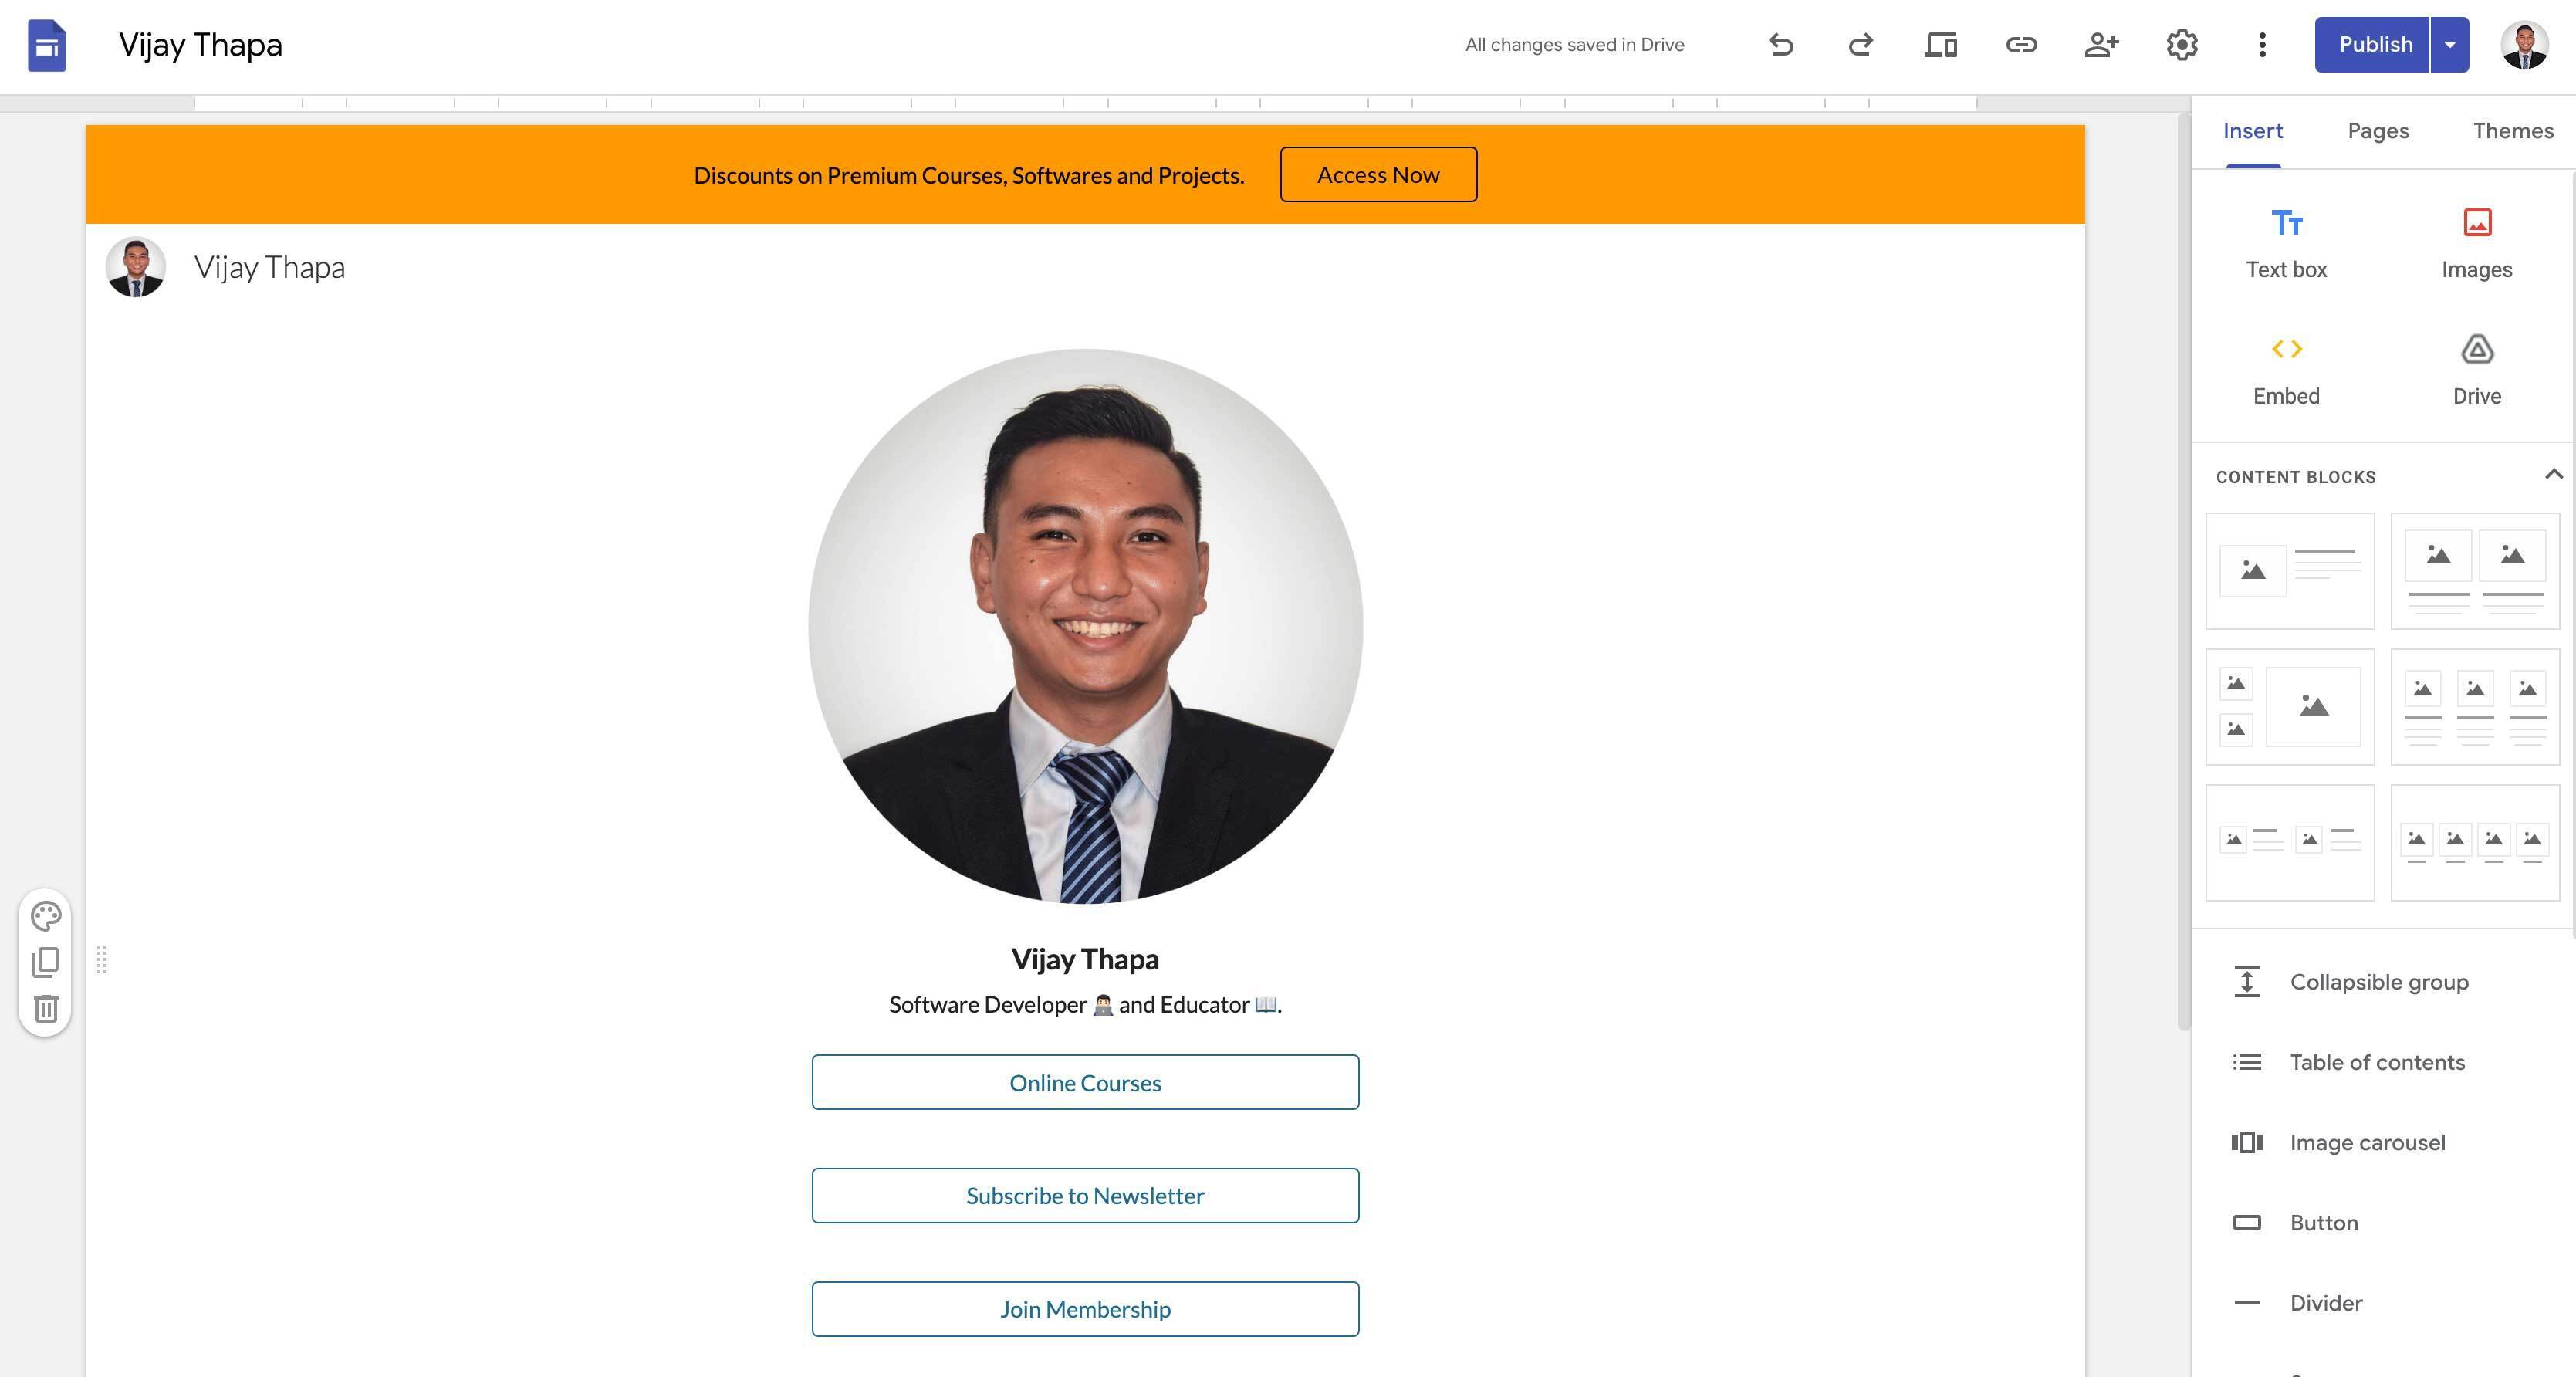
4. Then select the Announcement banner at the bottom of the pop-up.
5. Then add Message, Button Label and the link you want to redirect your customer to.
6. Check the box “Open in new tab” if you want to open a new tab which can be a store or a lead form.
### 8. Bonus: Add Analytics and Custom Domain
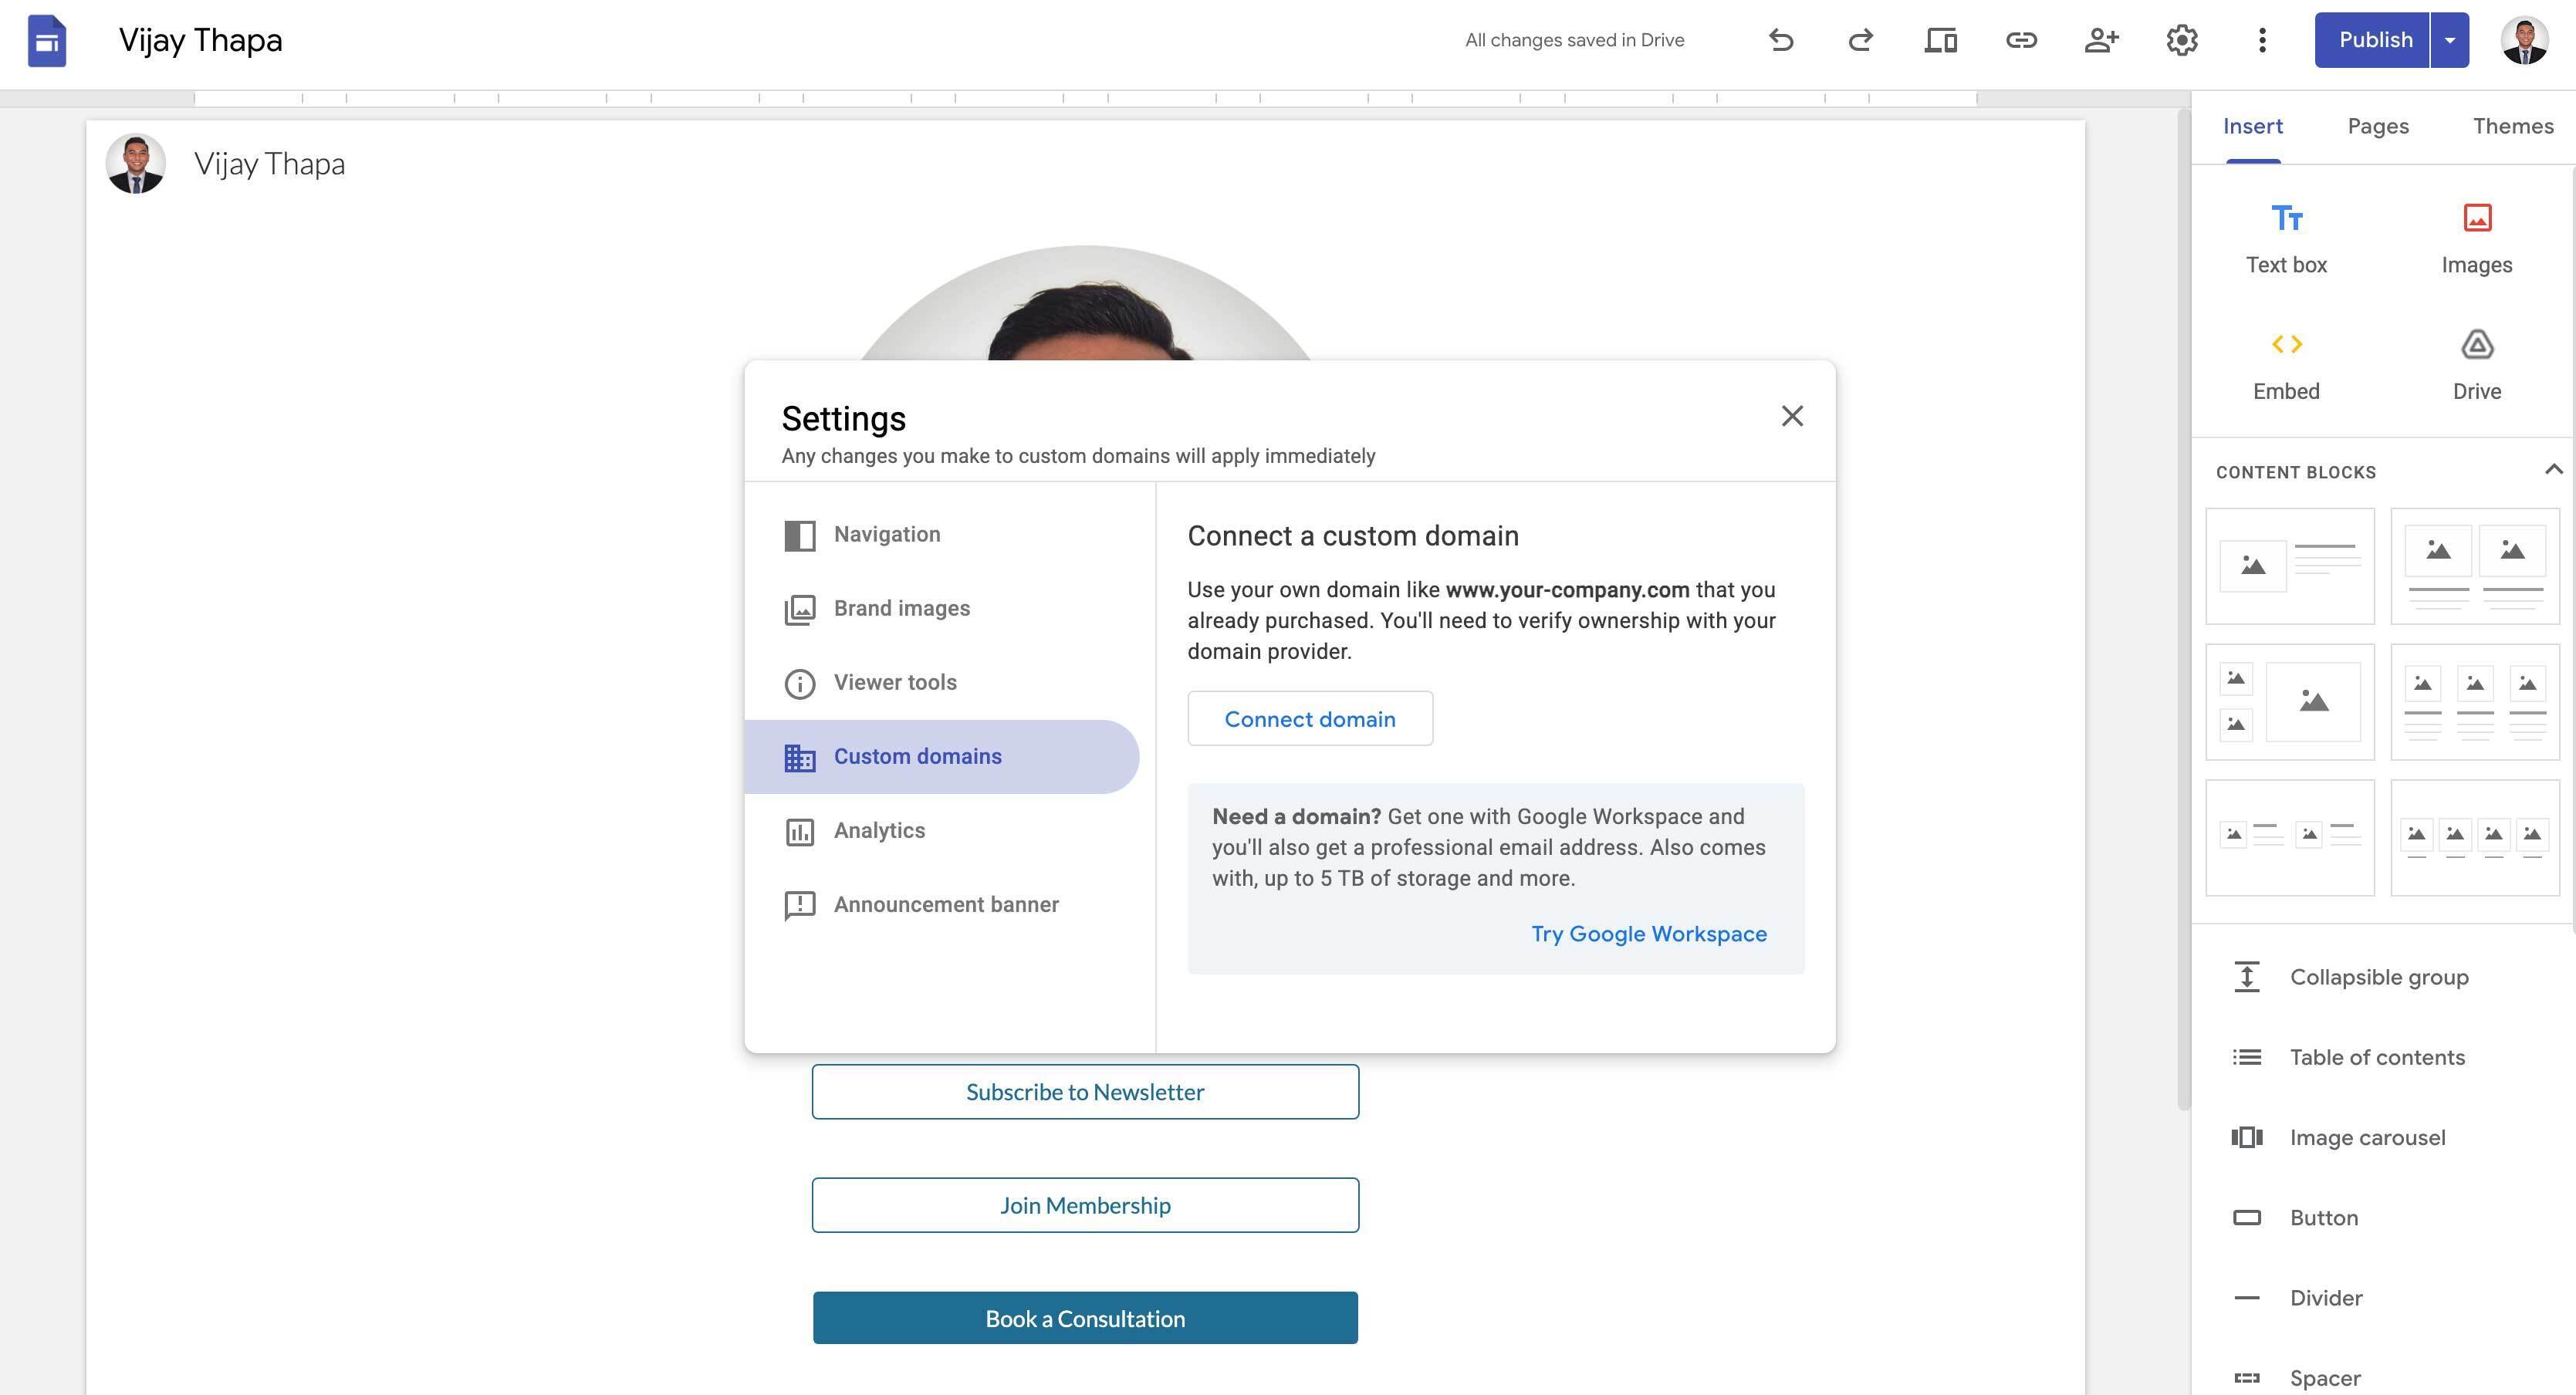
If you want to know about the users who visited our Link in Bio page (i.e. Country, Devices they Used, Time Spent on the page, and many more) or add your own custom domain so that your followers can easily access the site, then you can easily do it from the settings page.
For this, click on the Gear or Settings icon on the top tool bar, then go to Custom Domains or Analytics and setup.
## Must Do Things After Publishing (Creating) Link in Bio Page
Some of the must do things after publishing the Link in Bio Pages are
1. Add the link on all the social media platforms (TikTok, Instagram, Facebook, LinkedIn, Twitter, Snap, etc.).
2. Let your followers know about the newly generated links by sharing as posts, stories, or reels.
3. Create a QR Code with the link of “Link in Bio” page, add it in your digital products, or physical products like brochures, business cards, menus, etc. for your customers to access the link just by scanning with the phone.
## Best Practices for Link In Bio Pages
Here are some of the best practices to make your Link In Bio pages effective and optimized for conversion (convert visitors to customers)
**1. Prioritize Your Links:** Add links based on the priority, either by order (Importants on the top) or design (Filled style to the most important one and remaining in outlined style).
**2. Keep the Link Label Clean, Short and Easy to Scan:** Limit the number of links on your bio pages and give short concise names to the label of the link that’s easy to scan and understand.
**3. Put Matching link Text with Call to Action:** While adding the link in your social media profiles or on websites, tell people what to do with the links. Like, “Shop our new collection from the link in our bio”, “Download the step by step guide from the link in the bio”, “Get The First Consultation for Free from the link in our bio”, etc.
**4. Keep the Links Updated:** Regularly check the links you’ve added on the “Link in Bio Page” and remove those with low priorities, update broken links, add new current promotions, etc.
## Other Available Link-in-Bio Tools
There are other many platforms available to create Link-in-Bio pages, mostly using freemium/subscription model with recurring monthly or annual fees for pro features like custom domains, no branding, advanced analytics, unlimited links, and monetization tools (e.g., 0% transaction fees). Free tiers often include platform branding, limited analytics, and seller fees (5–12%).
Whereas with Google Sites platform you get all of their pro features for lifetime free.
Anyway, here’s the comparisons of major platforms as of April, 2026.
### Linktree
**Annual Pricing (pro) - $144–$360+**
Custom themes, advanced analytics (up to lifetime), hide footer, email integrations, reduced/0% fees on higher tiers, custom domain on top plans
**Free Plan**
Unlimited links, basic analytics, 12% seller fees on some sales
### Beacons.ai
**Annual Pricing (pro) - $100–$1,080**
Custom domain, remove branding, 0% fees (on Plus+), unlimited AI/emails, store/membership tools
**Free Plan**
Unlimited links, analytics, 9% seller fees, limited AI
### Carrd
**Annual Pricing (pro) - $9–$49**
No branding, custom domain (Standard+), forms/embeds, premium templates; ideal simple link-in-bio
**Free Plan**
3 sites, branding, basic one-page
### Stan.Store
**Annual Pricing (pro) - $300–$1,188**
Store-focused (digital products, memberships), 0–5% fees, advanced sales tools
**Free Plan**
None (trial only)
### Campsite
**Annual Pricing (pro) - $70–$288**
Custom domain, analytics add-ons; simple & affordable
**Free Plan**
Basic free
## Professionally Designed Premium Link-in-Bio Templates
To help you setup your lifetime free Link-in-Bio Page, I have designed the templates which you can duplicate in one click and publish immediately.
**_No monthly fees. Google-powered security and speed. Full customization + free custom domain & Analytics._**
Check the demos from the links below
1. For Businesses: [Demo](https://sites.google.com/view/businesslinks-template/) | [Download](https://www.patreon.com/posts/link-in-bio-pro-155669144)
2. For Influencers: [Demo](https://sites.google.com/view/influencerlinks/) | [Download](https://www.patreon.com/posts/link-in-bio-pro-155669144)
3. For Bio (Career/CV): [Demo](https://sites.google.com/view/biolinks-template/) | [Download](https://www.patreon.com/posts/link-in-bio-pro-155669144)
4. For Bakeries: [Demo](https://sites.google.com/view/bakelinks/) | [Download](https://www.patreon.com/posts/link-in-bio-pro-155669144)
5. For Restaurants: [Demo](https://sites.google.com/view/restaurantlinks/) | [Download](https://www.patreon.com/posts/link-in-bio-pro-155669144)
Comments
More Blog
View allkubernetesMinimalist EKS: The Easy Way
Amazon EKS manages the Kubernetes control plane, but you remain responsible for provisioning the...
J
Joaquin MenchacaaiNever forget to enter the Stern Grove lottery again!
Browser automation with Playwright, Python, GitHub Actions, and Entire to auto-enter San Francisco Stern Grove concert lotteries each week!
L
Lizzie SiegletypescriptA Free Screenshot Editor That Never Uploads Your Image
A free screenshot and image editor that runs entirely in your browser. Keeping every edit reversible and handling big phone photos, in plain TypeScript and Canvas2D.
M
Martin StarkshowdevI built a CLI to break my highlights out of Apple Books
A macOS CLI + MCP server that exports Apple Books highlights to Markdown and gives AI assistants direct access to your reading notes.
A
Andrey KorchakaiA Developer's Guide to Agent Hooks in Antigravity CLI
Motivation To be quite honest, "Hooks"—the shell commands we trigger at specific points...
T
TanaikeagentsTactical vs. Strategic Agentic AI Development — A Playbook for Developers
The Strategic Engineer: Why Writing Code Is No Longer Your Most Valuable Skill ...
A
Adewumi Saheed Adewale