Back to Blog devsecops
 kubernetes
 ai
ai typescript
 showdev
 ai
ai agents
NemoClaw for the Enterprise: A Zero-Trust Setup for OpenClaw (Part 1)
Adnan Sattar May 8, 2026
0 views
How to give your AI agent a safe house: full shell access, without becoming a liability to your...
---
title: NemoClaw for the Enterprise: A Zero-Trust Setup for OpenClaw (Part 1)
published: true
date: 2026-04-17 12:24:59 UTC
tags: devsecops,cybersecurity,nemoclaw,openclaw
canonical_url: https://medium.com/@adnansattar09/nemoclaw-for-the-enterprise-a-zero-trust-setup-for-openclaw-part-1-201cce688948
---
_How to give your AI agent a safe house: full shell access, without becoming a liability to your security team._
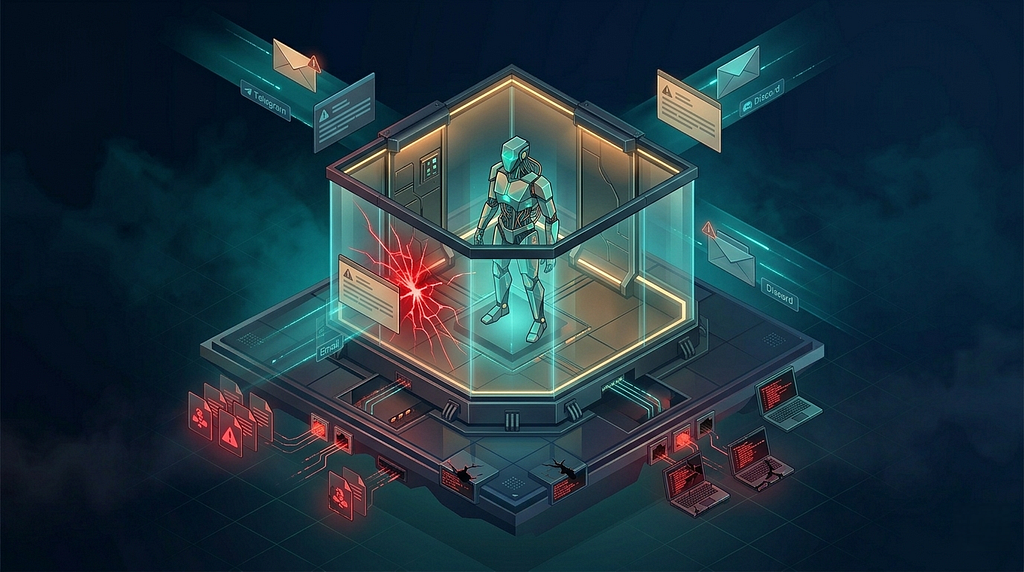
An AI agent with shell access is one prompt injection away from a very bad day. It can read your files, touch your network, run commands, and if the box it's sitting on is exposed to the public internet invite the rest of the world in with it.
This is the first article in a series on running OpenClaw via NemoClaw in OpenShell sandbox. Before we touch agents, policies, or skills, we need to build the house they live in. That means a hardened VPS, no public attack surface, and a clear blast radius if something goes sideways.
By the end of this guide you'll have:
- A fresh VPS running as a non-root user
- Passwordless SSH with password login fully disabled
- A Tailscale mesh that makes the box invisible to the public internet
- A UFW firewall that drops anything not coming over Tailscale
- Docker, Node.js, and uv installed and ready for OpenClaw
No agent yet. Just a safe house. Parts 2 and 3 will cover the NemoClaw install, Matrix E2EE messaging, and policy engineering.

_NemoClaw for the Enterprise: A Zero-Trust Setup for OpenClaw_
### Why This Matters (the 30-second version)
_Why A Zero-Trust Setup Matters_
OpenClaw is powerful because it has broad access to the system it runs on. Shell, files, network. It can do almost anything a human operator can do. That's the feature. It's also the threat model.
A single crafted message coming through a public channel (Telegram, Discord, email) can, in the worst case, convince an unguarded agent to run commands on your behalf that you'd never consent to. The defense isn't one thing; it's layers:
- **Rootless execution** : if something escapes, it's confined to a restricted user, not root
- **Zero-trust networking** : the machine has no public attack surface at all
- **Passwordless SSH** : brute-force attacks become mathematically hopeless
- **Strict firewall** : anything not coming over the Tailscale interface is dropped
- **E2EE communication** (covered in Part 2): the control channel can't be snooped
Each layer is cheap to set up. Skipping any one of them punches a hole that the others can't fully cover. Defense-in-depth only works when it's actually, you know, in depth.
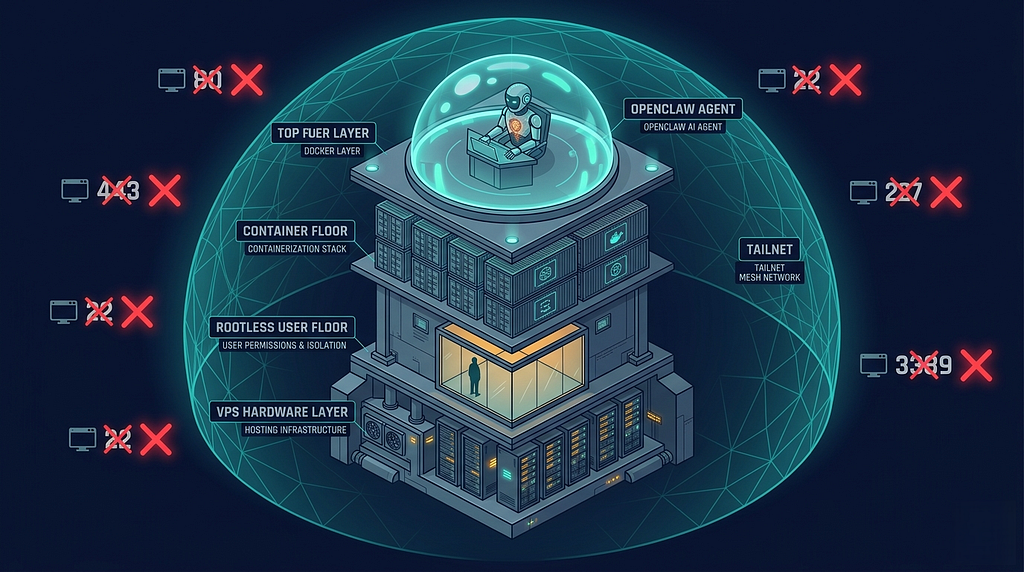
### What You're Building (architecture at a glance)
Here's the shape of what the stack looks like after this guide:
```plaintext
┌────────────────────────────────────────────────────────────────┐
│ Your Tailnet (Private) │
│ │
│ [Your Laptop] ───SSH───▶ [VPS: openclaw user] │
│ │ │
│ ├─ UFW (deny by default) │
│ ├─ tailscale0 (allowed) │
│ └─ OpenClaw Running in Sandbox │
│ │
└────────────────────────────────────────────────────────────────┘
▲
│ (public internet never reaches here)
▼
╳ Port 22 closed ╳ Port 80/443 closed ╳
```
The server has no listening ports exposed to the public internet. Your laptop reaches it only through the Tailscale mesh, which is authenticated with your Tailscale identity, not a password. The openclaw user that owns the agent has sudo but not root shell access, so any escape is already one privilege short.

_Mitigated Risks By Zero Trust Setup_
_Zero Trust Architecture_
### Prerequisites
Before you start, have these lined up:
**Hardware:** A VPS with at least 4 vCPU, 8 GB RAM, 50 GB SSD. OpenClaw will run on less, but NemoClaw pulls container images and runs a k3s cluster, so undersized boxes will bite you later.
**OS:** Ubuntu 24.04 LTS (recommended) or Debian 12. This guide assumes Ubuntu 24.04.
**Virtualization:** KVM. OpenVZ and similar shared-kernel setups don't play well with Docker. Hostinger, DigitalOcean, Linode, and Vultr all use KVM by default.
**Accounts:** Tailscale (free tier is fine).
**Local tools:** An SSH client (macOS/Linux have one built in; Windows users can use OpenSSH via PowerShell or WSL) and a Tailscale client on whatever machine you'll connect from.
One non-negotiable: **don't host an unhardened OpenClaw instance on your primary workstation or any box with sensitive local data.** If something goes wrong, you want the blast contained to a cheap VPS you can nuke and rebuild, not your daily driver.
### Step 1: Provision and Update the VPS
Spin up an Ubuntu 24.04 instance with your provider of choice. Pick a region close to you for lower latency. Set a strong initial root password. You'll use it exactly once.
SSH in as root:
```shell
ssh root@YOUR_VPS_IP
```
Update the system and enable unattended security upgrades:
```shell
apt update && apt upgrade -y
apt install -y unattended-upgrades
dpkg-reconfigure -plow unattended-upgrades
```
Install the packages you'll need over the rest of the guide:
```shell
apt install -y \
ca-certificates \
curl \
gnupg \
lsb-release \
build-essential \
git \
unzip \
jq
```
That's it for the root session. Everything else runs as an unprivileged user.
### Step 2: Create a Rootless User
Root is a loaded gun. Running OpenClaw as root means any exploit (a bad skill, a prompt injection that slips past guardrails, a malicious package) gets full control of the box. Instead, we'll create a dedicated user with sudo rights for setup, but no root shell, so the default blast radius is limited.
Still as root on the VPS:
```shell
adduser --gecos "" openclaw
usermod -aG sudo openclaw
```
The --gecos "" flag skips the interactive "Full Name / Room Number" prompts. You'll be asked for a password. Set one, but you won't need it often because we're about to switch to SSH keys.
### Step 3: Set Up Passwordless SSH
Password logins are a liability. Every Ubuntu box on the public internet is getting hammered with login attempts right now; yours is no exception. SSH keys are mathematically impossible to brute-force, and they're faster to use anyway.
**On your local machine** (not the VPS), generate an ED25519 key pair if you don't already have one:
```shell
ssh-keygen -t ed25519 -C "openclaw"
```
Accept the default path (~/.ssh/id\_ed25519) or give it a custom name. A passphrase is optional but recommended.
Copy the public key to the VPS:
```shell
ssh-copy-id -i ~/.ssh/id_ed25519.pub openclaw@YOUR_VPS_IP
```
You'll be prompted for the openclaw user's password (the one you set in Step 2). This is the last time you'll need it.
Verify the key works:
```shell
ssh openclaw@YOUR_VPS_IP
```
You should land directly at a shell without being asked for a password. **Don't skip this verification step.** The next section disables password login entirely, and if the key doesn't work, you'll lock yourself out of the server.

_SSH Only Access in Zero Trust Setup_
### Step 4: Disable Password Login
> **_Critical:_** _If your SSH key doesn't already work, fix that first. This step makes key-based auth the only way in. Get it wrong and your only recourse is the VPS provider's web console._
Once you've confirmed keys work, SSH in as the openclaw user and edit the SSH daemon config:
```shell
sudo nano /etc/ssh/sshd_config
```
Find and set the following values (uncomment them if they're prefixed with #):
```properties
PasswordAuthentication no
PermitRootLogin no
ChallengeResponseAuthentication no
UsePAM no
```
Save and exit (Ctrl+O, Enter, Ctrl+X in nano).
Restart SSH:
```shell
sudo systemctl restart ssh
```
**Don't close your current SSH session yet.** Open a new terminal and try to connect. If it works, you're good. If it doesn't, you still have the original session open to fix sshd\_config. Only after you've confirmed a fresh connection works should you close the original.
Password-based attacks now hit a wall regardless of how weak the user's password is. This single change blocks the vast majority of automated SSH bot traffic.
### Step 5: Install Core Dependencies
OpenClaw, NemoClaw and Openshell need a handful of runtimes:
Node.js 22+ for the CLI, Docker for the execution substrate, uv for Python package management, and Git because everything needs Git.
Here's the mental model worth internalizing before you run these commands:
- **OpenShell** is the control plane. It orchestrates sandboxes.
- **Docker** is the execution substrate. Containers are where agents actually run.
- **OpenClaw** is the workload, the agent itself.
You're installing substrate and plumbing now. Workload comes in Part 2.
### Node.js 22
```shell
curl -fsSL https://deb.nodesource.com/setup_22.x | sudo -E bash -
sudo apt install -y nodejs
node -v # should print v22.x.x
```
### Docker
Add Docker's official GPG key and repository:
```shell
sudo install -m 0755 -d /etc/apt/keyrings
curl -fsSL https://download.docker.com/linux/ubuntu/gpg | \
sudo gpg --dearmor -o /etc/apt/keyrings/docker.gpg
sudo chmod a+r /etc/apt/keyrings/docker.gpg
echo \
"deb [arch=$(dpkg --print-architecture) signed-by=/etc/apt/keyrings/docker.gpg] \
https://download.docker.com/linux/ubuntu \
$(. /etc/os-release && echo $VERSION_CODENAME) stable" | \
sudo tee /etc/apt/sources.list.d/docker.list > /dev/null
```
Install the Docker stack:
```shell
sudo apt update
sudo apt install -y \
docker-ce \
docker-ce-cli \
containerd.io \
docker-buildx-plugin \
docker-compose-plugin
```
Enable and start Docker, then add your user to the docker group so you don't need sudo for every command:
```shell
sudo systemctl enable docker
sudo systemctl start docker
sudo usermod -aG docker $USER
newgrp docker
```
Validate:
```shell
docker info
docker run hello-world
docker compose version
```
If hello-world pulls and prints its banner, Docker is good.
### uv (Python package manager)
uv is Astral's Rust-based replacement for pip and venv. It's dramatically faster and NemoClaw uses it under the hood:
```shell
curl -Ls https://astral.sh/uv/install.sh | bash
source ~/.bashrc
uv --version
```
If uv --version fails because it's not on your PATH, add it:
```shell
export PATH="$HOME/.local/bin:$PATH"
echo 'export PATH="$HOME/.local/bin:$PATH"' >> ~/.bashrc
```
### Sanity Check
Before moving on, verify the whole stack:
```shell
node -v # v22.x.x
git --version # any recent version
docker info # no errors
docker compose version
uv --version
curl -I https://google.com # outbound network works
```
If all five commands produce sensible output, your substrate is ready.
### Step 6: Go Invisible with Tailscale
Here's where the architecture pays off. Right now, your VPS has a public IP with SSH (port 22) open to the entire internet. Even with password auth disabled, that's an attack surface. Zero-days in OpenSSH aren't hypothetical, and port scanners catalog your server within minutes of provisioning.

_WireGuard Invisible Mode_
Tailscale replaces that public exposure with a private WireGuard-based mesh network (a "tailnet"). Your devices (laptop, phone, VPS) get private IPs in the 100.x.x.x range, and they talk to each other directly over encrypted tunnels. The rest of the internet doesn't even know your VPS exists.
Install Tailscale on the VPS:
```shell
curl -fsSL https://tailscale.com/install.sh | sh
```
Bring the node online with SSH-over-Tailscale enabled:
```shell
sudo tailscale up --ssh
```
The CLI will print an authentication URL. Open it in your browser, log into Tailscale, and approve the device.
Install the Tailscale client on your local machine too (via tailscale.com/download) and log into the same account. Your laptop and VPS are now on the same tailnet.
In the Tailscale admin console, enable **MagicDNS**. It lets you SSH to your box by hostname (ssh openclaw@your-tailscale-hostname) instead of memorizing a 100.x.x.x IP.
The --ssh flag is worth understanding. It routes SSH through Tailscale's identity layer, which means even your SSH keys become a belt-and-suspenders backup rather than the primary auth mechanism. Tailscale handles the identity check at the network layer.
### Step 7: Lock Down the Firewall
Tailscale gets you invisible, but belt-and-suspenders. We still want UFW to refuse anything that didn't come in over the tailscale0 interface. If Tailscale ever hiccups or gets misconfigured, the firewall is the last line of defense.
Install UFW:
```shell
sudo apt install -y ufw
```
Set deny-by-default for inbound, allow-by-default for outbound:
```shell
sudo ufw default deny incoming
sudo ufw default allow outgoing
```
Allow all traffic on the Tailscale interface:
```shell
sudo ufw allow in on tailscale0
```
Allow SSH on the public interface as a temporary safety net. Once you've confirmed Tailscale SSH works end-to-end, you'll remove this:
```shell
sudo ufw allow OpenSSH
sudo ufw enable
```

_Lock Down Firewall_
UFW will warn that enabling may disrupt existing SSH connections. Since we explicitly allowed OpenSSH, you're fine. Type y.
Verify:
```shell
sudo ufw status verbose
```
You should see a short list of rules: Tailscale allowed on its interface, OpenSSH allowed on public, everything else denied.
### Removing the Public SSH Safety Net
Once you've confirmed you can SSH in over Tailscale (ssh openclaw@your-tailscale-hostname), close the public SSH port entirely:
```shell
sudo ufw delete allow OpenSSH
sudo ufw reload
```
At this point, running a port scan against your VPS's public IP from anywhere on the internet returns nothing. The box is effectively invisible. The only way in is through your tailnet, authenticated with your Tailscale identity.
### Where You Are Now
If you made it this far, the result is:
- A VPS running Ubuntu 24.04 with automatic security updates
- A non-root openclaw user with sudo rights
- Passwordless SSH with password auth completely disabled
- Tailscale mesh with MagicDNS, making the server reachable only from your tailnet
- UFW dropping everything not coming over tailscale0
- Docker, Node.js 22, Git, and uv installed and working
You haven't installed OpenClaw yet. That's deliberate. Everything up to this point is infrastructure that would be worth doing even if you were never going to run an AI agent. It's just good server hygiene. Now it's going to serve as the substrate for something that genuinely needs these protections.
### Quick Verification Checklist
Before moving on, confirm:
- ssh openclaw@your-tailscale-host works from your laptop
- ssh openclaw@PUBLIC\_IP from a device _not_ on your tailnet fails to connect
- sudo ufw status shows deny-by-default with tailscale0 allowed
- grep -E "^(PasswordAuthentication|PermitRootLogin)" /etc/ssh/sshd\_config shows both set to no
- docker run hello-world succeeds as the openclaw user (no sudo)
- node -v, uv --version, git --version all return versions
If any of these fail, fix them before installing OpenClaw. The security posture only holds if every layer is actually in place.
_The NemoClaw Series Roadmap_
### What's Next
**[Part 2](https://dev.to/adnansattar/nemoclaw-for-the-enterprise-installing-nemoclaw-and-bootstrapping-the-sandbox-part-2-335f) & Part 3. Installing NemoClaw and Wiring Up Matrix E2EE:** We'll install the NemoClaw CLI, bootstrap the sandbox, and replace Telegram with Matrix as the control channel. Matrix gives us end-to-end encryption out of the box, which matters because the messages flowing through it are, by definition, high-privilege instructions to an AI agent.
**Part 4. Policy Engineering and Semantic Guardrails:** OpenShell's network policy engine lets you declare exactly which domains the agent can reach. We'll write policies that implement least-privilege at the network layer, and build out an AGENTS.md that acts as the agent's operating manual. The behavioral equivalent of a firewall.
The short version: security for AI agents isn't a single feature. It's a stack. We've just laid the foundation.
_If you found this useful, clap, follow, and drop a comment with what you'd like covered in the follow-ups. Production deployment horror stories especially welcome. They're the best teachers._
Comments
More Blog
View allkubernetesMinimalist EKS: The Easy Way
Amazon EKS manages the Kubernetes control plane, but you remain responsible for provisioning the...
J
Joaquin MenchacaaiNever forget to enter the Stern Grove lottery again!
Browser automation with Playwright, Python, GitHub Actions, and Entire to auto-enter San Francisco Stern Grove concert lotteries each week!
L
Lizzie SiegletypescriptA Free Screenshot Editor That Never Uploads Your Image
A free screenshot and image editor that runs entirely in your browser. Keeping every edit reversible and handling big phone photos, in plain TypeScript and Canvas2D.
M
Martin StarkshowdevI built a CLI to break my highlights out of Apple Books
A macOS CLI + MCP server that exports Apple Books highlights to Markdown and gives AI assistants direct access to your reading notes.
A
Andrey KorchakaiA Developer's Guide to Agent Hooks in Antigravity CLI
Motivation To be quite honest, "Hooks"—the shell commands we trigger at specific points...
T
TanaikeagentsTactical vs. Strategic Agentic AI Development — A Playbook for Developers
The Strategic Engineer: Why Writing Code Is No Longer Your Most Valuable Skill ...
A
Adewumi Saheed Adewale