 CoPilot
Back to Blog arduino
 devchallenge
 mlhacks
 discuss
 gemma
gemma ai
ai ai
ai
Build a Tiny Virtual Pet on Arduino in 60 Minutes 🐾
Jen Looper October 5, 2026
0 views
Turn an Arduino Uno Q into Kiku, a Tamagotchi-style virtual pet with an animated LED face, moods, and keyboard controls.
title: "Build a Tiny Virtual Pet on Arduino in 60 Minutes 🐾" published: true description: "Turn an Arduino Uno Q into Kiku, a Tamagotchi-style virtual pet with an animated LED face, moods, and keyboard controls." tags: arduino, beginners, programming, hacktoberfest
What if your first hardware project wasn't another blinking LED, but a tiny pet that gets hungry, plays with you, falls asleep, and reacts to what you type?
Meet Kiku. 🌸
Kiku is the mascot and in-house pet of Her AI Studio, a community program helping the next generation of women learn and build with AI.
In this mini workshop, we're shrinking Kiku down until the entire pet can live on an Arduino Uno Q.
Full tutorial is available in the Her AI Studio curriculum
What you need:
- an Arduino Uno Q
- a USB cable
- your laptop
- Arduino App Lab
- about 60 minutes
Tip! To celebrate Hacktoberfest 2026, swag packs from Major League Hacking are shipping with these Arduinos, so use this workshop for your Hack Day as an introduction to hardware hacking.
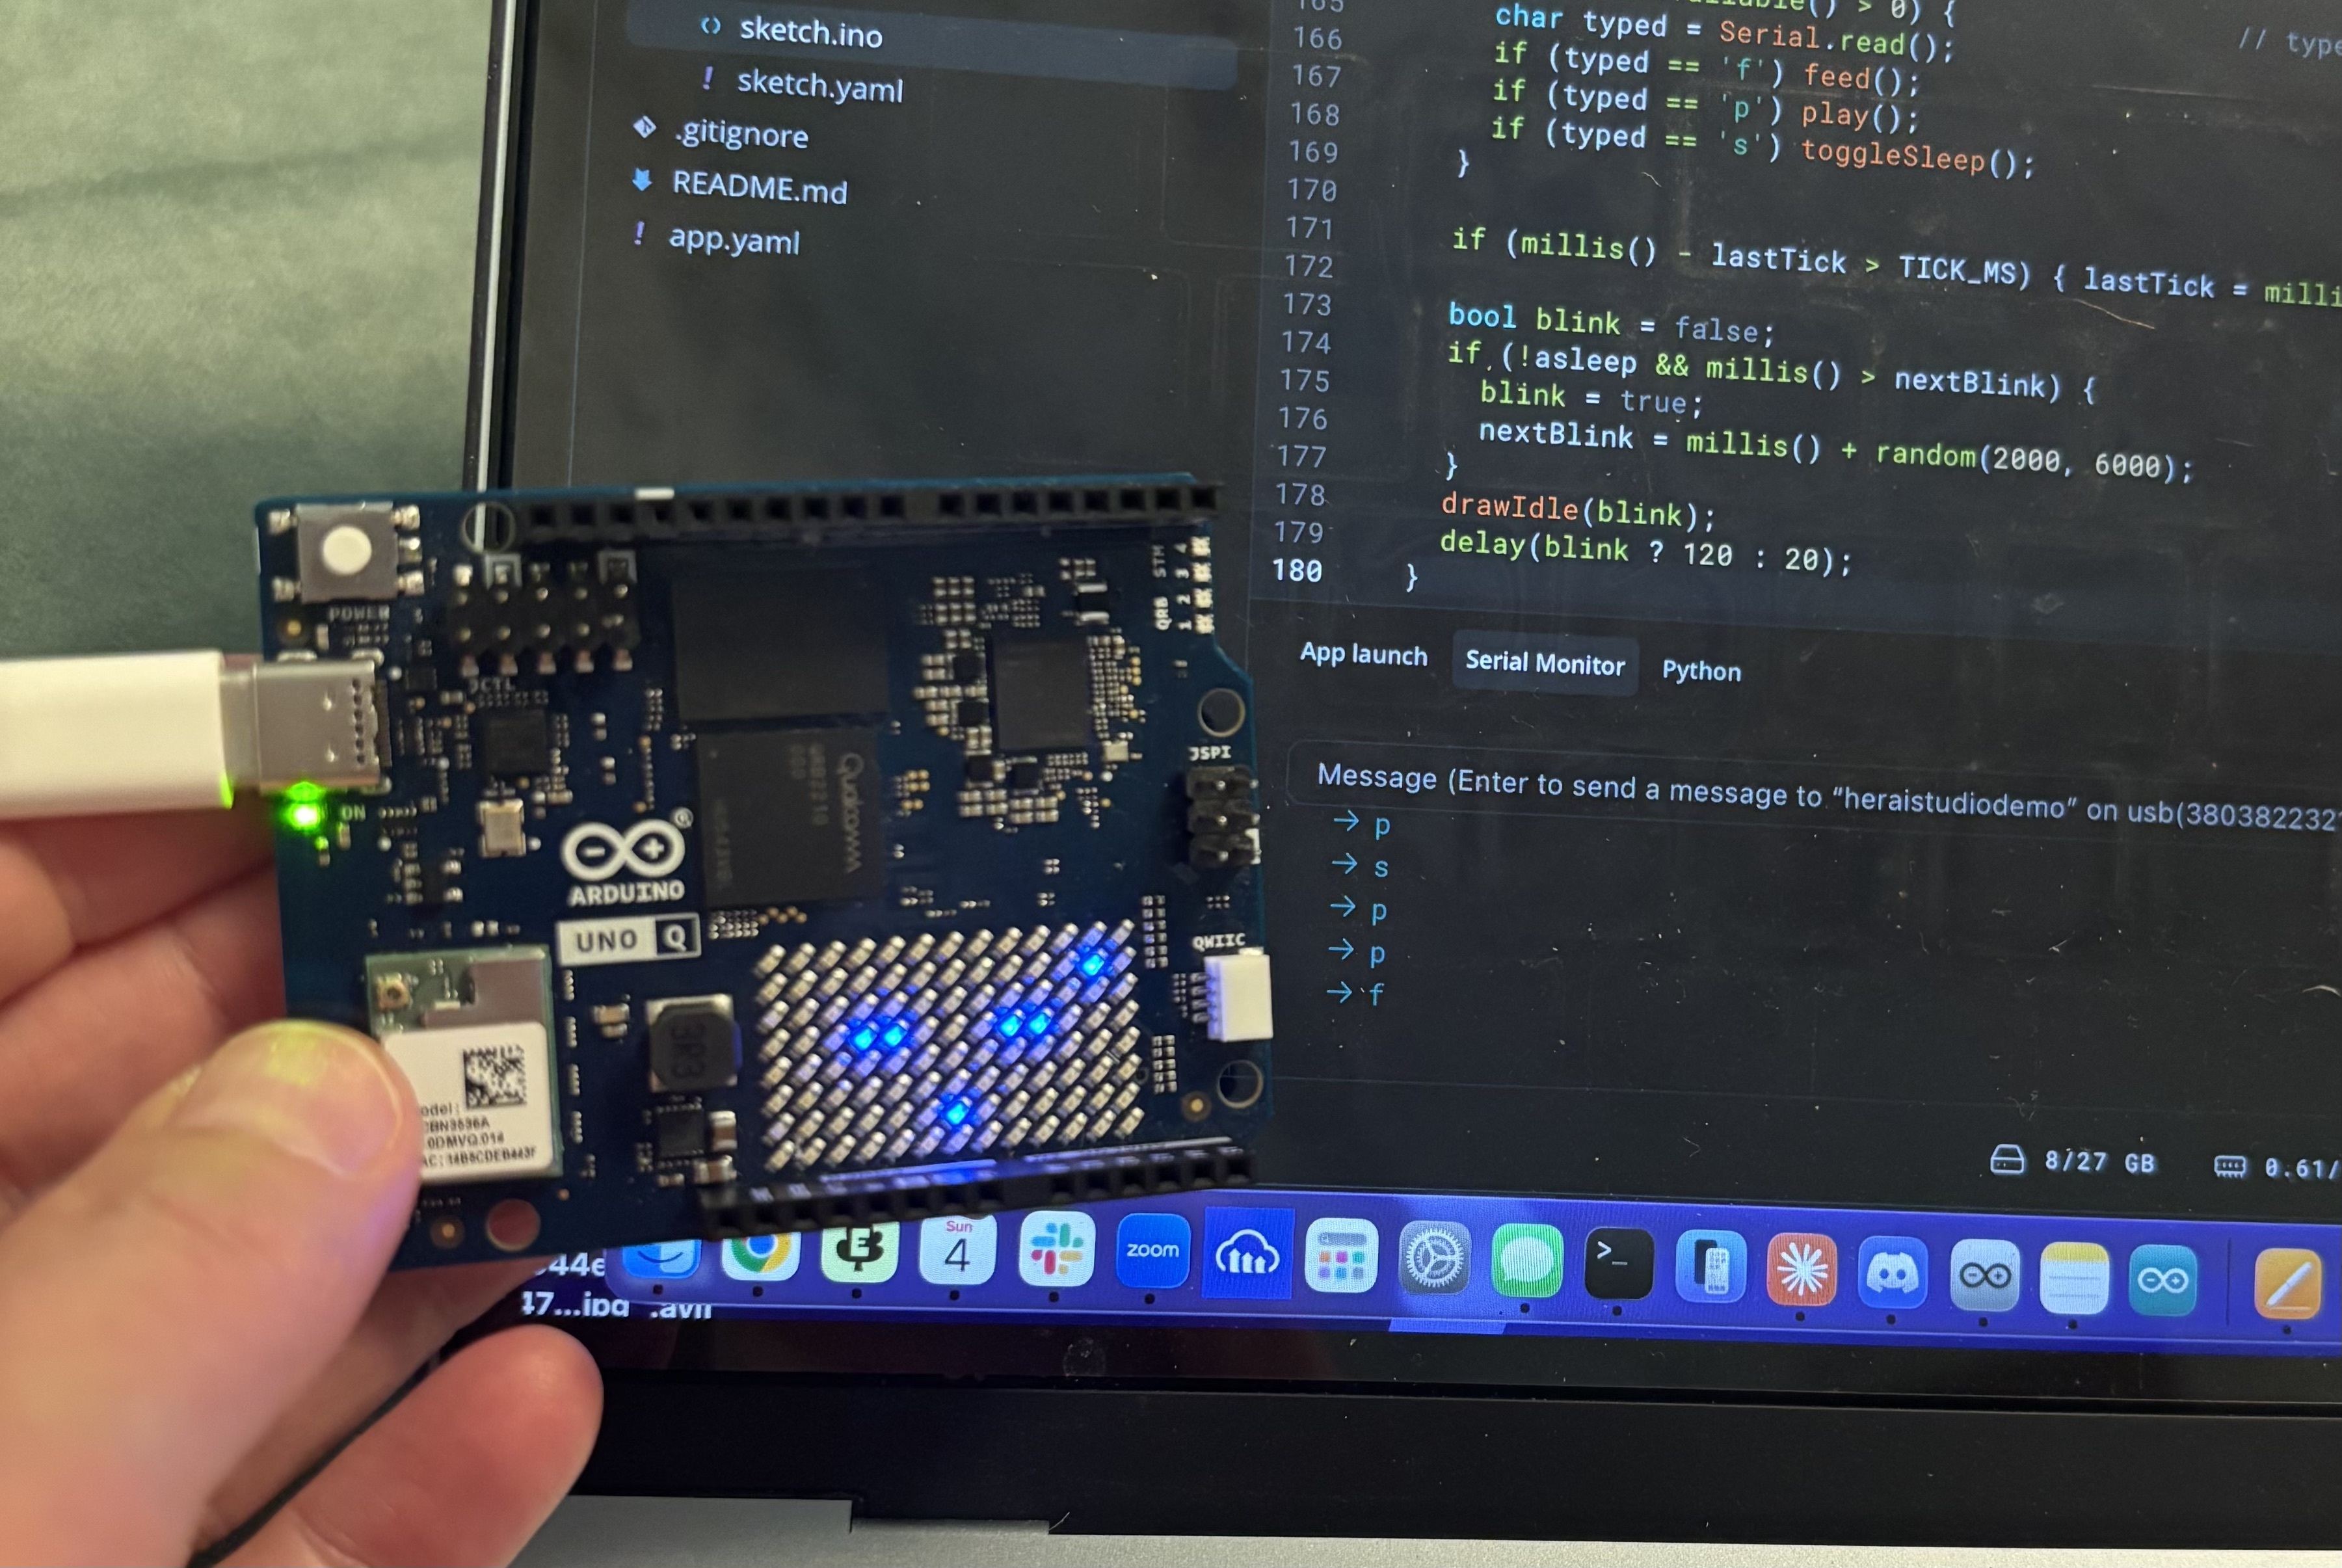
Shhh, Kiku is sleeping
By the end, you'll have a tiny Tamagotchi-style pet whose face lives on the board's LED matrix. You'll be able to feed it, play with it, and put it to sleep from your keyboard. More importantly, you'll see how a surprisingly small amount of code can produce behavior that feels alive.
What you'll learn
This project brings together several useful embedded-programming concepts:
- flashing code onto physical hardware
- communicating with a microcontroller over Serial
- drawing graphics on an LED matrix
- tracking application state
- responding to user input
- creating simple animations
- building a tiny state machine
If you've mostly written software that stays inside your laptop, there's something especially satisfying about seeing your code suddenly appear on physical hardware.
Part 1: Make sure the board is alive
Before building a virtual pet, start with the embedded developer's version of "Hello, world!": Blink an LED.
Connect your Uno Q to your laptop over USB and open Arduino App Lab which you've downloaded. Login to your board.
Create a new app, and take a look at the scaffolded code. Open sketch.ino, and write a basic blink sketch:
void setup() {
  pinMode(LED_BUILTIN, OUTPUT);
}

void loop() {
  digitalWrite(LED_BUILTIN, LOW);
  delay(1000);

  digitalWrite(LED_BUILTIN, HIGH);
  delay(1000);
}
Press run in App Lab.
If the built-in LED turns on and off every second, it's aliiiiive!
If the board isn't detected, check your USB cable. Some USB cables provide power but don't carry data.
Part 2: Give your Arduino a way to listen
Now we need Kiku to hear us. We could add buttons or sensors (and we do, in our full workshop with our full AI Kit), but there's a much simpler interface already available: Serial communication.
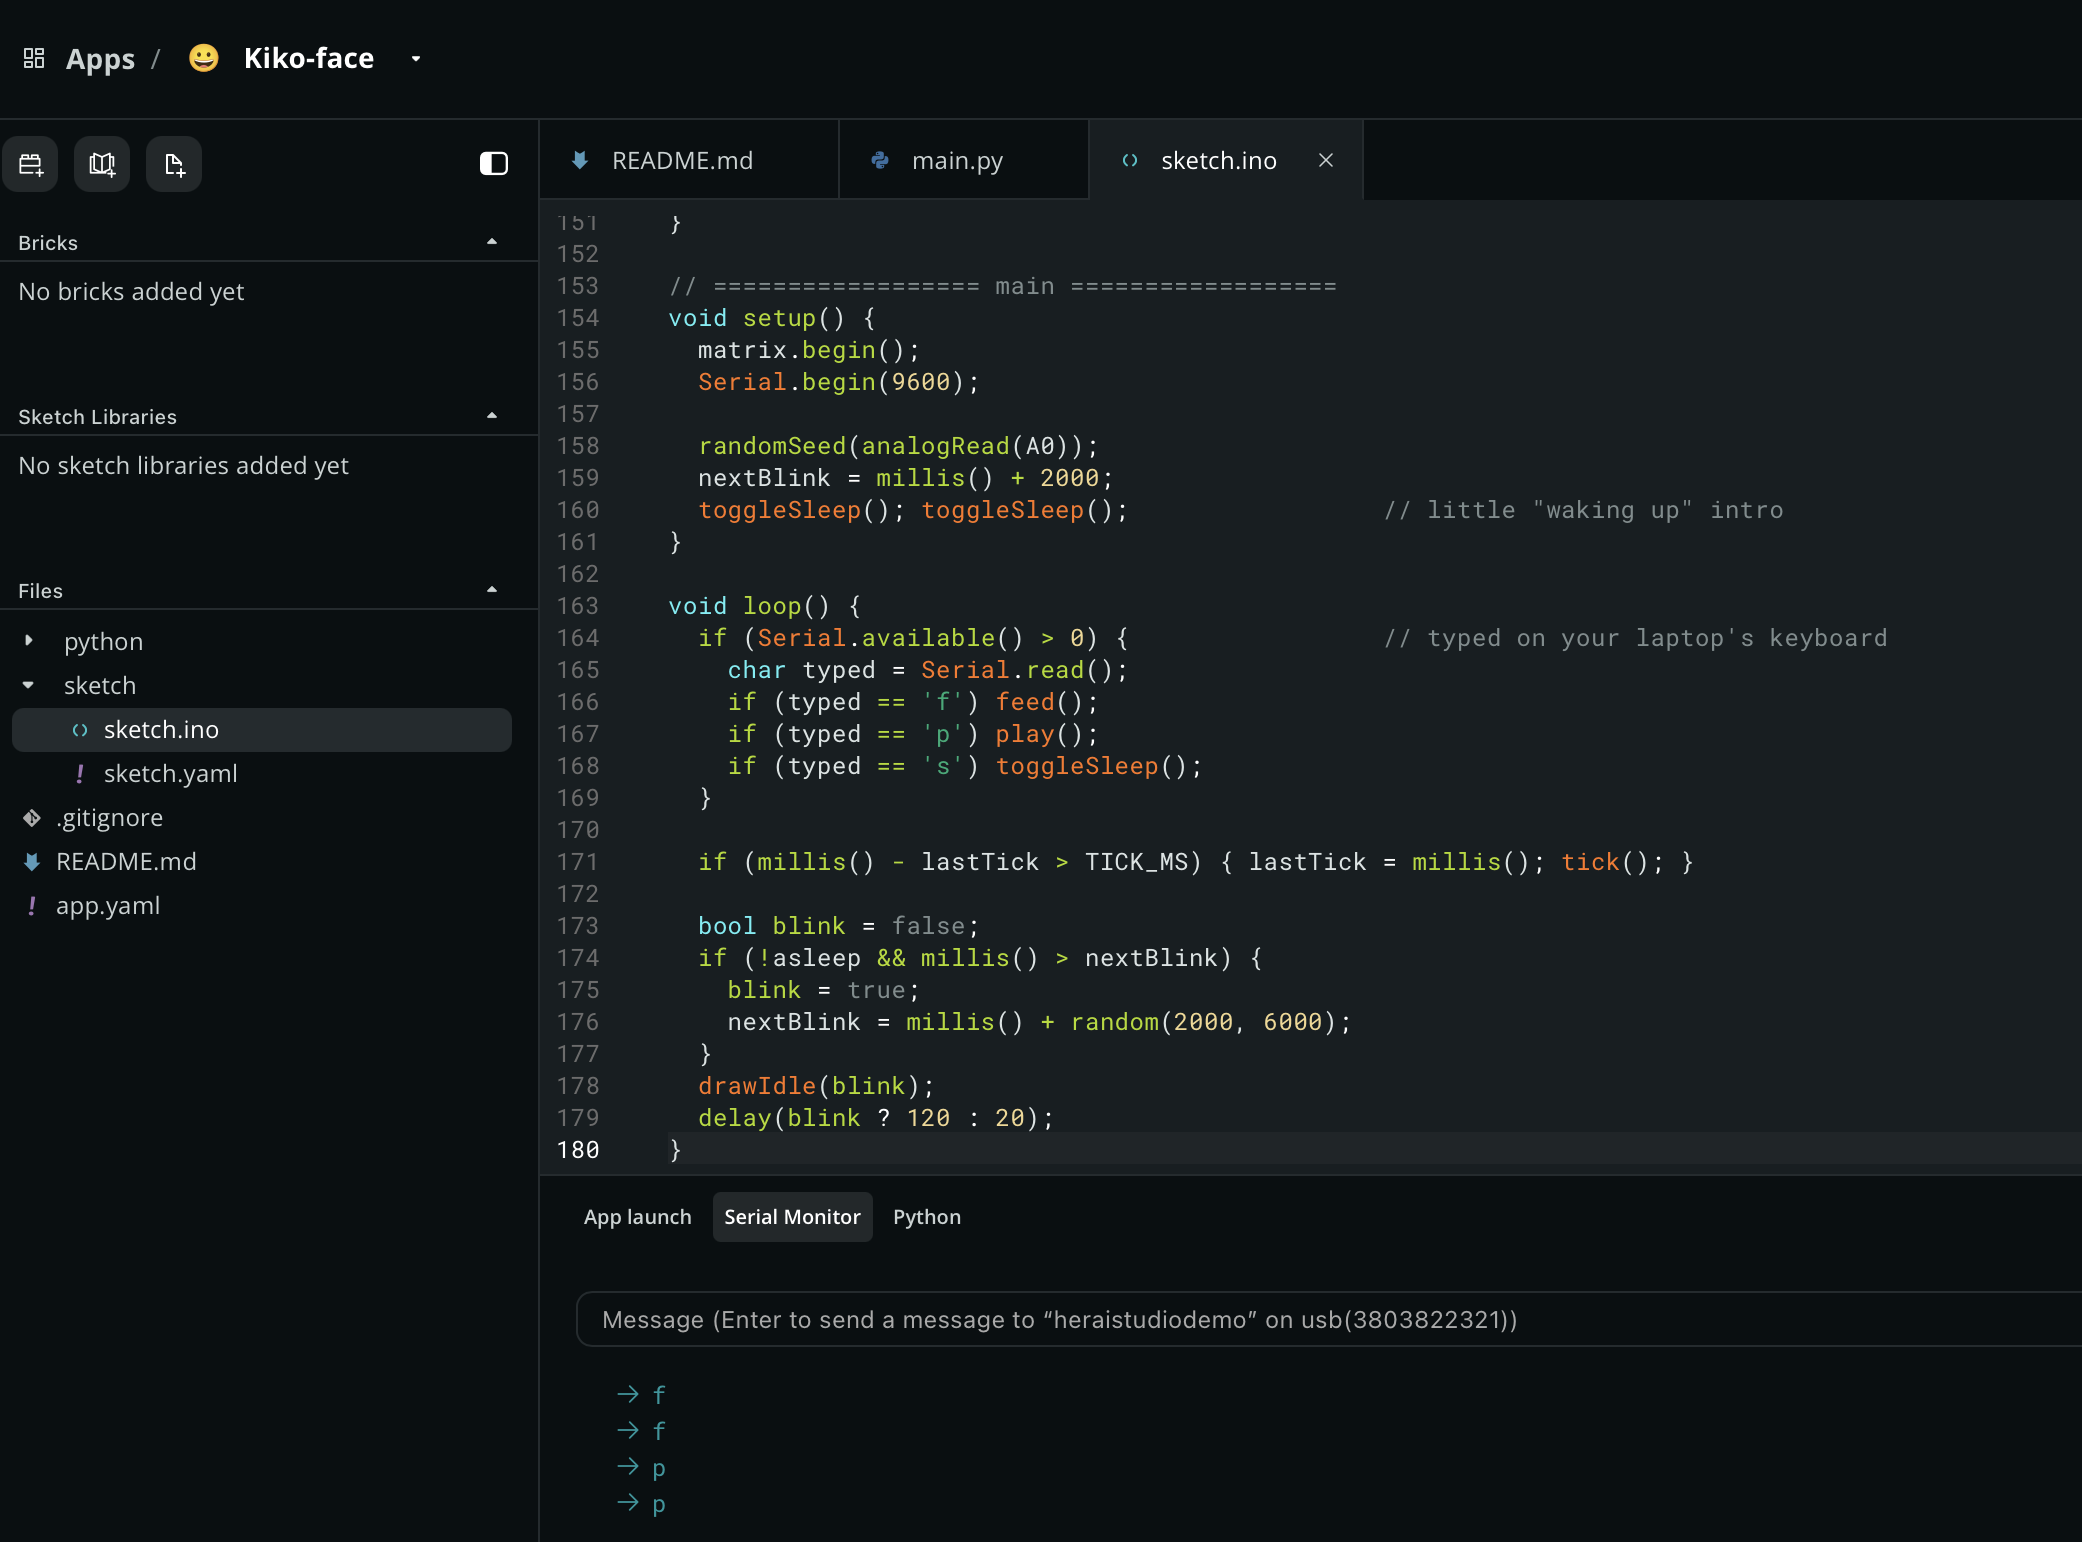
The same USB connection used to upload your program can carry messages between your laptop and your Arduino while the program is running. In App Lab, it looks like this:
Start Serial communication in setup():
void setup() {
  Serial.begin(9600);
}
Then check for incoming characters:
void loop() {
  if (Serial.available() > 0) {
    char typed = Serial.read();

    if (typed == 'f') {
      // feed Kiku
    }

    if (typed == 'p') {
      // play with Kiku
    }

    if (typed == 's') {
      // sleep or wake up
    }
  }
}
Your keyboard has effectively become the controller for a physical device.
To interact with Kiku, we'll use 3 keystrokes:
f → feed
p → play
s → sleep / wake
Part 3: Give Kiku some feelings
A virtual pet needs more than commands. It needs state. Kiku tracks three simple stats:
int hunger = 3;
int joy = 6;
int energy = 8;

bool asleep = false;
We'll treat each stat as a value from 0 to 10. Now actions can change the pet by incrementing or decrementing these values. Feeding Kiku, for example, reduces hunger (but don't overfeed!):
hunger = max(0, hunger - 3);
joy = min(10, joy + 1);
Playing might make Kiku happier while consuming energy:
joy = min(10, joy + 3);
energy = max(0, energy - 2);
hunger = min(10, hunger + 1);
Make time matter
If Kiku's stats only changed when we typed something, the pet wouldn't feel particularly alive.
So we introduce time! Every few seconds, a tick() function updates Kiku's state, like this:
void tick() {
  if (asleep) {
    // regain energy
  } else {
    // lose energy
    // gradually lose joy
  }

  // gradually become hungry
}
In your code, use a short interval so changes are easy to observe (and change this later when you want your pet to chill out):
const unsigned long TICK_MS = 10000;
That's one update every ten seconds. Walk away from Kiku and come back later, and its state will definitely be different - they can get cranky when left alone!
Give the state a face
Kiku turns its internal state into facial expressions on the Uno Q's LED matrix. We can define its eyes:
enum Eyes {
  EYES_OPEN,
  EYES_CLOSED,
  EYES_HAPPY,
  EYES_PEEK
};
And mouth poses:
enum Mouth {
  MOUTH_FLAT,
  MOUTH_SMILE,
  MOUTH_FROWN,
  MOUTH_OPEN,
  MOUTH_DOT
};
Now our program can translate state into emotion:
Mouth moodMouth() {
  if (hunger >= 7 || joy <= 3)
    return MOUTH_FROWN;

  if (joy >= 7)
    return MOUTH_SMILE;

  return MOUTH_FLAT;
}
Kiku isn't actually experiencing happiness or hunger, of course, but a handful of variables and conditionals suddenly starts to look like personality.
Connect actions to behavior
Now the pieces come together. Your main loop has three jobs:
- Listen for commands.
- Update Kiku's state over time.
- Draw the appropriate expression.
In simplified form:
void loop() {
  if (Serial.available() > 0) {
    char typed = Serial.read();

    if (typed == 'f') feed();
    if (typed == 'p') play();
    if (typed == 's') toggleSleep();
  }

  // update stats when enough time has passed

  // calculate blinking

  // redraw Kiku
}
That's the core architecture of your Kiku. Try it with your own device!
Open the Serial Monitor in App Lab and type:
f
Kiku eats.
Then:
p
Kiku plays.
And:
s
Kiku goes to sleep.
What's next?
Try to make some changes that alters Kiku's personality.
1. Change time
Modify TICK_MS.
2. Invent an expression
Make Kiku wink, act surprised, or act sad.
3. Add another command
Maybe:
c → clean
What did we actually build?
On the surface, we built a cute virtual pet. Underneath, we explored several concepts that appear in much larger systems:
Input handling: Serial commands become events.
State management: Variables remember what's happening between iterations of the loop.
State transitions: Actions modify that state.
Time-based behavior: The system changes even without direct input.
Rendering: Internal state becomes visible through the LED matrix.
Human-computer interaction: Animation and timing make simple logic feel expressive.
If you build your own Kiku for Hacktoberfest, we'd love to see what personality you give it.🌸
This article is presented as a gift to Hacktoberfest hackers by Her AI Studio, a community program for the next generation of women in AI.
The complete Kiku workshop, including the full Arduino sketch, exercises, knowledge checks, and additional resources, is available in the Her AI Studio curriculum.
Comments
More Blog
View alldevchallengeCongrats to the Hacktoberfest Weekend Challenge: Build for a Friend Winners!
We are so excited to announce the winners of the Hacktoberfest Weekend Challenge: Build for a Friend,...
J
Jem 1
mlhacksCongrats to Our First MLH x DEV Writing Challenge Winner!
We just wrapped the very first month of the MLH x DEV Writing Challenge, our new way of celebrating...
J
Jem 1
discussDev Opportunity Radar #20: $2M AI Reasoning Challenge, PayPal AI Hackathon, and Coinbase Analytics Challenge
TL;DR Welcome back to Dev Opportunity Radar. This is a weekly series where I share opportunities,...
H
Hemapriya Kanagala 1
gemmaGemma 4 From E2B to 31B on an AMD MI300X: fp8 Overtakes bf16 From 12B Up
Every Gemma 4 size from E2B to 31B served on one AMD Instinct MI300X in bf16, fp8, int8 W8A8 and int4 W4A16, on the same vLLM image. fp8 goes from 0.75x bf16 for one request at E2B to 1.23x at 31B and is faster than bf16 in every cell at 12B and 31B. The mixture-of-experts 26B sits at bf16's pace, and the 4-bit builds run at 0.14x to 0.69x at every size.
X
xbill 2
aiStuart Feldman Was Right in 1976: Why Your AI Agent Needs a Makefile, Not a 20-Step Prompt
How replacing fragile linear prompt checklists with a 50-year-old declarative build graph eliminates agent amnesia, enables seamless mid-flight session resumption, and mechanizes software engineering governance.
R
Randal L. Schwartz 2
aiI got Jev to zero mistakes. I'm still using Flash-Lite.
Jev is a brilliant decision model. Gemini Flash-Lite is the model nobody talks about, and it’s fast,...
S
Swift 2
Ready-made automations for this
Workflows from the Neura Market marketplace related to this CoPilot resource
- Learn n8n Keyboard Shortcuts with an Interactive Hands-On Tutorial Workflown8n · $24.99 · Related topic
- Build Comprehensive Entity Profiles with GPT-4, Wikipedia & Vector DB for Contentn8n · $24.99 · Related topic
- Build AI Agents with Think-Plan-Act Architecture Using Llama-4 Reasoningn8n · $24.99 · Related topic
- Telegram Bot Inline Keyboard with Dynamic Menus & Rating Systemn8n · $9.99 · Related topic