 Gemini
Back to Blog![Build Hybrid Image Analysis Application with Angular, Firebase AI Logic, and Gemini Nano [GDE]](https://media2.dev.to/dynamic/image/width=1200,height=627,fit=cover,gravity=auto,format=auto/https%3A%2F%2Fdev-to-uploads.s3.us-east-2.amazonaws.com%2Fuploads%2Farticles%2Fyehxbwot4tcsoo0snt9j.png) angular
angular![[AI in Practice] Upgrading from Gemini 3.5/3.6 to Gemini 4 Argon: Migration Notes and Pitfalls for LINE Bot Developers](https://media2.dev.to/dynamic/image/width=1200,height=627,fit=cover,gravity=auto,format=auto/https%3A%2F%2Fdev-to-uploads.s3.us-east-2.amazonaws.com%2Fuploads%2Farticles%2Fe3j23dy7fqvu09aob4ob.png) ai
ai googlecloud
 ai
ai ai
ai ai
ai ai
ai
Build Hybrid Image Analysis Application with Angular, Firebase AI Logic, and Gemini Nano [GDE]
Connie Leung August 7, 2026
4 views
This tutorial demonstrates how to build a hybrid image analysis application using Angular, Firebase...
This tutorial demonstrates how to build a hybrid image analysis application using Angular, Firebase AI Logic, and Gemini. Users upload an image, click the button, and wait for either the Gemini Nano or the Gemini 3.5 Flash model to generate tags, alternative texts, and recommendations.
What makes Firebase AI Logic so powerful is that the Hybrid and On-device Web SDK decides to use either the on-device or cloud AI model. In this demo, the SDK downloads and uses Gemini Nano when it is executed in the Chrome browser. When it runs on other browsers, the Gemini 3.5 Flash model handles the image analysis task. The underlying model being used is completely transparent to the user and receives a high-quality response regardless of the backend.
1. Prerequisites
- Angular 22
- TailwindCSS
- Node 24
- gemini-3.5-flash
- Firebase AI Logic
- Firebase Remote Config
- Firebase Local Emulator Suite
- Firebase App Hosting
- Firebase App Check
While Angular and CSS provide the user interface and styling, this demo's AI capability is powered by Firebase services such as Firebase AI Logic and Firebase Remote Config.
npm i -g firebase-tools
Install firebase-tools globally using npm.
npm i --save-exact firebase tailwindcss postcss @tailwindcss/postcss jsonrepair
npm i --save-exact --save-dev angular-eslint firebase-tools husky lint-staged serve
Install additional dependencies for Firebase AI Logic, CSS Styling, and JSON response streaming. The dev dependencies are installed to detect code smells, ensure code quality, and call the Firebase CLI to perform ad-hoc tasks.
2. Source Code
The full source code for this project is available in the NG Firebase Image Analyzer; however, the following sections describe the Firebase Project setup and provide code examples of the Firebase Hybrid and On-device Web SDK.
The following sections walk through the step-by-step Firebase project configuration.
3. Setup Firebase Project in Angular
Set up a Firebase project in an Angular project before any Angular service makes requests to Firebase AI Logic to perform AI tasks.
3.1 Access and Manage Firebase Projects
firebase logout
firebase login
Note: Logging out and logging back in to Firebase before configuring a new project is recommended to refresh authentication.
Create a firebase folder to store .firebasesrc and .firebase.json, which are Firebase configuration files. You can use the Antigravity CLI and Gemini to generate these configuration files within the folder. Antigravity CLI is a Google coding agent that uses AI models to tackle complex problems in the command line. You can find the information on this page.
In my prompt, I instructed the AI model what the default Firebase Project ID was, and the services to install. The demo utilizes Firebase AI Logic, App Hosting for production deployment, and the Firebase Local Emulator Suite to simulate hosting, accelerating the development cycle.
The following is a very simple firebase/.firebasesrc:
{
  "projects": {
    "default": "<Firebase Project ID>"
  }
}
The following is the full configuration firebase/firebase.json:
{
  "apphosting": [
    {
      "backendId": "ng-firebase-image-analyzer",
      "rootDir": "..",
      "ignore": ["node_modules", ".git", "firebase-debug.log", "firebase-debug.*.log", "functions"]
    }
  ],
  "emulators": {
    "apphosting": {
      "port": 5005,
      "rootDirectory": "..",
      "startCommand": "npm run start"
    },
    "ui": {
      "enabled": true
    }
  }
}
The apphosting block shows that the root directory of the Angular code is the parent folder and ignores a list of folders and files during upload.
The emulators block enables app hosting, the Angular application runs at port 5005 and the URL is http://localhost:5005.
The following is a simple apphosting.yaml:
runConfig:
  minInstances: 0
  maxInstances: 2
The YAML file limits the active instances to between 0 and 2, preventing unexpected cloud costs from infinite scaling.
Next, create a new firebase/scripts folder to store NodeJS scripts to facilitate Firebase integration with Angular.
mkdir -p firebase/scripts
3.2 Fetch Default Firebase Remote Config with Firebase CLI
Rather than downloading the default Firebase Remote Config JSON file from the Firebase Console manually, I instructed the Antigravity CLI and Gemini to download the Firebase Remote Configuration values, transforms the response to a JSON key-value pairs, and writes the file to ../public/remote-config-defaults.json. Then, the Angular application can access the JSON file in code during development and in the production build.
const { execSync } = require('child_process');
const fs = require('fs');
const path = require('path');

const firebaseDir = path.resolve(__dirname, '..');

const output = execSync('npx firebase remoteconfig:get --json --project default', {
  encoding: 'utf-8',
  cwd: firebaseDir,
});
const config = JSON.parse(output);
const parameters = config?.result?.parameters;

const defaults = {};
if (parameters) {
  for (const [key, paramObj] of Object.entries(parameters)) {
    if (paramObj.defaultValue && paramObj.defaultValue.value !== undefined) {
      defaults[key] = paramObj.defaultValue.value;
    }
  }
}

const outputPath = path.join(firebaseDir, '..', 'public', 'remote-config-defaults.json');
fs.writeFileSync(outputPath, `${JSON.stringify(defaults, null, 2)}\n`, 'utf-8');
console.log(`Successfully wrote ${outputPath}`);
Add a script in package.json to execute the NodeJS script.
"scripts": {
    "config:fetch": "node firebase/scripts/get-firebase-remote-config.js"
}
The output looks like the following:
{
  "geminiModelName": "gemini-3.5-flash",
  "vertexAILocation": "global",
  "thinkingLevel": "LOW"
}
The complete code can be found in this source file.
3.3 Generate Firebase App Object for App Initialization
The Angular application requires initializing a Firebase App and App Check during bootstrap before making any request to Firebase AI Logic. A Node.js script generates the Firebase App configuration object, reCAPTCHA Enterprise Key, and App Check Debug Token from .env and writes them to public/firebase.config.json. I gitignored the file because both the Recaptcha Enterprise Key and App check debug token are highly sensitive, and must not be revealed.
Copy the .env.example to .env and provide the valid information.
FIREBASE_API_KEY="<Firebase API Key>"
FIREBASE_AUTH_DOMAIN="<Firebase Auth Domain>"
FIREBASE_PROJECT_ID="<Firebase Project ID>"
FIREBASE_STORAGE_BUCKET="<Firebase Storage Bucket>"
FIREBASE_MESSAGING_SENDER_ID="<Firebase Messaging Sender ID>"
FIREBASE_APP_ID="<Firebase App ID>"
FIREBASE_RECAPTCHA_ENTERPRISE_KEY="<Recaptcha Enterprise Key>"
FIREBASE_APPCHECK_DEBUG_TOKEN="<App Check debug token>"
const fs = require('fs');
const path = require('path');

const envPath = path.resolve(__dirname, '../.env');
process.loadEnvFile(envPath);

const app = {
  apiKey: process.env.FIREBASE_API_KEY,
  authDomain: process.env.FIREBASE_AUTH_DOMAIN,
  projectId: process.env.FIREBASE_PROJECT_ID,
  storageBucket: process.env.FIREBASE_STORAGE_BUCKET,
  messagingSenderId: process.env.FIREBASE_MESSAGING_SENDER_ID,
  appId: process.env.FIREBASE_APP_ID,
};

// Check if recaptcha enterprise key is missing
if (!process.env.FIREBASE_RECAPTCHA_ENTERPRISE_KEY) {
  console.warn('Warning: Recaptcha Enterprise key is missing');
}

const config = {
  app,
  recaptchaEnterpriseKey: process.env.FIREBASE_RECAPTCHA_ENTERPRISE_KEY,
  appCheckDebugToken: process.env.FIREBASE_APPCHECK_DEBUG_TOKEN || '',
};

const outputPath = path.resolve(__dirname, '../../public/firebase.config.json');
fs.writeFileSync(outputPath, JSON.stringify(config, null, 2), 'utf-8');
console.log(`Successfully generated ${outputPath} from .env`);
Add a script in package.json to execute the NodeJS script.
"scripts": {
  "config:generate": "node firebase/scripts/generate-firebase-config.js"
}
The JSON object is shown as follows:
{
  "app": {
    "apiKey": "firebase api key",
    "authDomain": "auth domain",
    "projectId": "project key",
    "storageBucket": "storage bucket",
    "messagingSenderId": "message sender id",
    "appId": "app id"
  },
  "recaptchaEnterpriseKey": "<Recaptcha key>",
  "appCheckDebugToken": "<app check debug key>"
}
The complete code can be found in this source file.
3.4 App Hosting
App Hosting is configured in the Firebase Console.
- Select your web project
- Click App Hosting from the left-side menu
- Link your GitHub repository and select your region (e.g.,
asia-east1). - Click Settings
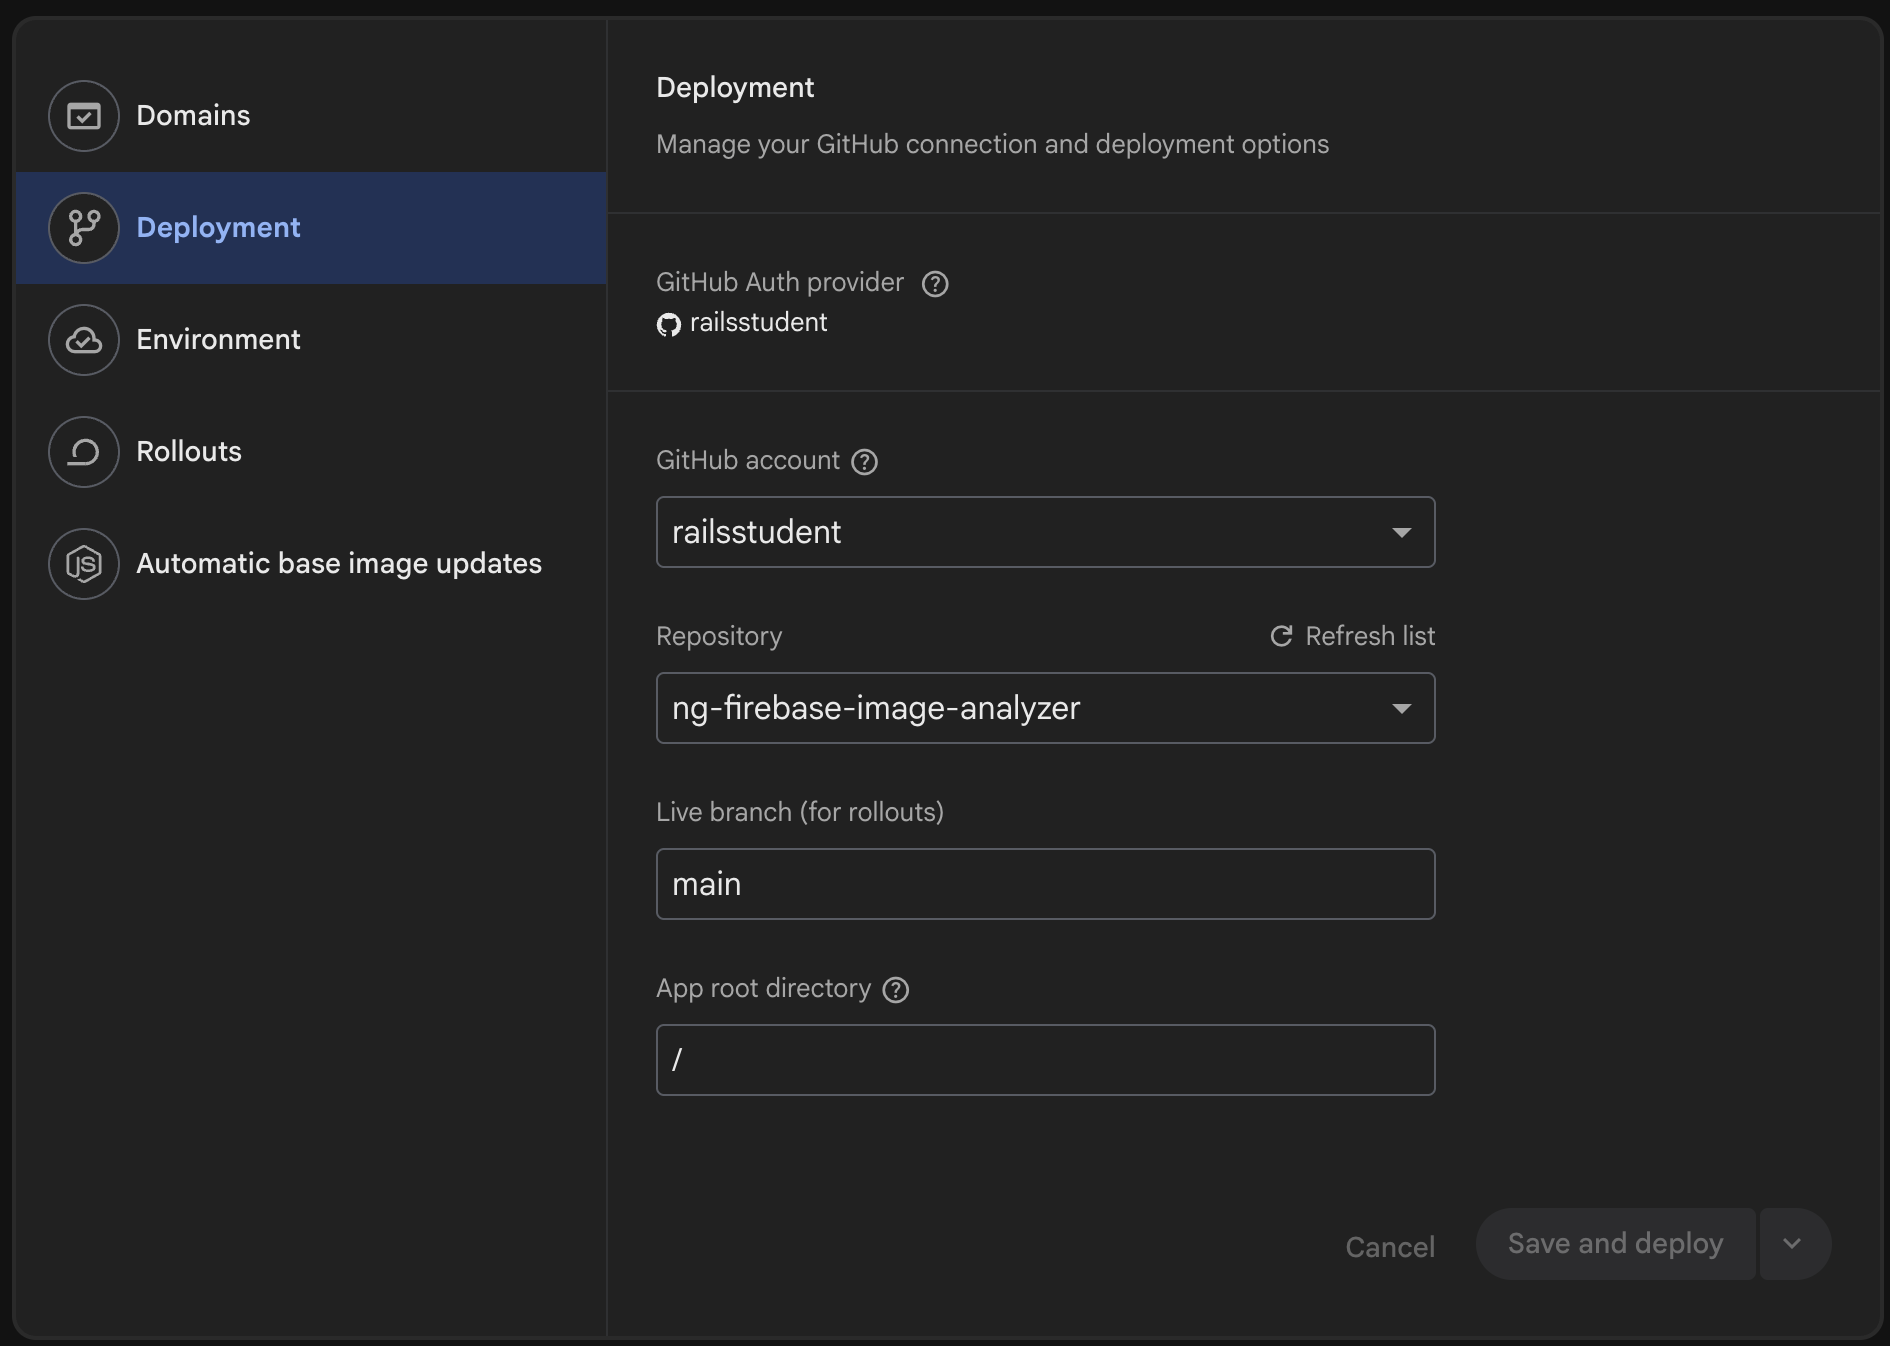
- Click the Domain item to examine the GitHub account, repository, and live branch to roll out.
- Click the Environment item to enter the environment variables. These environment variables are the same ones from
.env.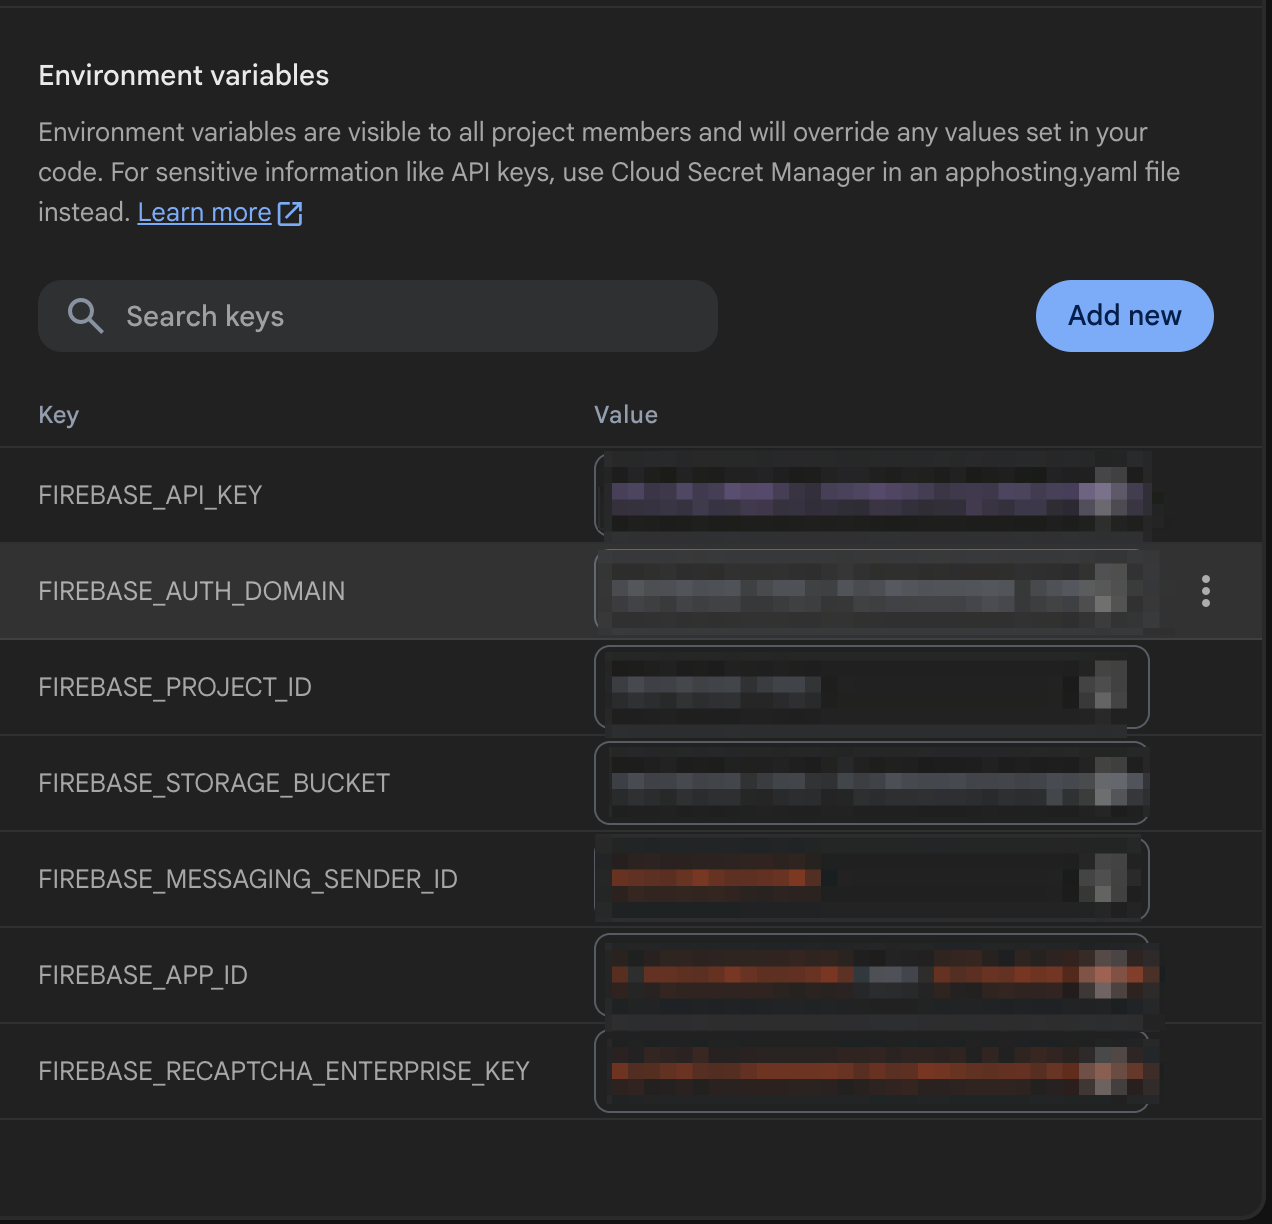
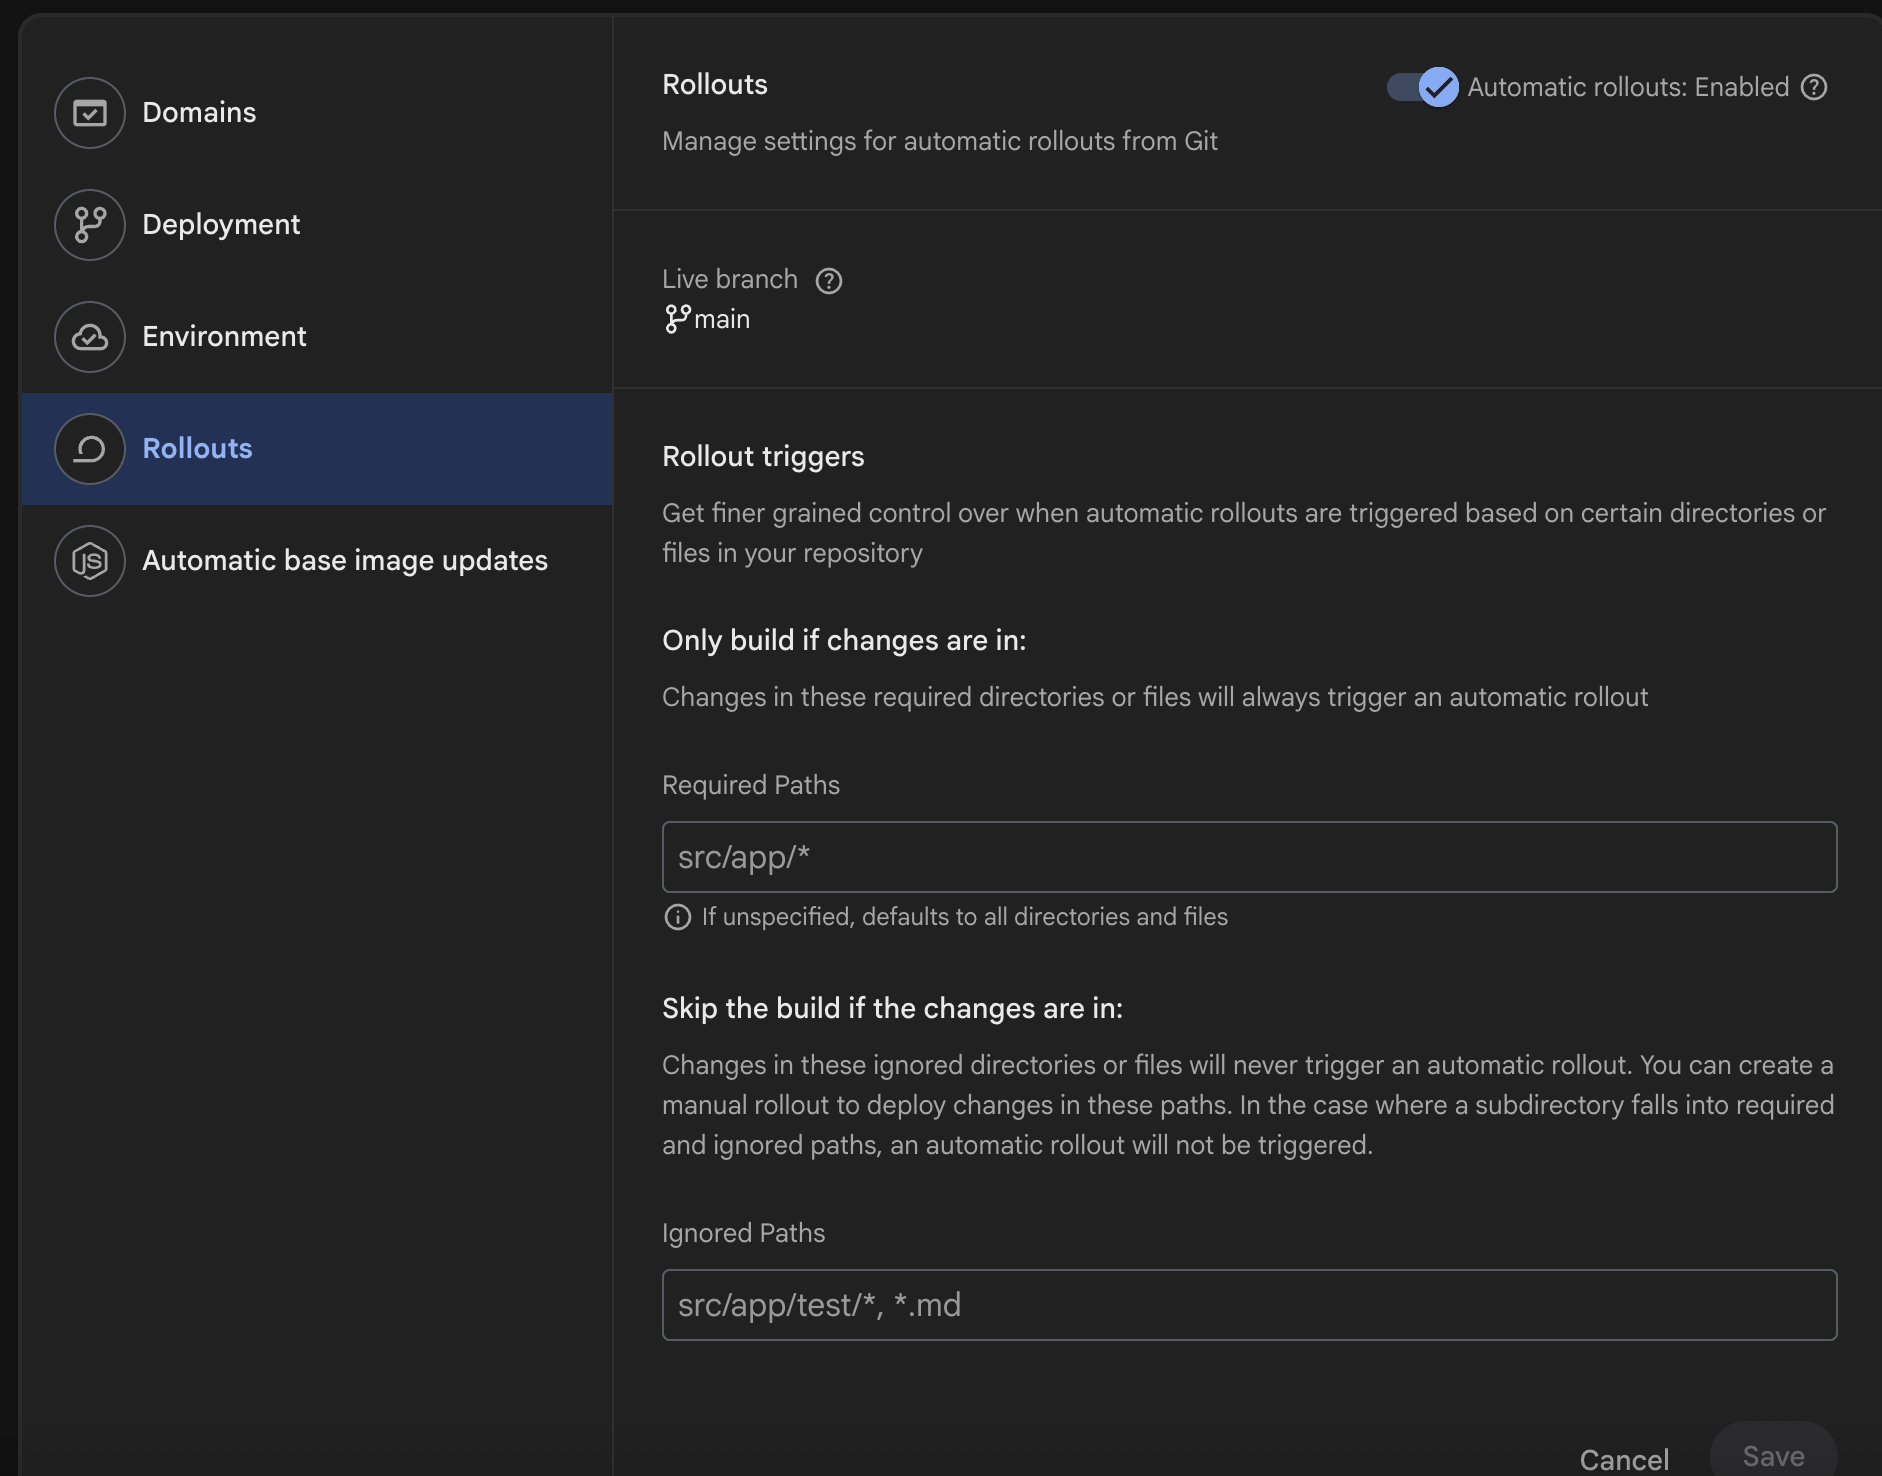
- Click the Rollouts item to keep the default settings.
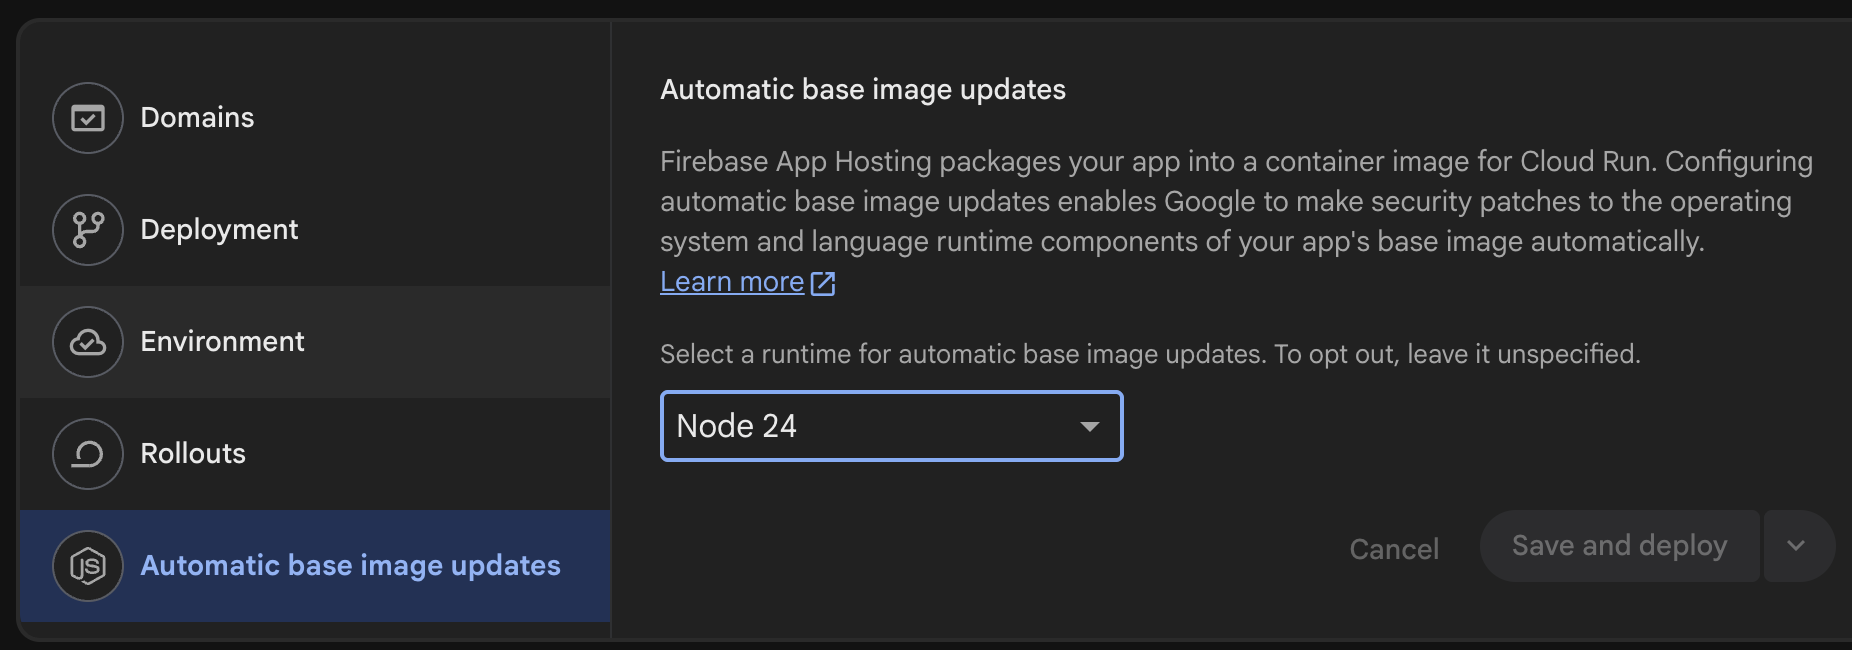
- Click the Automatic base image updates item and choose the latest Node.js runtime, which is Node 24.
4. Architecture
The Angular application initializes a Firebase App and constructs HybridParams with a cloud-based Gemini model, on-device parameters, in-cloud parameters, a system prompt, and safety settings. Then, the user uploads an image and a user prompt to prompt the model to perform image analysis to generate a response.
The Firebase AI Logic Hybrid and On-device Web SDK determines whether the browser supports Gemini Nano to handle the image-to-text task. If Gemini Nano is capable, then it is used to analyze the image to generate tags, alternative texts, and recommendations. Otherwise, the request is sent to Cloud and processed by the Gemini 3.5 Flash model.
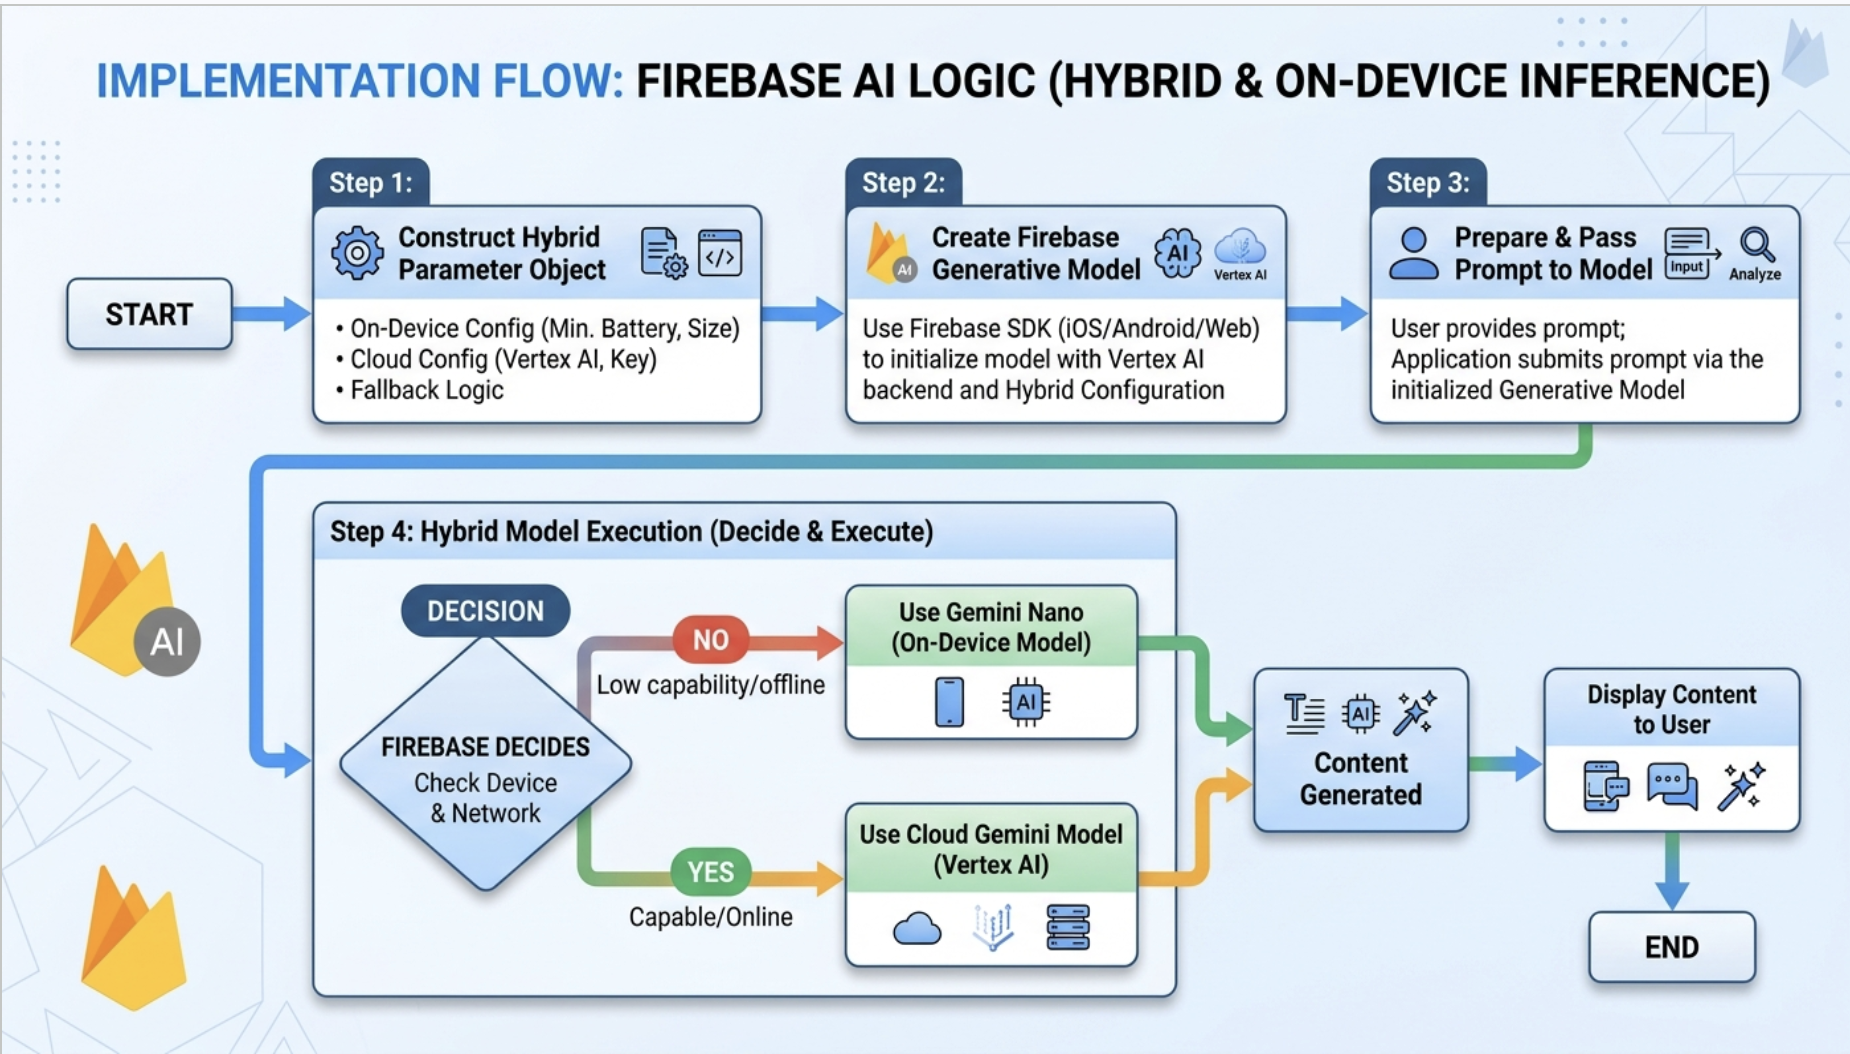
Next, we are ready to integrate Firebase with Angular by initializing the Firebase app, fetching Remote Config, and enabling security via App Check.
5. Initialize a Firebase App in Angular
Angular initializes the Firebase App during bootstrap. We declare a few injection tokens to inject the navigator, window, and Firebase AI instance. Then, we define Angular services that encapsulate the Firebase SDK to initialize a Firebase app, fetch and activate Firebase Remote Config values, and protect AI resources from abuse via App Check.
5.1. Injection Tokens
import { isPlatformBrowser } from '@angular/common';
import { inject, InjectionToken, PLATFORM_ID } from '@angular/core';
import { AI } from 'firebase/ai';

export const FIREBASE_AI = new InjectionToken<AI>('FirebaseAI');

export const WINDOW = new InjectionToken<Window | null>('WINDOW', {
  providedIn: 'root',
  factory: () => {
    const platformId = inject(PLATFORM_ID);
    return isPlatformBrowser(platformId) ? window : null;
  },
});

export const NAVIGATOR = new InjectionToken<Navigator | null>('NAVIGATOR', {
  providedIn: 'root',
  factory: () => {
    const win = inject(WINDOW);
    return win ? win.navigator : null;
  },
});
When the platform is a browser, the factory functions return the Window and Navigator objects, respectively.
5.2. Provide Firebase AI Model
import { FIREBASE_AI } from '@/features/ai/constants/ai.const';
import { ConfigService } from '@/features/ai/services/config.service';
import { EnvironmentProviders, inject, makeEnvironmentProviders } from '@angular/core';
import { getAI, VertexAIBackend } from 'firebase/ai';
import { getValue } from 'firebase/remote-config';

export function provideFirebaseAI(): EnvironmentProviders {
  return makeEnvironmentProviders([
    {
      provide: FIREBASE_AI,
      useFactory: () => {
        const configService = inject(ConfigService);
        const location = getValue(configService.RemoteConfig, 'vertexAILocation').asString() || 'global';
        return getAI(configService.firebaseApp, {
          backend: new VertexAIBackend(location),
        });
      },
    },
  ]);
}
The provideFirebaseAI provider uses the FIREBASE_AI injection token to construct a Firebase AI having Vertex AI as its backend. Vertex AI is utilized in this architecture because its endpoints are directly accessible in regions like Hong Kong, whereas the standard Gemini API requires a VPN.
5.3. Config Service
The core method of ConfigService is initialize(), which initializes the Firebase app, configures an instance of App Check, and fetches and activates the Firebase Remote Config values.
import { inject, InjectionToken, isDevMode } from '@angular/core';
import { WINDOW, NAVIGATOR } from '@/core/constants/navigator.const';

export const LOCAL_DOMAINS = new InjectionToken<string[]>('LOCAL_DOMAINS', {
  providedIn: 'root',
  factory: () => ['localhost', '127.0.0.1', '::1', '[::1]'],
});

export function injectIsLocalhost(): () => boolean {
  const win = inject(WINDOW);
  const localDomains = inject(LOCAL_DOMAINS);

  return () => !!win && localDomains.includes(win.location.hostname);
}

export function configureAppCheckDebugToken(configToken?: string, isLocalhost?: boolean): void {
  // eslint-disable-next-line @typescript-eslint/no-explicit-any
  (globalThis as any).FIREBASE_APPCHECK_DEBUG_TOKEN = configToken || isDevMode() || !!isLocalhost;
}
injectIsLocalhost creates and returns a higher-order function that determines whether the application is running on localhost.
export function injectOnlineStatus(): () => boolean {
  const navigator = inject(NAVIGATOR);
  return () => navigator?.onLine ?? true;
}
On the other hand, injectOnlineStatus returns a higher-order function that determines whether the application is running online or offline.
import firebaseConfig from '@/public/firebase.config.json';
import remoteConfigDefaults from '@/public/remote-config-defaults.json';
import { isDevMode, Service } from '@angular/core';
import { FirebaseApp, FirebaseOptions, initializeApp } from 'firebase/app';
import { AppCheck, initializeAppCheck, ReCaptchaEnterpriseProvider } from 'firebase/app-check';
import { fetchAndActivate, getRemoteConfig, RemoteConfig } from 'firebase/remote-config';

@Service()
export class ConfigService {
  #app: FirebaseApp | undefined = undefined;
  #remoteConfig: RemoteConfig | undefined = undefined;
  #isOnline = injectOnlineStatus();
  #isLocalhost = injectIsLocalhost();

  protected initializeAppCheckInstance(app: FirebaseApp, key: string): AppCheck {
    return initializeAppCheck(app, {
      provider: new ReCaptchaEnterpriseProvider(key),
      isTokenAutoRefreshEnabled: true,
    });
  }

  protected setupRemoteConfig(app: FirebaseApp): RemoteConfig {
    const rc = getRemoteConfig(app);
    rc.defaultConfig = remoteConfigDefaults;
    rc.settings.minimumFetchIntervalMillis = isDevMode() ? 0 : 3600000;
    return rc;
  }

  async initialize(): Promise<void> {
    this.#app = this.initializeApp(firebaseConfig.app);

    const isOnline = this.#isOnline();
    const isLocalhost = this.#isLocalhost();

    if (isOnline && firebaseConfig.recaptchaEnterpriseKey) {
      configureAppCheckDebugToken(firebaseConfig.appCheckDebugToken, isLocalhost);
      this.initializeAppCheckInstance(this.#app, firebaseConfig.recaptchaEnterpriseKey);
    }

    this.#remoteConfig = this.setupRemoteConfig(this.#app);

    if (isOnline) {
      await this.fetchAndActivate(this.#remoteConfig);
    }
  }
}
After Firebase app initialization, the online status and the Enterprise reCAPTCHA key are examined. When both conditions are met, an instance of Firebase App Check is initialized. Finally, the Remote Config is fetched and activated to overwrite the default values.
Tips: Angular 22 Architecture Best Practice: The Angular team now recommends the @Service() decorator over @Injectable({ providedIn: 'root' }) for global singletons because it is cleaner, contains less boilerplate, and is built specifically to pair with modern inject() functional dependency injection. Note: @Injectable() is still fully supported and necessary if you require constructor-based dependency injection or scoped providers (such as component-level scoping).
5.4. Bootstrap the application
import { provideFirebaseAI } from '@/features/ai/providers/ai.provider';
import { ConfigService } from '@/features/ai/services/config.service';
import { ApplicationConfig, inject } from '@angular/core';

export const appConfig: ApplicationConfig = {
  providers: [
    ... other providers ...
    provideAppInitializer(() => inject(ConfigService).initialize()),
    provideFirebaseAI(),
  ],
};
Include provideFirebaseAI and provideAppInitializer in the providers array of appConfig.
import { bootstrapApplication } from '@angular/platform-browser';
import { appConfig } from './app/app.config';
import { App } from './app/app';

bootstrapApplication(App, appConfig).catch((err) => console.error(err));
Calling bootstrapApplication ensures that the Firebase AI model, Firebase app, App Check, and Firebase Remote Config values are initialized properly during startup.
Once the Firebase integration is complete, we shift the focus to Angular AI services and JSON response streaming in the Angular component.
6. Image Analysis Service in Angular
6.1. AI Service with JSON Response Streaming
The Hybrid Image Analysis application prompts the Gemini Nano or Gemini 3.5 Flash model to return a structured output, which is a JSON object. Therefore, the application streams the JSON response and uses the jsonrepair library to repair the incomplete JSON object into a valid, partial JSON object.
import { EnhancedGenerateContentResponse } from 'firebase/ai';

export interface PartialResponse<T> {
  partialData: Partial<T>;
  response?: EnhancedGenerateContentResponse;
}
import { inject, Service } from '@angular/core';
import { GenerativeModel, SchemaRequest, TypedSchema } from 'firebase/ai';
import { jsonrepair } from 'jsonrepair';
import { GenerateContentParams, PartialResponse } from '../types/ai.types';
import { AiModelCacheService } from './ai-model-cache.service';

@Service()
export class AiService {
  #cacheService = inject(AiModelCacheService);

  private getCachedModel({ schema, systemInstruction }: GenerateContentParams) {
    const model = this.#cacheService.getOrCreateModel({
      schema,
      systemInstruction,
    });

    return model;
  }

  private parseStreamJSONResponse<T>(text: string, schema?: TypedSchema | SchemaRequest) {
    if (schema) {
      try {
        return JSON.parse(text) as Partial<T>;
      } catch {
        return JSON.parse(jsonrepair(text)) as Partial<T>;
      }
    }

    return { alternativeTexts: [text] } as unknown as Partial<T>;
  }

  private async downloadDeviceModel(model: GenerativeModel) {
    if (model) {
      await model.initializeDeviceModel((val) => console.log(`Download progress: ${Math.round(val * 10000) / 100}%`));
    }
  }

  private constructRequest(params: GenerateContentParams) {
    return typeof params.contents === 'string' || Array.isArray(params.contents) ? params.contents : [params.contents];
  }

  async *generateContentStream<T>(params: GenerateContentParams): AsyncGenerator<PartialResponse<T>> {
    const model = this.getCachedModel(params);
    const request = this.constructRequest(params);

    await this.downloadDeviceModel(model);

    const result = await model.generateContentStream(request);
    let accumulatedText = '';

    for await (const chunk of result.stream) {
      accumulatedText = accumulatedText + chunk.text();
      const parsed = this.parseStreamJSONResponse<T>(accumulatedText, params.schema);
      yield {
        partialData: parsed,
      };
    }

    const finalResponse = await result.response;
    const finalParsed = this.parseStreamJSONResponse<T>(finalResponse.text(), params.schema);
    yield {
      partialData: finalParsed,
      response: finalResponse,
    };
  }
}
The downloadDeviceModel helper method downloads the Gemini Nano model to the Chrome browser. When users request the image analysis task, it runs on-device instead of on a cloud server. Sensitive user data does not leave the local computer, and Cloud AI usage costs remain at zero.
The generateContentStream generator yields partial JSON objects and the final response.
6.2. Image Analysis Service, Prompts and Structured Output
The ImageAnalysisService delegates the image analysis task to AiService to obtain the generated tags, alternative texts, and recommendations.
export async function fileToGenerativePart(file: File | Blob, mimeType?: string): Promise<Part> {
  const resolvedMimeType = mimeType || file.type;
  if (!resolvedMimeType) {
    throw new Error('MIME type must be specified or present on the File/Blob.');
  }

  const dataUrl = await readFileAsDataURL(file);
  const base64Data = dataUrl.split(',')[1];

  return {
    inlineData: {
      data: base64Data,
      mimeType: resolvedMimeType,
    },
  };
}
The fileToGenerativePart utility function reads the uploaded image and converts it into inline base64 data. The function returns the data and MIME type required by the Gemini model.
export const SYSTEM_INSTRUCTION = `You are an expert image analyst, accessibility specialist, and professional photo editor.

Your behavior rules:
1. Always output strictly in raw JSON matching the provided schema, with no markdown formatting or conversational text.
2. For descriptions, prioritize screen-reader accessibility guidelines.
3. For tags, always provide an objective visual reason and platform-specific variants.`;

export const IMAGE_ANALYSIS_USER_PROMPT =
  'Analyze the attached image and generate the alternative descriptions, tags, and styling suggestions according to your defined system instructions and the response schema.';
SYSTEM_INSTRUCTION is the system prompt and IMAGE_ANALYSIS_USER_PROMPT is the user prompt.
The system prompt defines the AI's persona as an expert photo editor, while the user prompt describes the input image and specifies what structured data is expected in return.
import { Schema } from 'firebase/ai';
import { AltTextsSchema } from './alt-texts.schema';
import { RecommendationsSchema } from './recommendation.schema';
import { TagsSchema } from './tag.schema';

export const ImageAnalysisSchema = Schema.object({
  properties: {
    alternativeTexts: AltTextsSchema,
    tags: TagsSchema,
    recommendations: RecommendationsSchema,
  }
});
ImageAnalysisSchema was the structured output of the user prompt that consisted of alternative texts, tags, and recommendations.
import { fileToGenerativePart } from '@/core/utils/base64.util';
import { AiService } from '@/features/ai/services/ai.service';
import { ImageAnalysisSchema } from '@/features/image-analysis/schemas/image-analysis.schema';
import {
  ImageAnalysisResponse,
  StreamingAnalysisWithMetadata,
} from '@/features/image-analysis/types/image-analysis-metadata.type';
import { inject, Service } from '@angular/core';
import { IMAGE_ANALYSIS_USER_PROMPT, SYSTEM_INSTRUCTION } from '../prompts/image-analysis.prompt';

@Service()
export class ImageAnalysisService {
  #aiService = inject(AiService);

  async *analyzeImageStream(file: File | Blob, customPrompt?: string): AsyncGenerator<StreamingAnalysisWithMetadata> {
    const imagePart = await fileToGenerativePart(file);
    const userPrompt = customPrompt ? customPrompt : IMAGE_ANALYSIS_USER_PROMPT;

    const generator = await this.#aiService.generateContentStream<ImageAnalysisResponse>({
      systemInstruction: SYSTEM_INSTRUCTION,
      contents: [userPrompt, imagePart],
      schema: ImageAnalysisSchema,
    });

    for await (const update of generator) {
      const partialData = update.partialData;
      const analysis = {
        alternativeTexts: partialData?.alternativeTexts,
        tags: partialData?.tags,
        recommendations: partialData?.recommendations,
      };

      yield {
        analysis,
      };
    }
  }
}
The analyzeImageStream is a generator that returns the output of the image analysis.
7. Image Analysis User Interface in Angular
The ImageAnalysis component features an image uploader to select an image for analysis. When the button is clicked, it invokes triggerAnalysis to stream the image analysis response and sets the value of the analysisData signal.
import { ImageAnalysisService } from '@/features/image-analysis/services/image-analysis';
import { StreamingAnalysisWithMetadata } from '@/features/image-analysis/types/image-analysis-metadata.type';
import { ImageUploader } from '@/shared/ui/image-uploader/image-uploader';
import { Component, computed, inject, signal } from '@angular/core';
import { ImageAnalysisPanel } from './image-analysis-panel/image-analysis-panel';
import { TagList } from './tag-list/tag-list';
import { ImageTag } from './tag-list/types/image-tag.type';

@Component({
  selector: 'app-image-analysis',
  imports: [ImageUploader, TagList, ImageAnalysisPanel],
  templateUrl: './image-analysis.html',
  styleUrl: './image-analysis.css',
})
export default class ImageAnalysis {
  imageAnalysisService = inject(ImageAnalysisService);

  // Local reactive states
  imageUrl = signal<string | null>(null);
  selectedFile = signal<File | null>(null);
  analysisData = signal<StreamingAnalysisWithMetadata | null>(null);

  tags = computed<ImageTag[]>(() => {
    const data = this.analysisData();
    if (!data) {
      return [];
    }
    return (data.analysis.tags || []).map((t) => {
      return {
        label: t.name,
        tooltip: t.sentence,
      };
    });
  });

  onFileSelected(file: File) {
    this.selectedFile.set(file);
    this.analysisData.set(null);
    this.errorMessage.set('');
  }

  async triggerAnalysis() {
    const file = this.selectedFile();
    if (!file) {
      return;
    }

    const stream = this.imageAnalysisService.analyzeImageStream(file);
    for await (const update of stream) {
      this.analysisData.set(update);
    }
  }

  onImageRemoved() {
    this.selectedFile.set(null);
    this.analysisData.set(null);
    this.errorMessage.set('');
  }
}
When analysisData is updated, the HTML template of the component displays the latest values.
<div class="workspace-container">
  <app-image-uploader
    [(imageUrl)]="imageUrl"
    (fileSelected)="onFileSelected($event)"
    (imageRemoved)="onImageRemoved()"
  ></app-image-uploader>

  @if (imageUrl() && !isLoading()) {
    <div class="action-container">
      <button (click)="triggerAnalysis()" class="primary-action-btn">
        <span class="material-symbols-outlined">psychology</span>
        Analyze Image ({{ seconds() }}s)
      </button>
    </div>
  }

  @if (tags().length > 0) {
    <!-- Semantic Tag Cloud -->
    <div class="tag-cloud-section animate-fade-in">
      <h4 class="section-subtitle">Detected Classifications</h4>
      <app-tag-list [tags]="tags()"></app-tag-list>
    </div>

    @if (analysisData()) {
      <!-- Advanced Analysis Results Panel -->
      <app-image-analysis-panel
        class="animate-fade-in block"
        [data]="analysisData()"
        [imageUrl]="imageUrl()"
        [source]="source()"
      ></app-image-analysis-panel>
    }
  }
</div>
The template passed the inputs to app-tag-list and app-image-analysis-panel components.
<div class="tag-list-wrapper">
  <div class="tag-list-grid">
    @for (tag of tags(); track tag.label) {
      <app-badge [label]="tag.label" [tooltip]="tag.tooltip" />
    }
  </div>
</div>
The above is the HTML template of the tag list component. This component renders a list of tags. When a tag is hovered, a tooltip shows to explain why it is chosen.
@if (data(); as analysis) {
  @let innerAnalysis = analysis.analysis;
  @let alternativeTexts = innerAnalysis?.alternativeTexts;
  @let recommendations = innerAnalysis?.recommendations;

  <div class="analysis-panel-container">
    <app-tab-group>
      <app-tab id="thought" label="Thought Summary">
        <app-thought-summary
          [alternativeTexts]="alternativeTexts"
        />
      </app-tab>

      <app-tab id="detailed" label="Recommendations">
        <app-image-recommendation [recommendations]="recommendations" />
      </app-tab>
    </app-tab-group>
  </div>
}
The app-image-analysis-panel renders alternative texts and recommendations in separate tabs for users to view.
8. Conclusion
This concludes the journey of building a Hybrid Image Analysis Application using Angular, Firebase AI Logic Hybrid and On-device Web SDK, and Gemini models.
Engineers can build AI applications that run locally and use the Gemini Nano model in the Chrome browser. When the network is unstable, the application also works offline because AI processing never leaves the local machine for the cloud infrastructure.
Resources
Comments
More Blog
View allai[AI in Practice] Upgrading from Gemini 3.5/3.6 to Gemini 4 Argon: Migration Notes and Pitfalls for LINE Bot Developers
Background I have a LINE Bot that I use every day, linebot-helper-python. I use it daily...
E
Evan LingooglecloudSix Months After Cloud Next ‘26: A Builder’s Tour of the Gemini Enterprise Agent Platform
What actually shipped across Build, Scale, Govern, and Optimize — and what I'd tell a team starting...
J
Jonathan Zhuo 1
aiAlphaEvolve and Gemini: Autonomous Algorithm Discovery for Unified Disaster Prediction
📄 Published Paper (Open Access on Zenodo): Autonomous Discovery of Unified Multi-Hazard Prediction...
T
Tanaike 1
aiLangChainJS and Gemini 4 Argon: What's here and what's coming?
Google has released the latest version in the Gemini family, Gemini 4 Argon, and I was fortunate...
A
Allen FirstenbergaiNobody’s winning the AI race yet
By Ryan Swift Yesterday, Google finally released its Gemini 4 Argon model for public use. It’s...
R
Ryan Swift 1
aiI got Jev to zero mistakes. I'm still using Flash-Lite.
Jev is a brilliant decision model. Gemini Flash-Lite is the model nobody talks about, and it’s fast,...
S
Swift 1
Ready-made automations for this
Workflows from the Neura Market marketplace related to this Gemini resource
- Automated Stock Analysis Reports with Technical & News Sentiment using GPT-4n8n · $24.99 · Related topic
- Create Data-Driven SEO Content Briefs with AI Analysis of SERP Data Using Bright Datan8n · $14.99 · Related topic
- Real-Time Forex Sentiment Analysis & Alerts with Gemini AI to Discordn8n · $14.99 · Related topic
- AI-Powered Crypto Analysis Using OpenRouter, Gemini, and SerpAPIn8n · $9.99 · Related topic