Back to Blog gemini
 ai
ai ai
ai ai
ai go
go playwright
 cli
cli
How to Get Started and Build with Gemini CLI (Powered by Gemini 3 Flash)
leslysandra February 1, 2026
0 views
By Lesly Zerna / @leslysandra As developers, we are constantly looking for tools that speed up our...
**By Lesly Zerna / @leslysandra**
As developers, we are constantly looking for tools that speed up our workflow without breaking our flow state. Last June 2025, Google made a massive splash in the open-source community by releasing the **Gemini CLI** and in December 2025, by updating with their latest model, **Gemini 3 Flash**.
If you are tired of copy-pasting code between your browser and your IDE, or if you want to see what a true "AI Agent" looks like in your terminal, this guide is for you :)
*Note: Many of the concepts and examples in this post were inspired by this [Gemini CLI course by DeepLearning.AI](https://www.deeplearning.ai/short-courses/gemini-cli-code-and-create-with-an-open-source-agent/), which I highly recommend checking out, as well as checking the official [Gemini CLI documentation](https://geminicli.com/docs/get-started/installation/) as well as [Google for devs blog](https://blog.google/innovation-and-ai/technology/developers-tools/introducing-gemini-cli-open-source-ai-agent/).*
---
## What is Gemini CLI?
In simple terms, **Gemini CLI** is a **terminal application** that lets you chat with Google’s Gemini AI directly from your command line.
But it is more than just a chatbot. It is an **open-source AI agent** **powered by Gemini**.
When you use ChatGPT or the Gemini web interface, you are in a "sandbox"—the AI cannot see your files or run commands unless you upload them. Gemini CLI breaks that wall. It lives *inside* your environment, meaning it can understand your project structure, read your code directly, and help you build faster.
**Why is the "Gemini 3 Flash" update important?**
[Gemini 3 Flash](https://developers.googleblog.com/en/gemini-3-flash-is-now-available-in-gemini-cli/) is optimized for speed and low latency. When you are using an AI Agent that needs to perform multiple steps (like "read this file," then "analyze it," then "write a test"), speed is critical. Flash makes the CLI feel snappy and responsive.
---
## Why Use the CLI? (Browser vs. Terminal)
Working from the browser is great for general questions, but for building software, the Command Line Interface (CLI) is superior. Here is why:
* **Direct File System Access:** You don't need to copy-paste code. You can simply say, "Refactor the `utils.py` file," and the CLI can read it and propose changes directly.
* **Context Awareness:** The CLI knows where it is. It understands your current working directory and the files inside it.
* **Automation & Scripting:** You can pipe output from other commands into Gemini. For example: `cat logs.txt | gemini "Find the critical error"`.
* **Built-in Tools:** Gemini CLI comes battery-included with tools such as:
* **File System:** Read, write, and list files.
* **Web:** Fetch URLs and search Google (grounding your code in real-time info).
* **Shell:** Execute terminal commands safely.
* **Customization & Extensions:** Because it is **open source**, you can extend it. It supports the **Model Context Protocol (MCP)**, allowing you to build custom tools that connect to your database or internal APIs.
---
## Real-Life Examples and Ideas to Build
Here are a few ways you can start using Gemini CLI today to boost your productivity.
### 1. The "Smart" Code Reviewer
Instead of manually checking your code for style issues, use Gemini CLI to review it before you push.
* **Command:**
`gemini "Review @main.py for potential bugs and clean code practices. Output the suggestions as a list."`
* **Why it works:** The CLI reads the file directly and uses Gemini’s logic to find edge cases you might have missed.
### 2. Instant Data Analyst
Imagine you have a messy CSV file or a log file and you need quick insights.
* **Scenario:** You have a file called `server_logs.csv`.
* **Command:**
`gemini "Read @server_logs.csv and tell me which IP address appears the most frequently. Then, use grep to count exactly how many times it appears."`
* **Why it works:** The agent combines its ability to write code (to analyze the CSV) with system tools (like `grep`) to verify the data.
### 3. Rapid Prototyping
Need to scaffold a new feature?
* **Command:**
`gemini "Create a new folder called 'blog-app'. Inside it, create an index.html file with a basic responsive layout and a style.css file with a dark mode theme."`
* **Result:** The CLI actually creates the folder and writes the files for you. You are ready to start coding immediately.
---
## How to Get Started: Installation
Ready to try it? Installing Gemini CLI is straightforward. You will need `Node.js` installed on your machine.
*([More details, see the official documentation at geminicli.com](https://geminicli.com/docs/get-started/installation/))*
**Step 1: Open your terminal.**
**Step 2: Run the install command.**
```bash
npm install -g @google/gemini-cli@latest
```
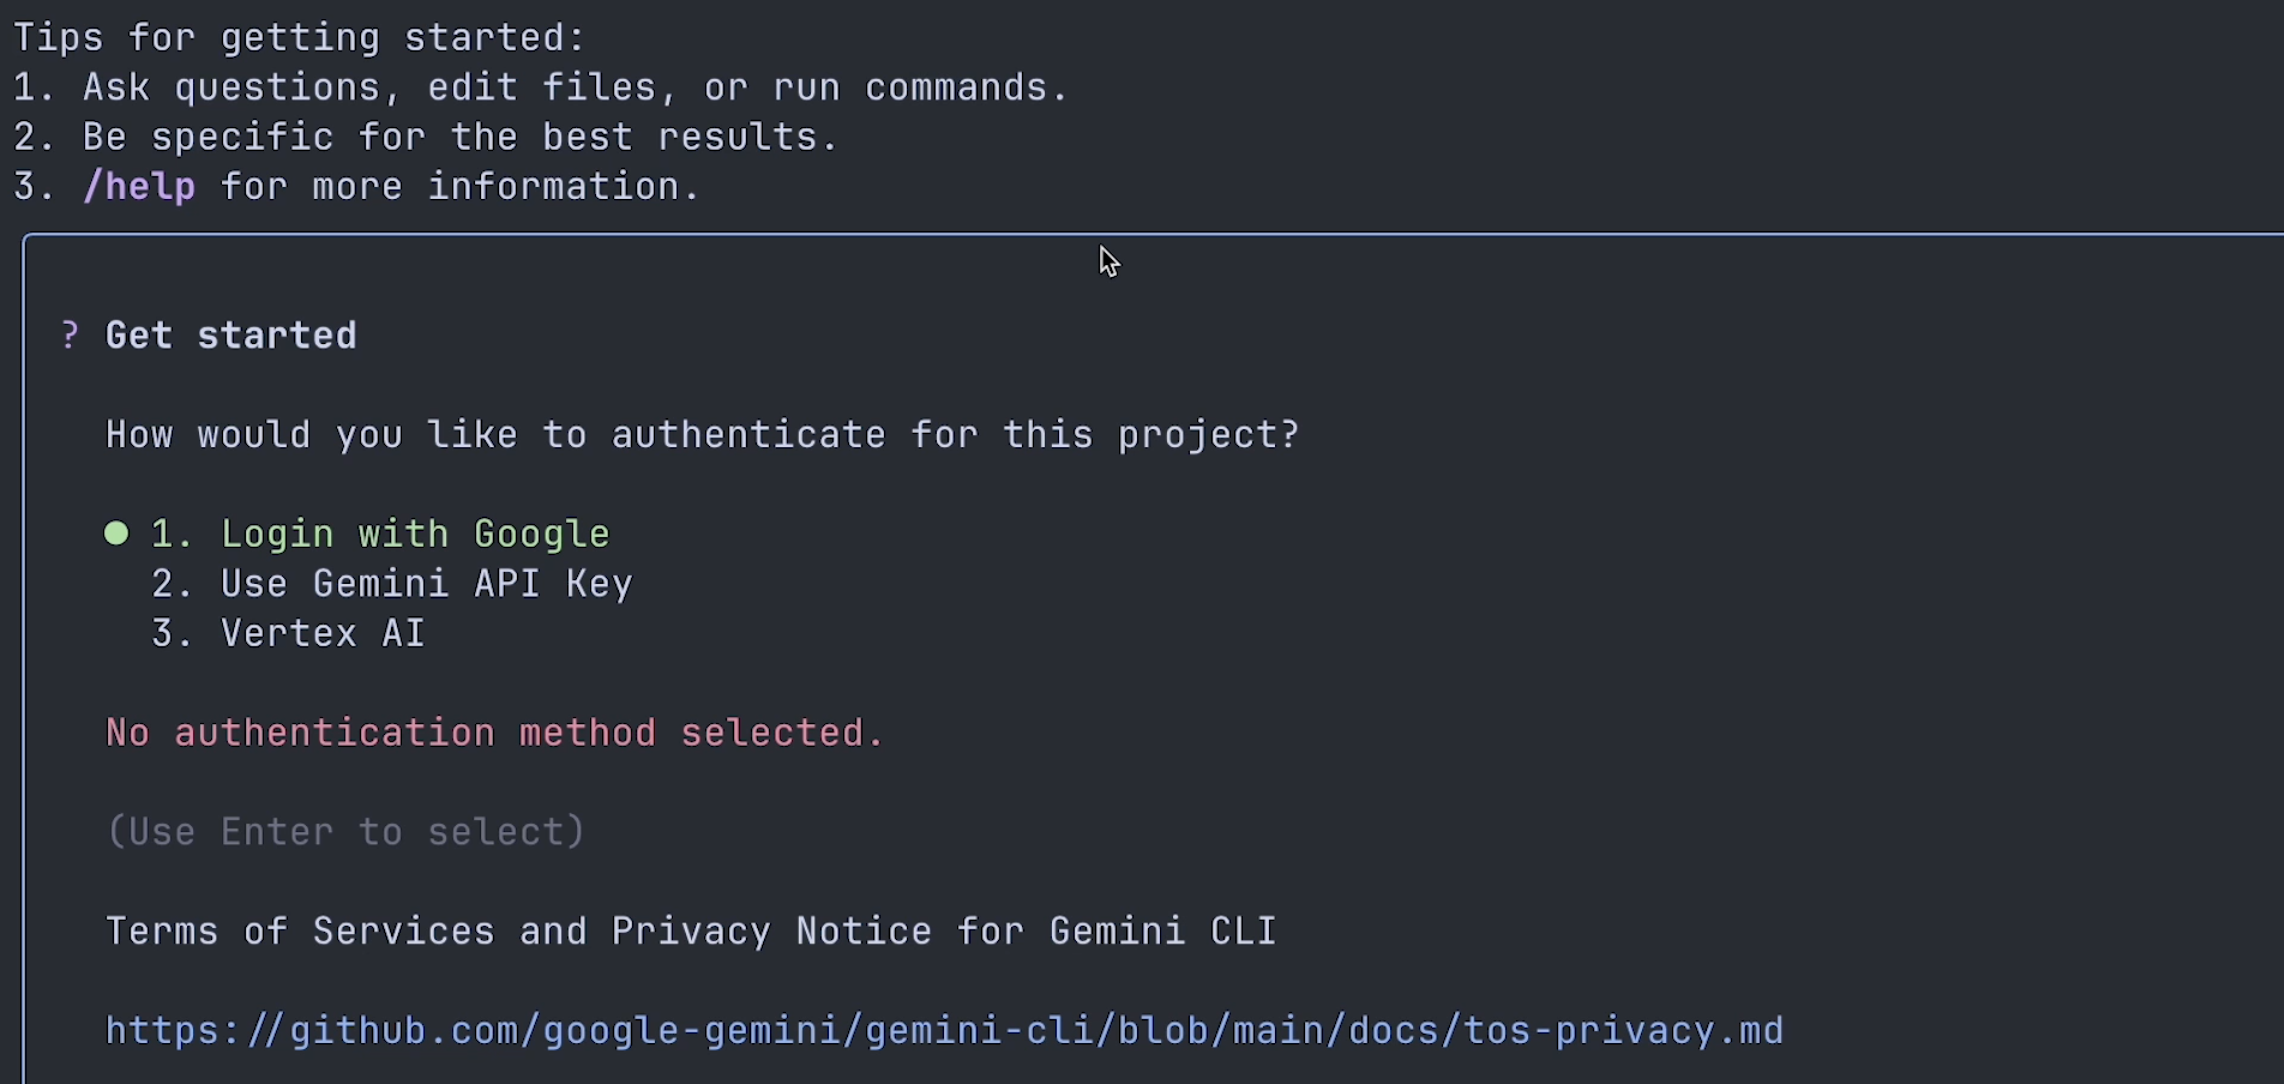
**Step 3: Authenticate.**
You can start the tool by simply typing:
```bash
gemini
```
On your first run, it will ask you to authenticate. You can usually log in directly with your Google account, which gives you a generous free tier to start experimenting.
And once it is installed you can see it running in your terminal:
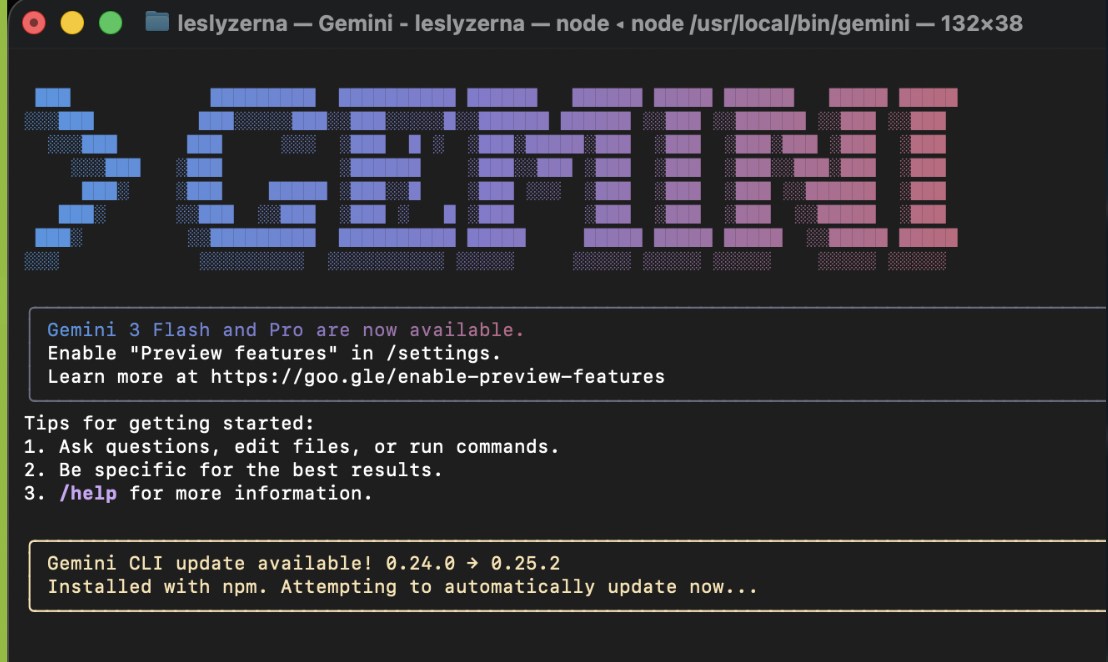
**Step 4: Enable the Latest Features (Crucial Step!)**
To use the powerful **Gemini 3 Flash** model, you need to enable preview features.
1. Type `/settings` in the CLI.
2. Look for **"Preview Features"**.
3. Set this to **"True"**.
This ensures you are running on the latest, fastest, and most capable models available.
---
## Under the Hood: How Gemini CLI Works
You might be wondering, "How does a text box in my terminal know how to run code?"
Gemini CLI uses a concept called the **ReAct Loop** (Reason + Act). Here is the simple [explanation](https://docs.cloud.google.com/gemini/docs/codeassist/gemini-cli) of what happens when you type a command:
1. **Thought:** You ask a question (e.g., "Why is my build failing?"). The AI analyzes your request.
2. **Tool Use:** Instead of just guessing, the AI sees it has "tools" available—like reading a file or running a shell command. It decides, "I should run the build command to see the error."
3. **Observation:** The CLI runs the command, captures the output (the error message), and feeds it back to the AI.
4. **Answer:** The AI reads the error and gives you the specific fix.
This "Loop" allows the CLI to act like a real pair programmer rather than just a text generator.
---
## Navigating the Terminal: Essential Commands ##
Once you have installed Gemini CLI, you aren't just typing into a void. There are specific commands to help you control the agent.
* **/help**: The most important command. Use this to see what the agent can do and how to interact with it.
* **/settings**: Use this to explore your setup. This is where you configure your **Assistant** settings and change the **Mode**.
* **/docs**: Opens the documentation if you need to read up on advanced features.
### How to Reference Your Files
This is the superpower of the CLI. You don't need to copy-paste code. To ask Gemini about a specific file, simply use the `@` symbol.
**Example:**
> "Can you explain the logic inside **@main.py** and suggest improvements?"
The agent will read that specific file and base its answer on the code inside it.
---
## Understanding Context and `GEMINI.md`
**What is Context?**
Context is simply a collection of information that the AI agent uses to understand your specific request. It’s the "background knowledge" the AI needs so you don't have to repeat yourself.
### The Magic of `GEMINI.md`
You can teach the CLI about your project by creating a special file called `GEMINI.md`. Think of this as a "ReadMe for the AI."
If you place a `GEMINI.md` file in your folder, the CLI automatically reads it to understand your project rules, coding style, or architecture. You can place this file in:
1. **The Global Directory:** For rules that apply to *all* your projects.
2. **The Current Working Folder:** For project-specific rules.
3. **Subdirectories:** For rules specific to that module.
### Managing Memory
You can verify what the AI currently "knows" or add new things to its memory manually using these commands:
* **Check Context:**
```bash
/memory show
```
*This will list everything currently in the agent's context.*
* **Add Context Manually:**
```bash
/memory add "Remember that we are using Python 3.11 for this project"
```
*Or you can point it to a specific context file:*
```bash
/memory add path/to/another/gemini.md
```
---
Already excited about the topic? This is just the intro, we'll explore more about CLI Extensions, uses for Software Development, Data Analysis, MCP and more in the coming blogs!
---
## Conclusion (This first part!)
The shift from chat-in-browser to agent-in-terminal is a huge leap for developer productivity. With **Gemini 3 Flash** now powering the **Gemini CLI**, and the ability to customize **Context** using `GEMINI.md`, we have a tool that is fast enough to keep up with our thoughts and smart enough to handle complex tasks.
Give it a try, explore the **open source** code, and let me know what you build!
More blogs coming up soon! Subscribe and stay tuned!, Lesly
Comments
More Blog
View allaiHow I'm using ASTs and Gemini to solve the "Codebase Onboarding" problem 🧠
Hi everyone! 👋 I’m Tara, a Senior Software Engineer and Consultant. Over the years, I've jumped...
T
tworrellaiLocal AI Will Save Us All (The Math Says So, Trust Me)
Every few weeks a take goes viral in tech circles making the case for ditching cloud AI and running...
S
Sebastian SchürmannaiLost in the AI Hype, I Started Small
And it helped me get back into tech without drowning TL;DR at the end Coming back to...
R
Rohini GaonkargoBuilding a Replay-Tested Interactive Brokers Client in Go
I wanted an IBKR library that felt like Go and had testing I could trust. So I wrote one.
T
Thomas MarcelisplaywrightPlaywright in Pictures: Fully Parallel Mode
Playwright’s fullyParallel mode is often treated as a simple performance switch. In practice, it...
V
Vitaliy PotapovcliDesigning a CLI for Both Humans and Agents
Learn how Alpic designed its CLI for both human developers and AI agents — covering tradeoffs like polling, context windows, interactivity, and statelessness.
J
Julien Vallini