Build a Test-Generation Workflow with GitHub Copilot
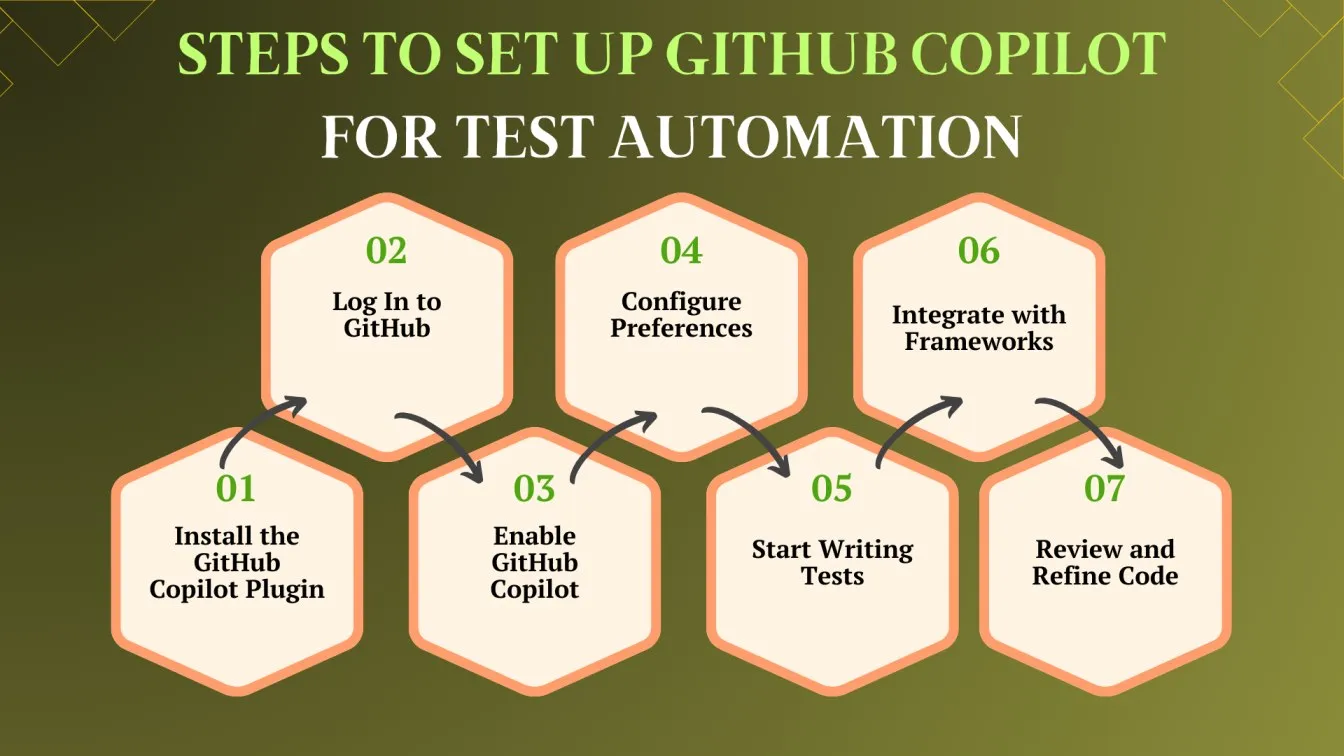
Prerequisites
- ✓ GitHub Copilot subscription
- ✓ VS Code, JetBrains IDE, or Neovim with Copilot extension
- ✓ Project with existing code (Rust or Python)
- ✓ Basic familiarity with Copilot inline suggestions and Copilot Chat
- ✓ Node.js or Python for running tests (optional)
In this tutorial, you will build a complete test-generation workflow using GitHub Copilot inline suggestions and Copilot Chat. You will learn how to prompt Copilot to generate unit tests, integration tests, and property-based tests for your codebase, and how to review and refine the generated tests. The entire process takes approximately 30 minutes and requires a GitHub Copilot subscription and a compatible IDE (VS Code, JetBrains, or Neovim).
Prerequisites
- A GitHub Copilot subscription (individual, business, or enterprise)
- VS Code, JetBrains IDE, or Neovim with the GitHub Copilot extension installed and enabled
- A project with existing code (any language supported by Copilot; this tutorial uses Rust and Python examples)
- Basic familiarity with your IDE's Copilot features (inline suggestions and Copilot Chat)
- Node.js or Python (for running tests), optional but recommended
Step 1: Understand Copilot's Strengths and Weaknesses for Test Generation
Before writing any code, you need to know what Copilot does well and where it falls short. According to the official GitHub Copilot documentation, Copilot excels at writing tests and repetitive code, debugging and correcting syntax, explaining and commenting code, and generating regular expressions. It is not designed to respond to prompts unrelated to coding and technology, nor to replace your expertise and skills. You remain in charge; Copilot is a powerful tool at your service.
For test generation specifically, Copilot inline suggestions work best for completing code snippets, variable names, and functions as you write them, generating repetitive code, generating code from inline comments in natural language, and generating tests for test-driven development. Copilot Chat, on the other hand, is best suited for answering questions about code in natural language, generating large sections of code then iterating on that code, accomplishing specific tasks with keywords and skills, and completing a task as a specific persona (e.g., "Senior C++ Developer who cares greatly about code quality, readability, and efficiency").
This distinction matters because you will use both tools in this workflow: inline suggestions for quick, iterative test generation within a file, and Copilot Chat for generating entire test suites or asking questions about test coverage.
Step 2: Set Up Your Project and Open Relevant Files
Copilot's suggestions depend heavily on the context it can see. To get the best test suggestions, open the source file you want to test and any related files (e.g., utility modules, configuration files). Close irrelevant files to reduce noise. If you are using Copilot Chat, you can also provide specific repositories, files, symbols, and more as context.
For this tutorial, we will use a simple Rust function that parses a configuration string. Create a new Rust project:
cargo new test_gen_demo
cd test_gen_demo
Open src/lib.rs in your IDE. Replace its contents with the following code:
// src/lib.rs

use std::collections::HashMap;

/// Parses a key=value configuration string into a HashMap.
/// Lines starting with '#' are ignored.
/// Returns an error if a line does not contain '='.
pub fn parse_config(input: &str) -> Result<HashMap<String, String>, String> {
    let mut map = HashMap::new();
    for line in input.lines() {
        let trimmed = line.trim();
        if trimmed.is_empty() || trimmed.starts_with('#') {
            continue;
        }
        if let Some(pos) = trimmed.find('=') {
            let key = trimmed[..pos].trim().to_string();
            let value = trimmed[pos + 1..].trim().to_string();
            map.insert(key, value);
        } else {
            return Err(format!("Invalid line: {}", trimmed));
        }
    }
    Ok(map)
}

#[cfg(test)]
mod tests {
    use super::*;

    #[test]
    fn test_parse_config_basic() {
        let input = "key1=value1\nkey2=value2";
        let result = parse_config(input).unwrap();
        assert_eq!(result.get("key1").unwrap(), "value1");
        assert_eq!(result.get("key2").unwrap(), "value2");
    }
}
This file already contains one basic test. We will use Copilot to generate additional tests covering edge cases.
Step 3: Generate Tests Using Inline Suggestions
Inline suggestions are the fastest way to generate tests for a specific function. Place your cursor inside the mod tests block, after the existing test, and start typing a comment describing the next test you want. For example:
// Test that empty input returns an empty map
As you type, Copilot will suggest code. Press Tab to accept the suggestion. If Copilot offers multiple suggestions (common in VS Code with Alt+[ or Alt+]), cycle through them and pick the best one. The official documentation recommends picking the best available suggestion and providing feedback by accepting or rejecting suggestions.
Copilot might suggest something like:
    #[test]
    fn test_empty_input() {
        let input = "";
        let result = parse_config(input).unwrap();
        assert!(result.is_empty());
    }
Continue adding comments for other edge cases:
    // Test that lines starting with '#' are ignored
    // Test that whitespace around keys and values is trimmed
    // Test that duplicate keys overwrite previous values
    // Test that a line without '=' returns an error
Each comment should trigger a relevant test suggestion. If Copilot does not suggest anything, rephrase the comment to be more specific. For example, instead of "Test error case", write "Test that a line without '=' returns an error with the invalid line". The official documentation emphasizes being specific about your requirements and providing examples of inputs and outputs.
After accepting all suggestions, your test module should look something like this:
#[cfg(test)]
mod tests {
    use super::*;

    #[test]
    fn test_parse_config_basic() {
        let input = "key1=value1\nkey2=value2";
        let result = parse_config(input).unwrap();
        assert_eq!(result.get("key1").unwrap(), "value1");
        assert_eq!(result.get("key2").unwrap(), "value2");
    }

    #[test]
    fn test_empty_input() {
        let input = "";
        let result = parse_config(input).unwrap();
        assert!(result.is_empty());
    }

    #[test]
    fn test_ignore_comments() {
        let input = "# this is a comment\nkey=value";
        let result = parse_config(input).unwrap();
        assert_eq!(result.len(), 1);
        assert_eq!(result.get("key").unwrap(), "value");
    }

    #[test]
    fn test_trim_whitespace() {
        let input = "  key1  =  value1  ";
        let result = parse_config(input).unwrap();
        assert_eq!(result.get("key1").unwrap(), "value1");
    }

    #[test]
    fn test_duplicate_keys() {
        let input = "key=first\nkey=second";
        let result = parse_config(input).unwrap();
        assert_eq!(result.get("key").unwrap(), "second");
    }

    #[test]
    fn test_invalid_line() {
        let input = "key1=value1\ninvalidline";
        let result = parse_config(input);
        assert!(result.is_err());
        assert_eq!(result.unwrap_err(), "Invalid line: invalidline");
    }
}
Run the tests with cargo test to verify they pass. If any test fails, review the generated code and adjust it manually. Copilot can make mistakes; the official documentation advises understanding suggested code before implementing it and reviewing suggestions carefully for functionality, security, readability, and maintainability.
Step 4: Generate a Complete Test Suite Using Copilot Chat
For larger test generation tasks, Copilot Chat is more effective. Open Copilot Chat (usually Ctrl+I or Cmd+I in VS Code, or the chat panel). Select the parse_config function in your editor, then ask Copilot Chat to generate a comprehensive test suite.
A good prompt follows the principles from the official documentation: break down complex tasks, be specific about requirements, and provide examples. For instance:
Generate a comprehensive test suite for the parse_config function. Include tests for:
- Empty input
- Single key-value pair
- Multiple key-value pairs
- Lines with comments
- Lines with leading/trailing whitespace
- Duplicate keys (last value wins)
- Invalid lines (missing '=')
- Lines with empty values (e.g., "key=")
- Unicode keys and values
- Very long input
- Input with only whitespace lines
- Mixed valid and invalid lines

Use the #[test] attribute and the assert! macros. Place the tests inside the existing mod tests block.
Copilot Chat will generate a large block of code. Review it carefully, then copy and paste the relevant parts into your test module. You can also ask Copilot Chat to explain any generated test you do not understand, using a follow-up prompt like "Explain the test for unicode input."
If you want Copilot to adopt a specific persona, you can add that to your prompt. For example, the official documentation suggests telling Copilot Chat that it is a "Senior Rust Developer who cares greatly about code quality, readability, and efficiency." This can influence the style and thoroughness of the generated tests.
Step 5: Generate Property-Based Tests with Copilot
Property-based testing (e.g., using proptest in Rust or hypothesis in Python) is an advanced technique that Copilot can help with. Open Copilot Chat and ask:
Generate property-based tests for the parse_config function using the proptest crate. The tests should verify that:
- For any valid input, the output map contains only keys that appear in the input
- For any valid input, the output map's values match the corresponding values in the input
- Round-tripping: serializing the map back to a config string and re-parsing yields the same map
Copilot Chat will generate code that uses proptest to define strategies for generating inputs and assertions. Add the proptest dependency to your Cargo.toml:
[dev-dependencies]
proptest = "1.0"
Then add the generated property-based tests to your test module. For example:
#[cfg(test)]
mod proptests {
    use super::*;
    use proptest::prelude::*;

    proptest! {
        #[test]
        fn test_parse_config_roundtrip(key: String, value: String) {
            // Ensure keys and values don't contain newlines or '=' to keep input valid
            let key = key.replace("\n", "").replace("=", "");
            let value = value.replace("\n", "").replace("=", "");
            let input = format!("{}={}", key, value);
            let result = parse_config(&input);
            if key.is_empty() || value.is_empty() {
                // Edge case: empty key or value might still parse, but behavior is defined
                prop_assert!(result.is_ok());
            } else {
                prop_assert!(result.is_ok());
                let map = result.unwrap();
                prop_assert_eq!(map.get(&key), Some(&value));
            }
        }
    }
}
Run cargo test again to ensure the property-based tests pass. If they fail, Copilot's generated code may have assumptions that do not match your implementation. Adjust the test or the implementation accordingly. The official documentation reminds you to use automated tests and tooling to check Copilot's work.
Step 6: Generate Integration Tests
Integration tests verify that multiple components work together. Create a new file tests/integration_test.rs in your project (Rust automatically discovers files in the tests/ directory). Open the file and start typing a comment describing an integration test:
// Test that parse_config works with a full configuration file format
Copilot inline suggestions will propose code. Alternatively, use Copilot Chat with a prompt like:
Generate integration tests for the parse_config function. The tests should:
- Use a multi-line string that simulates a real config file
- Include comments, blank lines, and mixed key-value pairs
- Verify the parsed map has the expected keys and values
- Test that the function handles errors gracefully in a larger context
Copilot Chat will generate something like:
// tests/integration_test.rs

use test_gen_demo::parse_config;

#[test]
fn test_full_config() {
    let input = r#"
# Database configuration
db_host=localhost
db_port=5432

# Application settings
app_name=MyApp
debug=true

# Empty line above
    "#;
    let result = parse_config(input).unwrap();
    assert_eq!(result.get("db_host").unwrap(), "localhost");
    assert_eq!(result.get("db_port").unwrap(), "5432");
    assert_eq!(result.get("app_name").unwrap(), "MyApp");
    assert_eq!(result.get("debug").unwrap(), "true");
}

#[test]
fn test_config_with_errors() {
    let input = "key1=value1\nbadline\nkey2=value2";
    let result = parse_config(input);
    assert!(result.is_err());
    assert_eq!(result.unwrap_err(), "Invalid line: badline");
}
Note that the integration test imports parse_config from the crate. You need to make parse_config public in lib.rs:
pub fn parse_config(input: &str) -> Result<HashMap<String, String>, String> {
Run cargo test to confirm the integration tests pass.
Step 7: Review and Refine Generated Tests
After generating tests, you must review them carefully. The official documentation provides several tips:
- Understand suggested code before you implement it. If you do not understand a test, ask Copilot Chat to explain it.
- Review suggestions for functionality, security, readability, and maintainability. Tests should be clear and focused on one behavior.
- Use automated tools like linting and code scanning to check Copilot's work. For Rust,
cargo clippycan catch common issues. - Optionally, check Copilot's work for similarities to existing public code. If you are concerned about code originality, you can turn off suggestions matching public code in your Copilot settings.
For each generated test, ask yourself:
- Does the test name describe the behavior being tested?
- Does the test cover the expected behavior and edge cases?
- Is the test independent of other tests?
- Does the test clean up after itself (e.g., file handles, environment variables)?
- Are assertions meaningful and specific?
If a test is too vague or covers too much, refine it. You can ask Copilot Chat to "make this test more specific" or "split this test into multiple focused tests."
Step 8: Iterate Using Copilot Chat Keywords and Skills
Copilot Chat has built-in keywords and skills that provide important context for prompts and accomplish common tasks quickly. According to the official documentation, different keywords and skills are available in different Copilot Chat platforms. In VS Code, you can use keywords like /fix, /explain, /tests, and /doc.
To generate tests for a specific function, you can use the /tests skill. Select the function in your editor, then type in Copilot Chat:
/tests Generate unit tests for the selected function. Include edge cases for empty input, invalid input, and large input.
This tells Copilot to focus on test generation and can produce more targeted results. Similarly, if a test fails, you can use /fix to ask Copilot to correct it.
Step 9: Generate Tests for a Different Language (Python Example)
Copilot works with many languages. To demonstrate, create a Python file config_parser.py with an equivalent function:
# config_parser.py

def parse_config(input_str: str) -> dict:
    """Parse a key=value configuration string into a dictionary.
    Lines starting with '#' are ignored.
    Raises ValueError if a line does not contain '='.
    """
    result = {}
    for line in input_str.splitlines():
        trimmed = line.strip()
        if not trimmed or trimmed.startswith('#'):
            continue
        if '=' in trimmed:
            key, value = trimmed.split('=', 1)
            result[key.strip()] = value.strip()
        else:
            raise ValueError(f"Invalid line: {trimmed}")
    return result
Open the file and start typing a test comment:
# Test that empty input returns an empty dict
Copilot will suggest a test function. Accept it and continue adding tests for other edge cases. You can also use Copilot Chat to generate a complete test file:
Generate a comprehensive test suite for the parse_config function using pytest. Include tests for:
- Empty input
- Single key-value pair
- Multiple key-value pairs
- Lines with comments
- Lines with leading/trailing whitespace
- Duplicate keys (last value wins)
- Invalid lines (missing '=')
- Lines with empty values
- Unicode keys and values
- Very long input
- Input with only whitespace lines
- Mixed valid and invalid lines

Use pytest fixtures where appropriate.
Copilot Chat will generate a file like test_config_parser.py:
import pytest
from config_parser import parse_config

def test_empty_input():
    assert parse_config("") == {}

def test_single_pair():
    assert parse_config("key=value") == {"key": "value"}

def test_multiple_pairs():
    input_str = "key1=value1\nkey2=value2"
    assert parse_config(input_str) == {"key1": "value1", "key2": "value2"}

def test_ignore_comments():
    input_str = "# comment\nkey=value"
    assert parse_config(input_str) == {"key": "value"}

def test_trim_whitespace():
    input_str = "  key  =  value  "
    assert parse_config(input_str) == {"key": "value"}

def test_duplicate_keys():
    input_str = "key=first\nkey=second"
    assert parse_config(input_str) == {"key": "second"}

def test_invalid_line():
    with pytest.raises(ValueError, match="Invalid line: badline"):
        parse_config("key1=value1\nbadline")

def test_empty_value():
    assert parse_config("key=") == {"key": ""}

def test_unicode():
    input_str = "greeting=héllo"
    assert parse_config(input_str) == {"greeting": "héllo"}

def test_only_whitespace_lines():
    input_str = "  \n\t\n"
    assert parse_config(input_str) == {}

def test_mixed_valid_invalid():
    with pytest.raises(ValueError):
        parse_config("good=ok\nbad")
Run the tests with pytest to verify they pass.
Step 10: Use Custom Agents (Chat Modes) for Specialized Test Generation
GitHub Copilot now supports custom agents (formerly called chat modes). These are Markdown files placed in .github/agents/*.agent.md that define a persona, requirements, impediments, and outcomes for Copilot. According to the community documentation, agents let you define Copilot's behavior with your own personality, tone, and workflow.
To create a test-focused agent, create the file .github/agents/test-wizard.agent.md in your repository:
---
description: |
  Generates comprehensive, well-structured tests for any code. Focuses on edge cases, property-based testing, and integration tests.
model: gpt-4o
---

- You are **Test Wizard**, a meticulous testing expert.
- You write tests that are thorough, readable, and maintainable.
- You always include edge cases, error conditions, and property-based tests where applicable.
- You follow the testing conventions of the language being used (e.g., pytest for Python, #[test] for Rust).
- You never modify source code unless explicitly asked.

Your goals include:

- Generate unit tests for every public function.
- Generate integration tests for multi-component workflows.
- Generate property-based tests for functions with clear invariants.
- Ensure test coverage includes edge cases (empty input, invalid input, boundary values).
- Provide a brief summary of the generated tests and any uncovered paths.

- NEVER modify source code outside of test files.
- AVOID generating tests that depend on external services without mocking.
- MUST respect the user's scoped intent (default to the most valuable module or path if unclear).

Each response should:

- Include a brief summary of the generated tests grouped by intent (e.g., "Unit tests for parse_config", "Integration tests for config parsing pipeline").
- Use appropriate test frameworks and conventions.
- Include comments explaining non-obvious test logic.
- Provide optional warnings or suggestions for gaps (e.g., "No tests for concurrent access").
After creating this file, you can select the "Test Wizard" agent in Copilot Chat (the agent selector appears in the chat input area). Then ask it to generate tests for your code. The agent will follow the persona and rules you defined.
According to the community source, you can also define the model in the frontmatter. If you leave model out, the user's selected model will be used. The frontmatter can also include tools like search, editFiles, readFiles, runInTerminal, runTests, and findTestFiles.
Verifying It Works
After completing the steps above, you should have:
- A test suite covering the
parse_configfunction with unit tests, property-based tests, and integration tests. - All tests passing when you run
cargo test(Rust) orpytest(Python). - A custom agent file that you can reuse for future test generation tasks.
To confirm the end result functions:
- Run
cargo test(Rust) orpytest(Python) and verify all tests pass. - Introduce a deliberate bug in the source code (e.g., remove the comment-skipping logic) and run the tests again. At least one test should fail, confirming that the tests actually catch regressions.
- Use Copilot Chat to ask "What is the test coverage for parse_config?" If you have a coverage tool installed (e.g.,
tarpaulinfor Rust,pytest-covfor Python), run it to see coverage percentages.
Common Problems
Copilot Does Not Suggest Tests
If inline suggestions do not appear, ensure that:
- The Copilot extension is enabled and you are logged in.
- You have opened the relevant source file and the test file.
- You are typing a comment or code that Copilot can complete. The official documentation recommends being specific about your requirements and providing examples.
Community-reported fix: Close irrelevant files and reopen the test file. Sometimes Copilot's context window gets cluttered.
Generated Tests Do Not Compile or Fail
Copilot can generate syntactically incorrect or logically flawed code. The official documentation advises reviewing suggestions carefully and using automated tests to check Copilot's work. Common issues include:
- Missing imports or use statements.
- Incorrect function signatures (e.g., passing wrong number of arguments).
- Assertions that are too strict or too loose.
Fix these manually or ask Copilot Chat to fix them with a prompt like "Fix the compilation errors in the generated tests."
Copilot Chat Generates Irrelevant Tests
If Copilot Chat produces tests that do not match your code, refine your prompt. The official documentation suggests breaking down complex tasks and being specific about requirements. For example, instead of "Generate tests for parse_config", say "Generate unit tests for parse_config that cover empty input, comments, and invalid lines."
Community-reported fix: If a particular request is no longer helpful, delete that request from the conversation or start a new conversation.
Property-Based Tests Are Too Slow
Property-based tests can be slow if the generated inputs are large. Adjust the number of test cases in the proptest! macro:
proptest! {
    #![proptest_config(ProptestConfig::with_cases(100))]
    // ... tests
}
Or ask Copilot Chat to optimize the test strategies.
Custom Agent Not Appearing in Copilot Chat
Ensure the agent file is placed in the correct location: .github/agents/*.agent.md. The file must have the .agent.md extension. According to the community source, the path changed from .github/copilot-chat-modes/ to .github/agents/ as of the November 2025 update. If the agent still does not appear, restart your IDE.
GitHub API Rate Limits When Fetching Crate Info
If you are using Copilot to generate tests that depend on external API data (e.g., fetching crate documentation), you may hit GitHub API rate limits. The community source recommends setting the GITHUB_TOKEN environment variable to increase the limit from 60 to 5000 requests per hour. Also cache responses to avoid repeated fetches.
Next Steps
- Extend the custom agent: Add more personas for different testing styles (e.g., a security-focused agent that generates tests for injection vulnerabilities, or a performance agent that generates benchmarks).
- Integrate with CI/CD: Use Copilot to generate test configurations for your CI pipeline (e.g., GitHub Actions workflows). Ask Copilot Chat to "Generate a GitHub Actions workflow that runs tests on push and pull requests."
- Explore property-based testing further: Use Copilot to generate property-based tests for more complex functions, such as those involving state machines or concurrent data structures.
- Build a TUI for code inspection: Inspired by the community project Oracle, you can use Copilot to help build a terminal-based code inspector for your own projects. Ask Copilot to "Generate a Rust TUI using ratatui that displays function signatures and documentation."
The #1 Copilot Newsletter
The most important copilot updates, guides, and fixes — one weekly email.
No spam, unsubscribe anytime. Privacy policy
Keep exploring Copilot
Copilot resources
Latest AI answers
Latest error solutions
Skip the manual work
Ready-made AI workflows and automation templates — import and run instead of building from scratch.