
Back to Blog selfhosting
 ai
ai googlecloud
 discuss
 agents
 agenticarchitect
 ai
ai
How to start self-hosting with Coolify 4 on a VPS
Josef Strzibny April 1, 2026
0 views
Learn how to deploy Coolify 4 on a virtual private server on Hetzner to self-host anything you want with your own PaaS.
title: How to start self-hosting with Coolify 4 on a VPS published: true description: Learn how to deploy Coolify 4 on a virtual private server on Hetzner to self-host anything you want with your own PaaS. tags: selfhosting cover_image: https://serpapi.com/blog/content/images/size/w1200/2026/03/Screenshot-2026-03-31-at-10.19.30-1.png

published_at: 2026-03-30 22:00 +0000
canonical_url: https://serpapi.com/blog/how-to-start-self-hosting-with-coolify-4-vps/
Coolify is an open source Platform as a Service (PaaS) that can help you self-host a lot of different software from content management tools like Ghost to SEO tracking software like SerpBear. The only thing you'll need is a virtual private server (VPS) from a hosting provider of your choice and a little bit of set up which is exactly what we'll go through in this post.
💡
Coolify v4 is still beta software as of the time of writing of this post. If you need a little bit more stability, wait for the final release.
What is Coolify?

Coolify is a self-hostable alternative to Heroku, Vercel, or Netlify. It's an open source PaaS that allows developers to deploy their applications as well as manage 3rd-party services and databases.
Some of the biggest advantages include:
- Self-hosted control: You own your data on your own servers which saves money and avoids vendor lock-in.
- Hosting versatility: Hosts web applications, static websites, databases (PostgreSQL, MySQL, MongoDB, etc.), and services
- Automated DevOps: Automatically installs dependencies, sets up databases, and handles deployments from GitHub, GitLab, or Bitbucket.
- Web console: Offers a web-based dashboard for managing multiple servers, viewing logs, and monitoring resource usage like CPU and RAM.
- Built-in tools: Features automatic S3-compatible backups, auto provisioning of SSL certificates, webhooks, or preview deployments.
You can run Coolify in various ways. You can use a single server for everything you host or do a separate deployment for the services you'll run.
Applications, databases and services
Coolify supports deploying custom applications and 3rd-party services. It generally distinguish between 3 different types of resources:
- Applications come with a git source or are built using Docker from Dockerfile. You can deploy anything from PHP to Java.
- Databases are preconfigured Docker images for running databases, like MySQL or PostgreSQL.
- Services are deployments based on Docker Compose files that are stored directly on the server. You deploy well known software like Ghost.
You can mix and match any of these on a single Coolify instance.
Setting up the virtual server
There are two variants to self-hosting. One with physical servers that are usually dedicated to you and one with virtual servers where you share the underlying physical servers with others.
We'll set up a simple virtual server on Hetzner which is a provider praised for its affordable costs. You are free to use any other provider you like or already have. Some other popular providers include Digital Ocean, Vultr, or OVHcloud.
💡
Coolify currently offers $20 credit for deploying to Hetzner by following the https://coolify.io/hetzner link.
To create a virtual private server (VPS), you'll need an SSH key pair which you'll authenticate with in the future. You can optionally set a password for the private key as well. To generate a new one, run ssh-keygen:
ssh-keygen
The command will interactively ask you about your key details. If you name it coolify you should end up with two files inside the ~/.ssh directory, one for private key and one for public key (coolify.pub).
💡
Protect your SSH private key! You always provide others with your public key, not the private key. The private key should stay with you on your computer.
Once you have your key pair, it's fairly straightforward to spin up a new server with the provider of your choice.
On Hetzner, create a new project and on the project overview click Add Server.
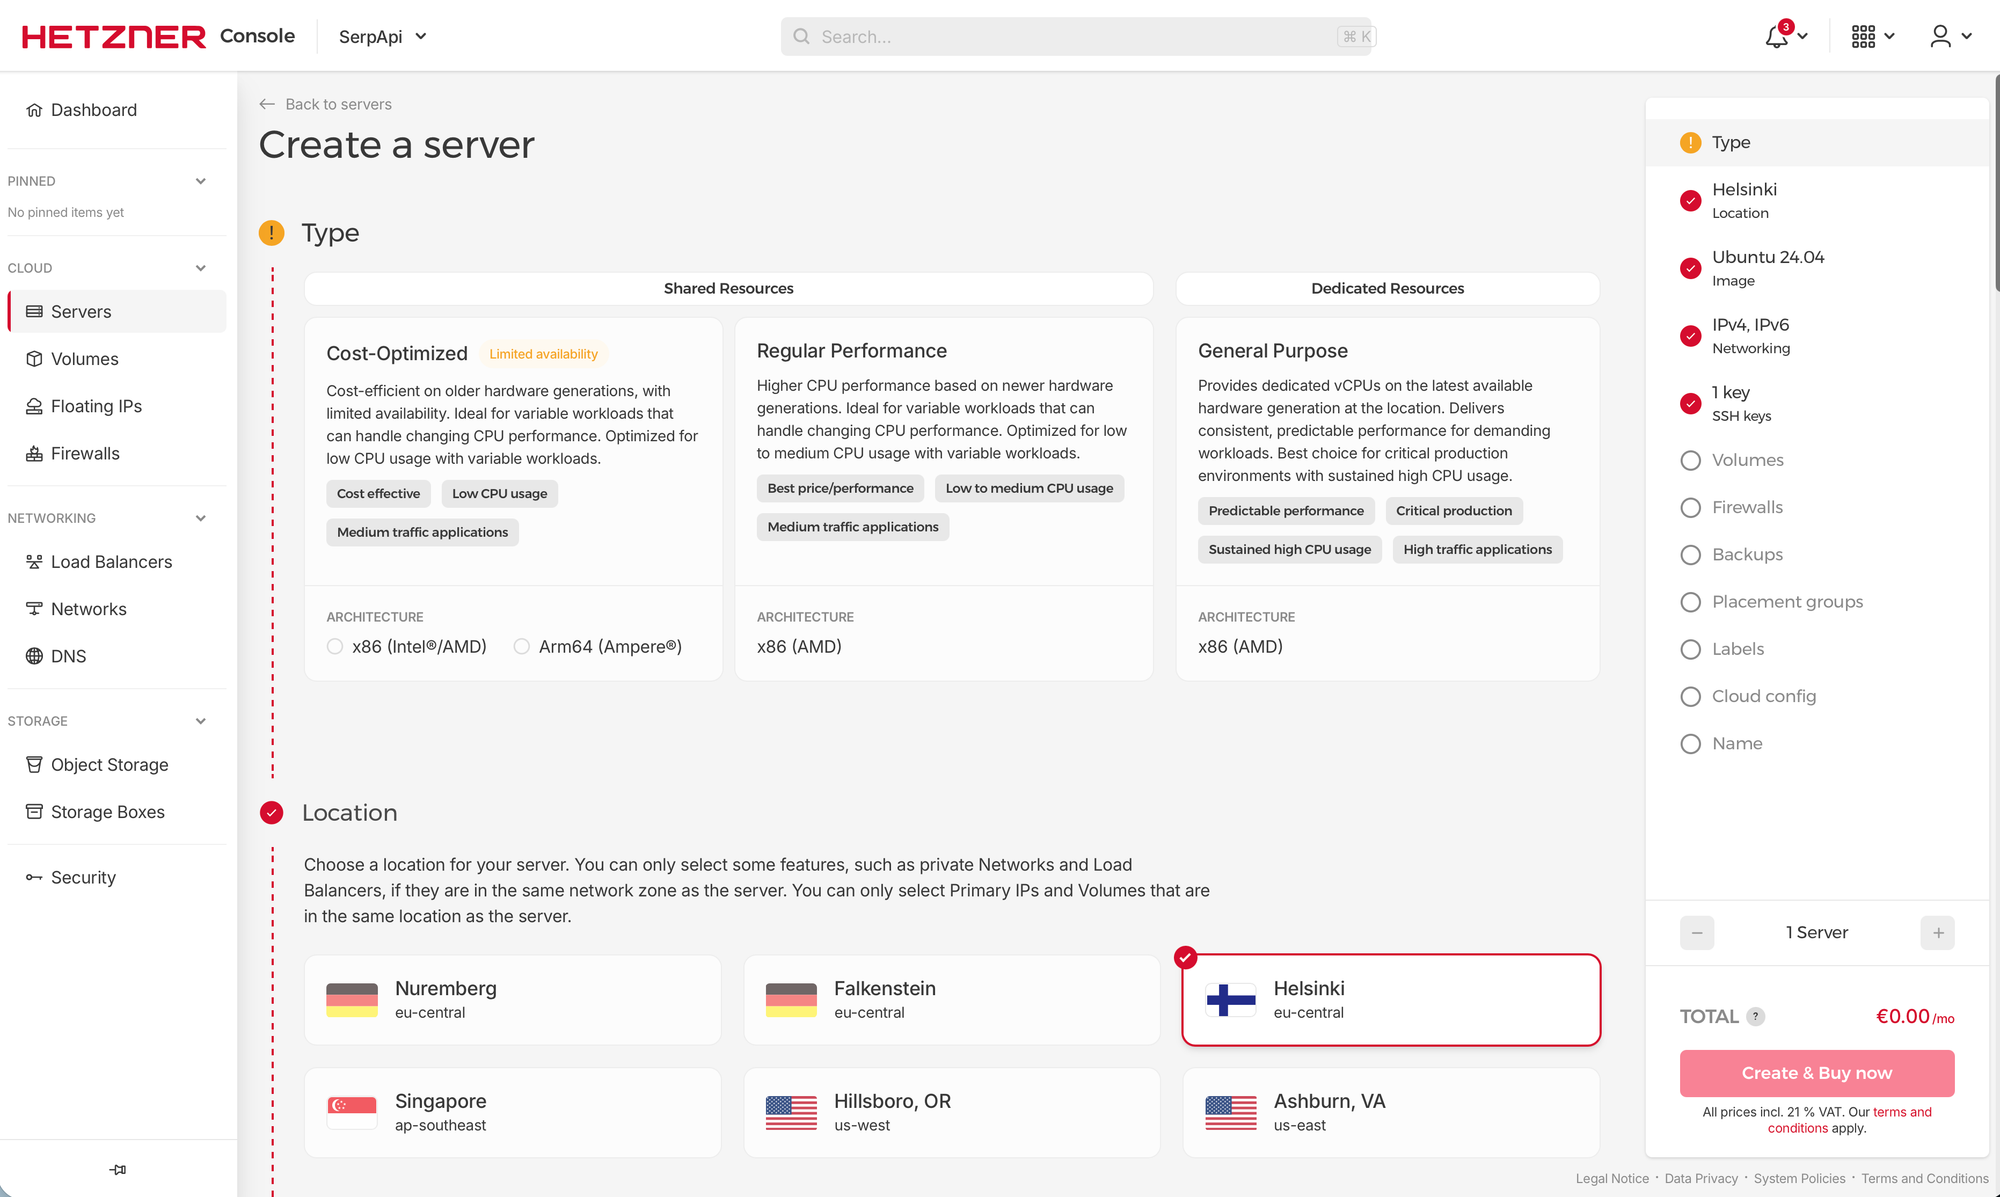
Select a location close to you, Ubuntu 24.04 or your favorite operating system (Debian, SUSE, and Fedora based systems are supported), the size you want, and optionally enable full virtual machine backups. Under SSH Keys upload your public SSH key which should disable password-based access on most providers and let you use your private key instead.
As for the size of the box, Coolify recommends at least 2 vCPUs, 2 GB of RAM, and 30 GB of storage space. If you are going to self-host projects on the same instance, you generally need to increase the box size accordingly. For only running one or two extra applications, consider increasing RAM.
This is all that's needed for things to work, but we can also provide a custom cloud-init script under Cloud config. For example, we can set up automatic system updates and install fail2ban for extra protection of our SSH port:
# Do a system update
apt update;
DEBIAN_FRONTEND=noninteractive apt upgrade -y

# Install essential packages
apt install -y curl unattended-upgrades fail2ban

# Set up unattented updates
echo -e "APT::Periodic::Update-Package-Lists \"1\";\nAPT::Periodic::Unattended-Upgrade \"1\";\n" > /etc/apt/apt.conf.d/20auto-upgrades
/etc/init.d/unattended-upgrades restart

# Install fail2ban
systemctl start fail2ban.service
systemctl enable fail2ban.service
You can optionally install Docker at this step from the system package manager but do not install Docker from Snap as that's not supported by Coolify.
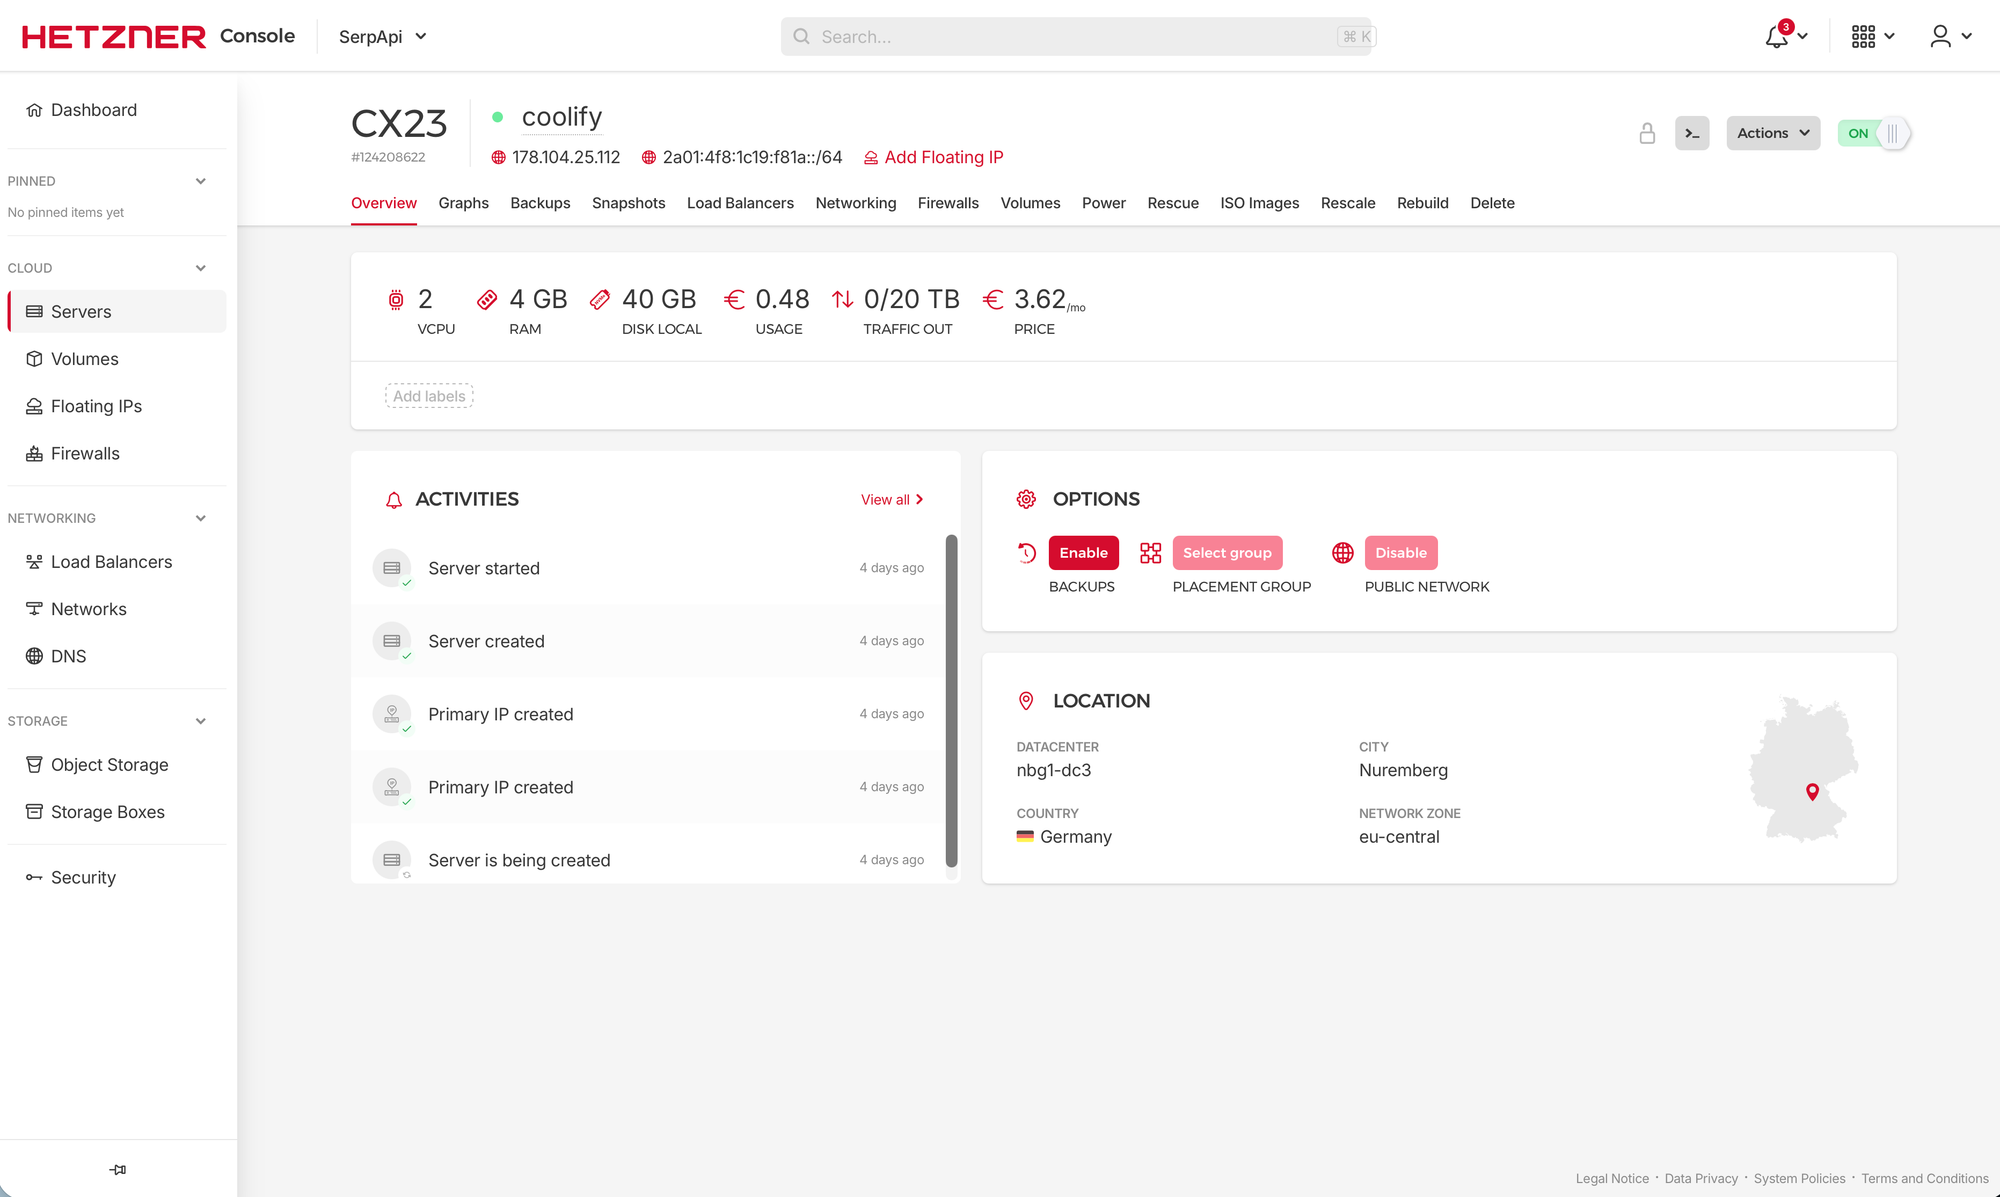
Finally, give the server a name (you can call it coolify, but do not use a domain name) and click Create & Buy now. Provisioning the server will take some minutes and once done you should be able to find the public server IPv4 address next to its name on the server page:
You should now be able to log in from your terminal as:
ssh-add ~/.ssh/path-to-your-key
ssh root@[IP_ADDRESS]
There is quite a bit more to running and securing servers. You should ideally choose a different user than root and/or disable public SSH access altogether in the cloud's firewall. If you want to do that, have a look at WireGuard or Tailscale.
Configuring DNS
Now that you have a public IP address, you can create DNS records to get nice URLs for accessing Coolify, SerpBear, and whatever else you decide to self host.
Head over to your domain registrar console and set the DNS A records for domains or subdomains you want to use for Coolify and the applications you want to host:
# For accesing Coolify web console (admin area)
coolify.example.com -> 178.104.25.112

# Example application
serpbear.example.com -> 178.104.25.112
Choose "A" type records to directly connect a domain name or subdomain to the IP address (replace the values, the above is just an example). You can use Porkbun or GoDaddy to register your first domain name if you don't have one yet.
Since we'll run everything on a single host, the IP address remains the same for all instances.
Installing Coolify
Now that we have our Linux box up and running, we can SSH into it and run the official installer script:
curl -fsSL https://cdn.coollabs.io/coolify/install.sh | sudo bash
You can change some installation details with environment variables, so go and review this list before running the script.
For example, you might want to choose the admin username, email, and password:
env ROOT_USERNAME=admin \
[email protected] \
ROOT_USER_PASSWORD=SecurePassword123 \
bash -c 'curl -fsSL https://cdn.coollabs.io/coolify/install.sh | bash'
Once run, you'll see a Congratulations! screen with the list of the IP addresses, version as well as a log file:
____ _ _ _ _ _
  / ___|___ _ ____ _ _ ____ _| |_ _ _| | ___| |_(_)___ _ _____ | |
 | | / _ \| '_ \ / _` | ' __/ _` |__ | | | | |/ _` | __| |/ _ \| '_ \/__ | |
 | |__| (_) | | | | (_| | | | (_| | |_| |_| | | (_| | |_| | (_) | | | \__ \_|
  \ ____\___ /|_| |_|\ __, |_| \__ ,_|\ __|\__ ,_|_|\ __,_|\__ |_|\ ___/|_| |_|___ (_)
                   |___/


Your instance is ready to use!

You can access Coolify through your Public IPV4: http://178.104.25.112:8000
You can access Coolify through your Public IPv6: http://[2a01:4f8:1c19:f81a::1]:8000

If your Public IP is not accessible, you can use the following Private IPs:

http://10.0.0.1:8000
http://10.0.1.1:8000
http://2a01:4f8:1c19:f81a::1:8000
http://fdb0:c330:3639::1:8000

WARNING: It is highly recommended to backup your Environment variables file (/data/coolify/source/.env) to a safe location, outside of this server (e.g. into a Password Manager).


============================================================
[2026-03-19 11:02:44] Installation Complete ============================================================ [2026-03-19 11:02:44] Coolify installation completed successfully [2026-03-19 11:02:44] Version: 4.0.0-beta.468 [2026-03-19 11:02:44] Log file: /data/coolify/source/installation-20260319-110120.log
After installation, you should find your self-hosted Coolify instance at http://[IP_ADDRESS]:8000:
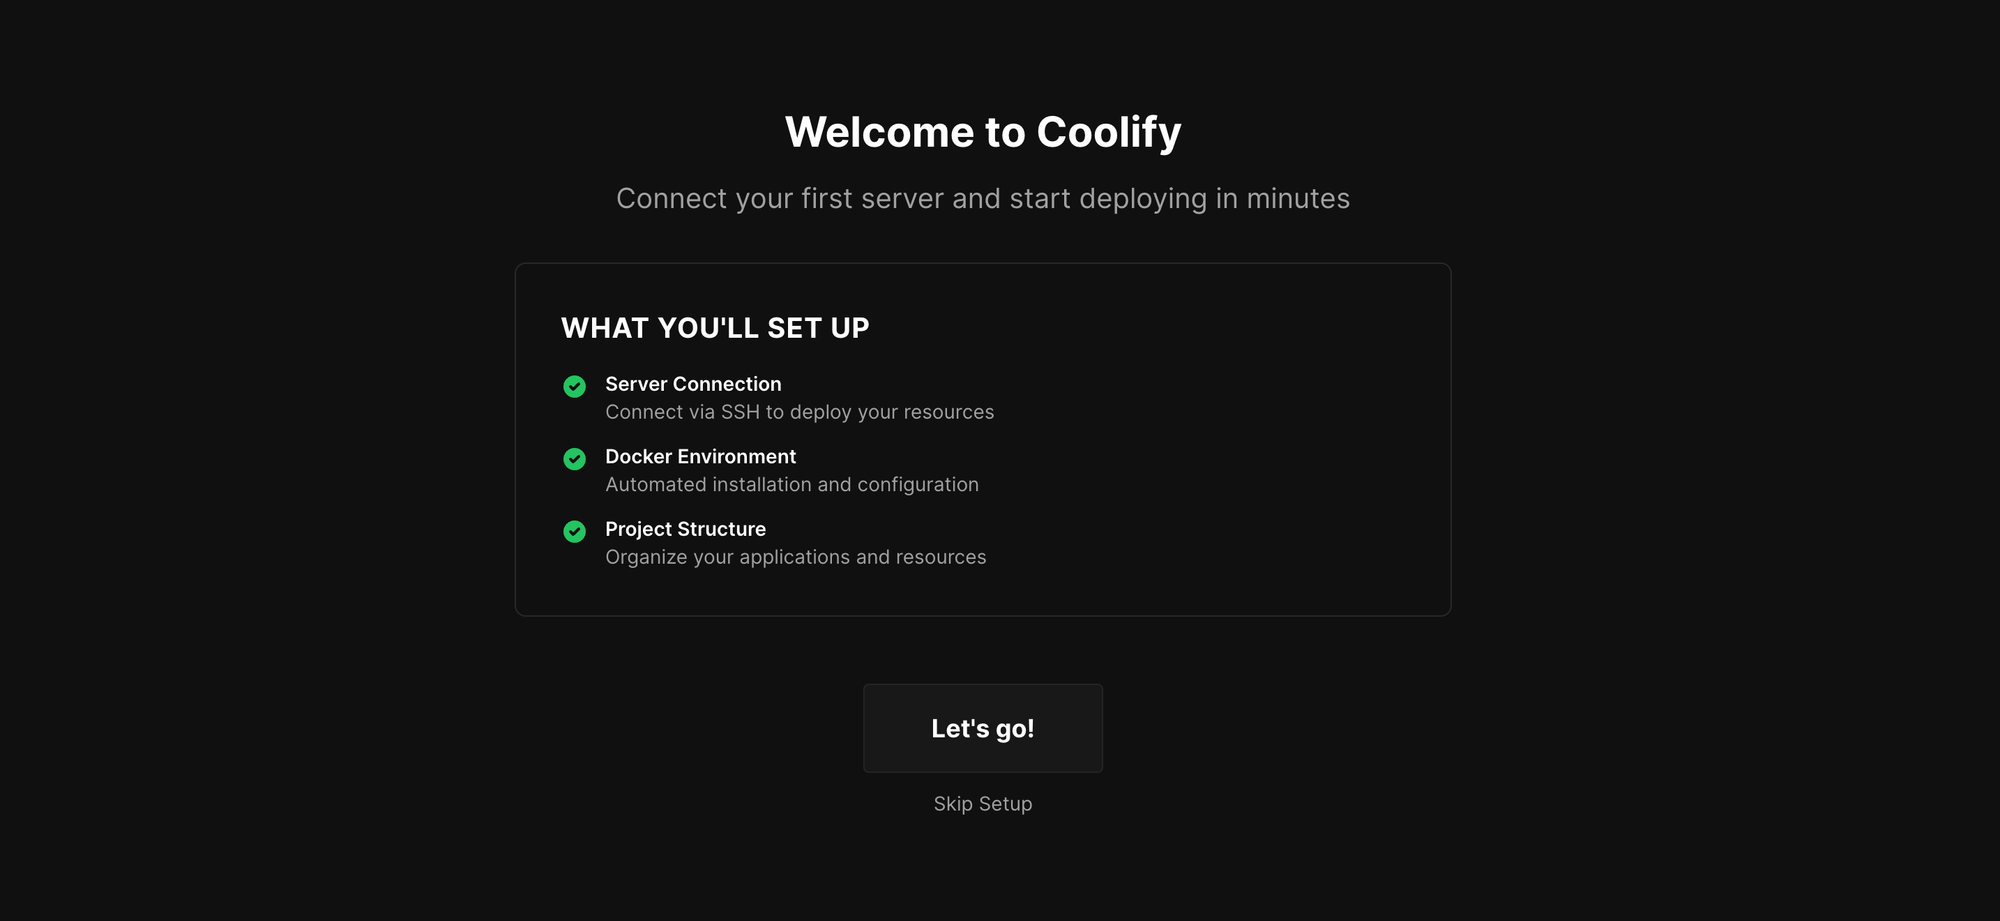
You should see a Welcome to Coolify screen. Click Let's go!
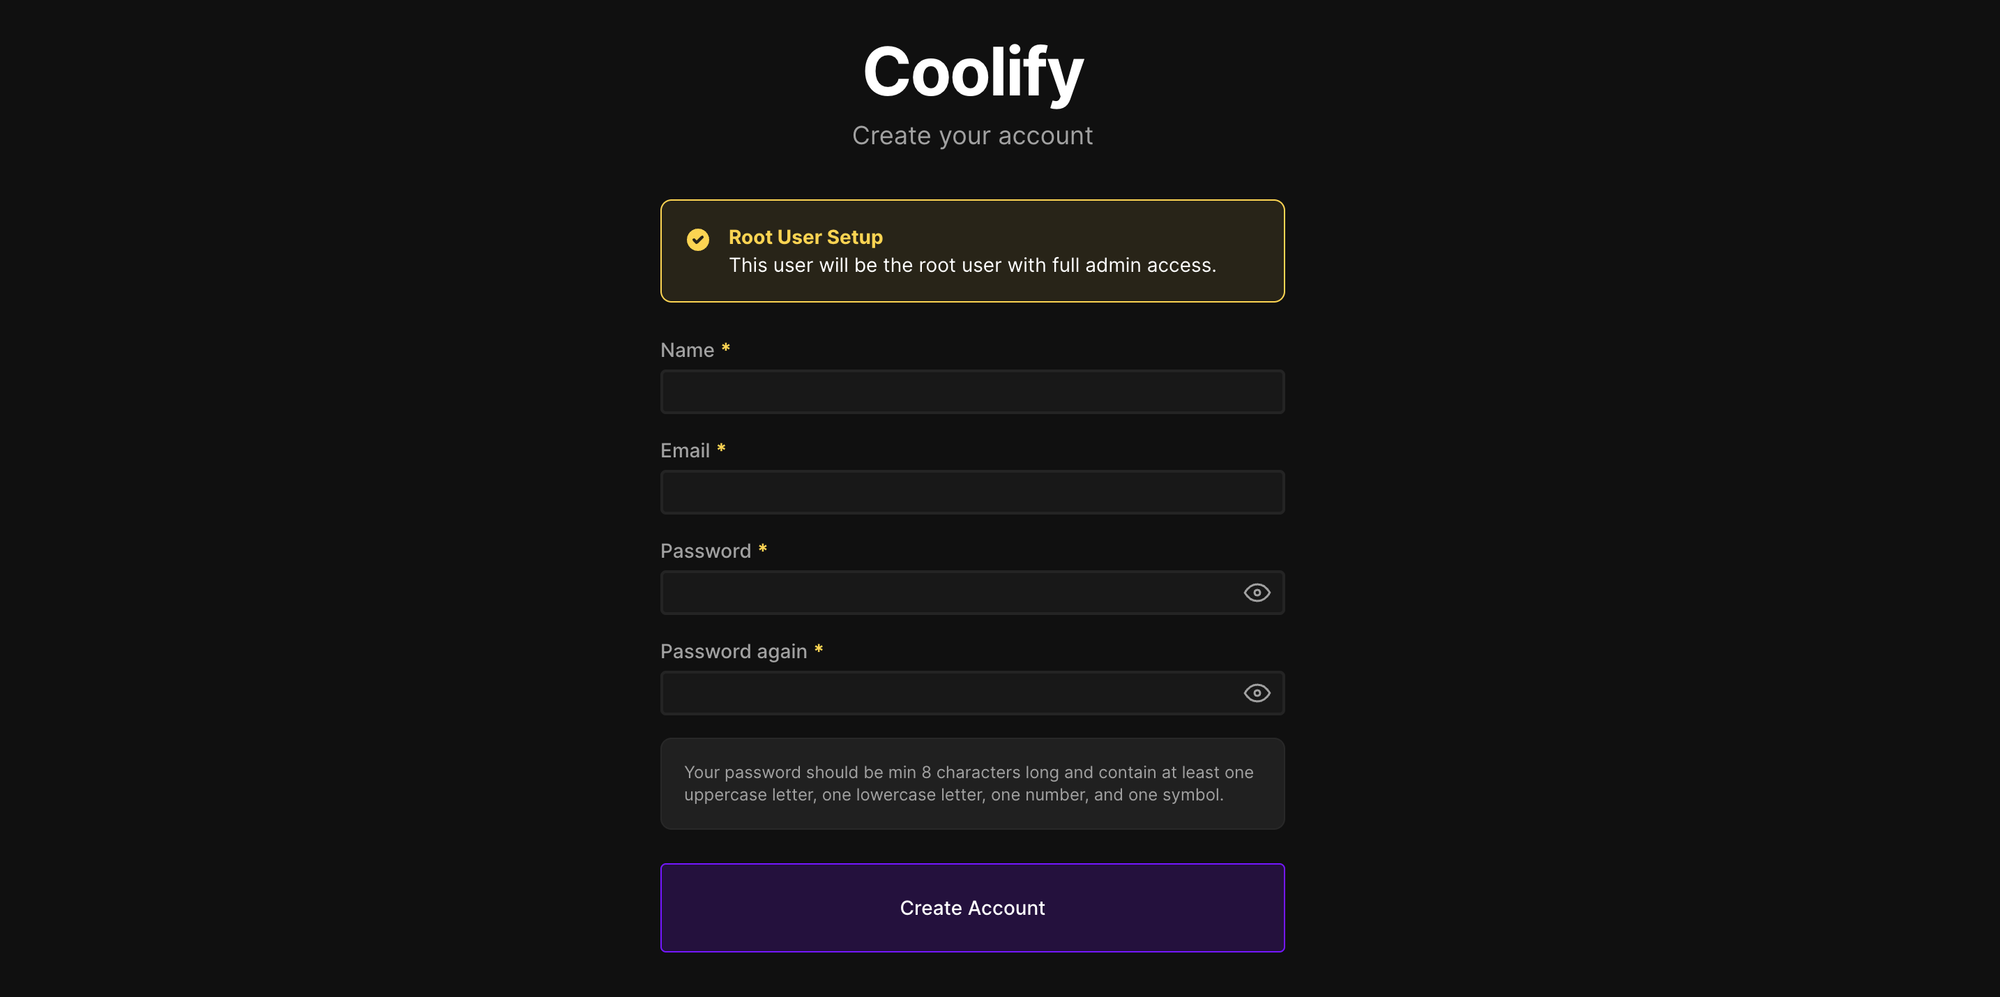
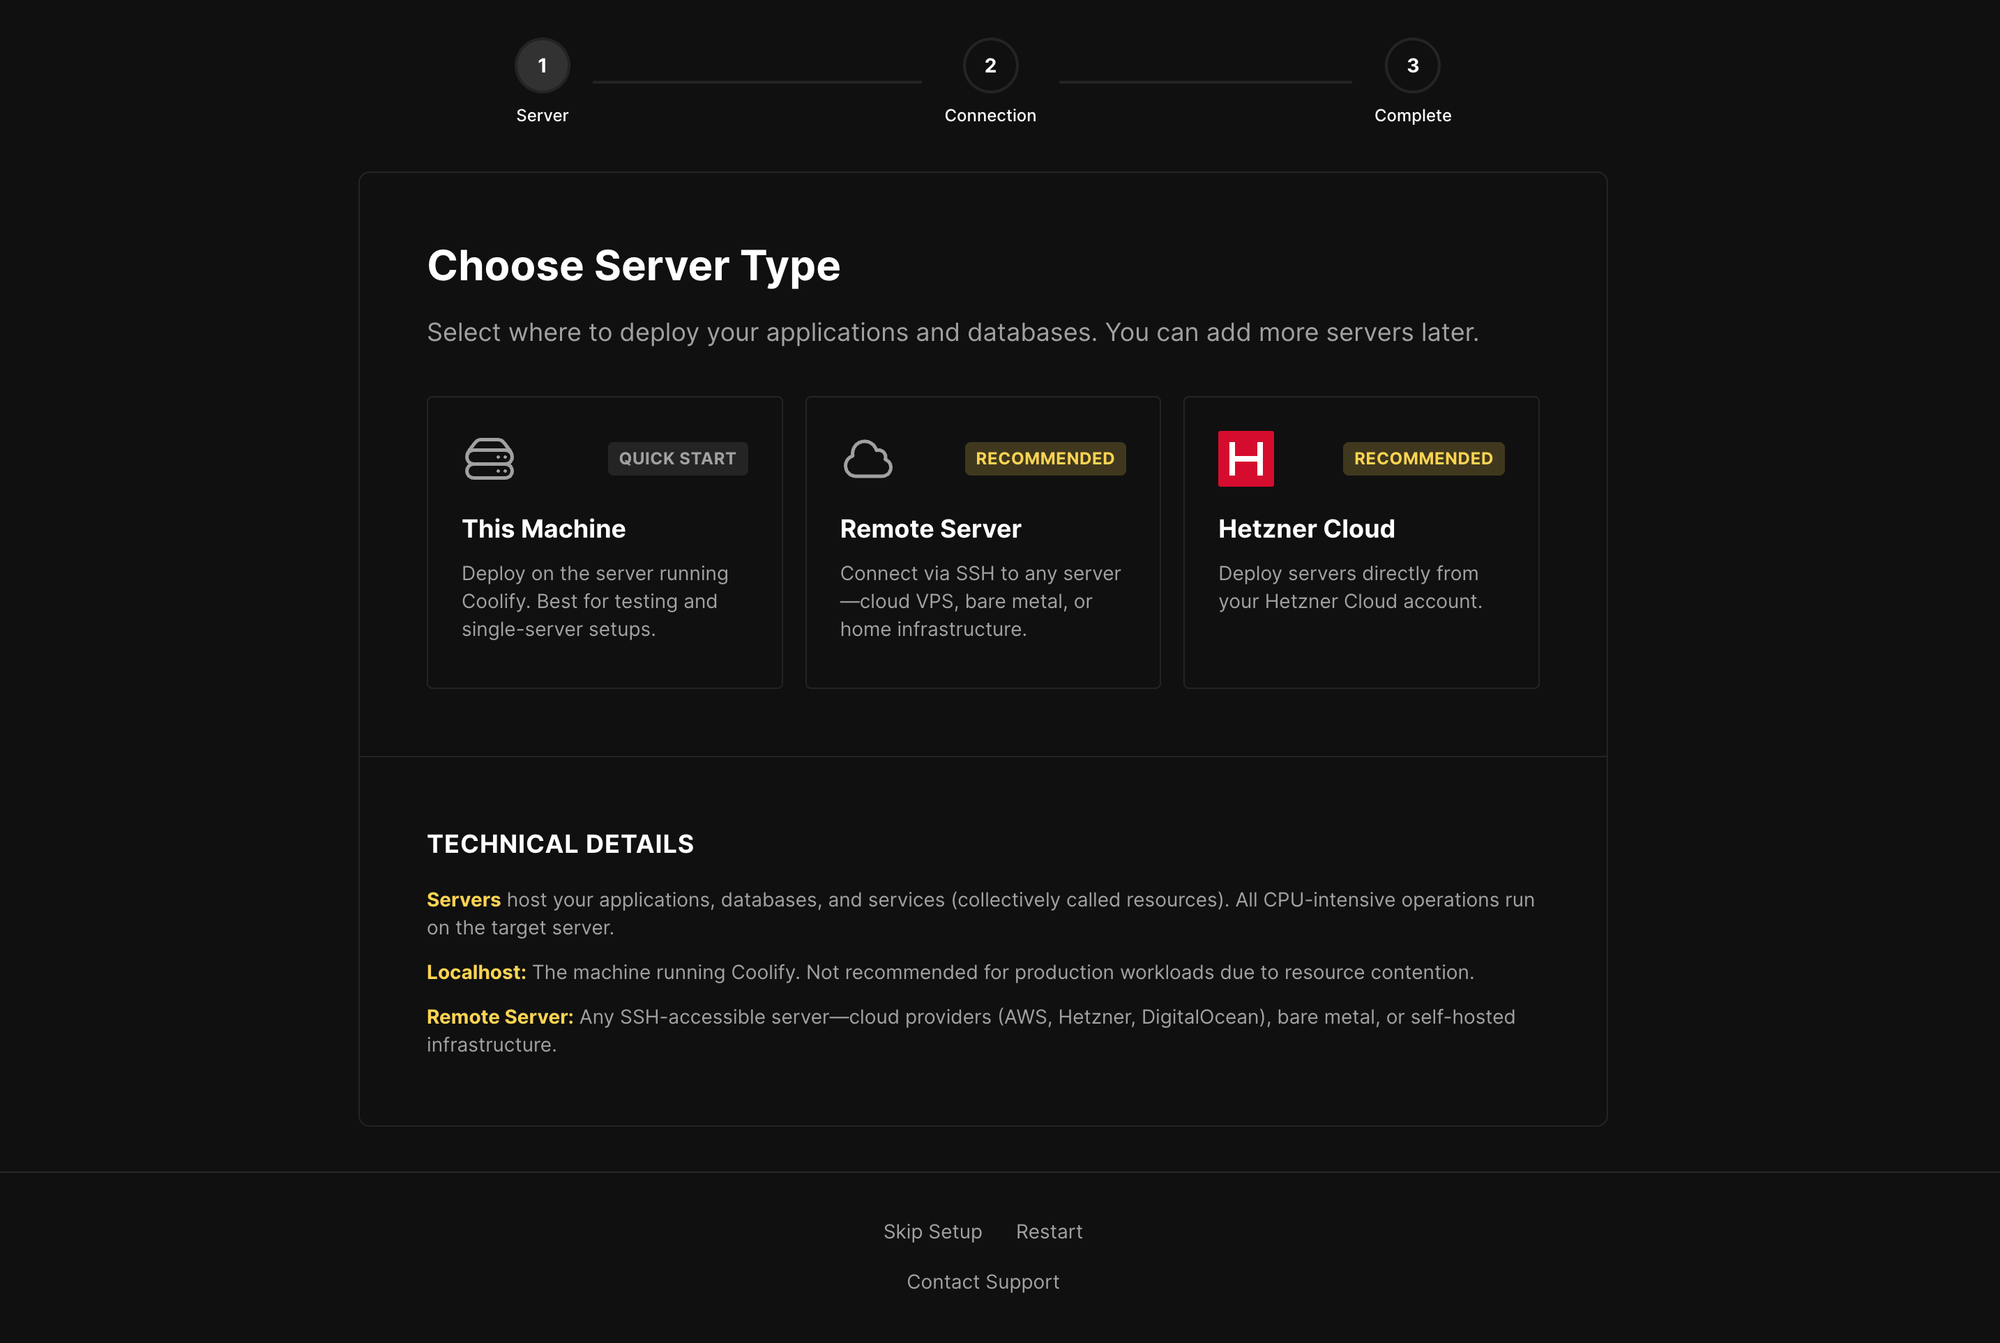
Create your root account and on the next screen choose This Machine as your server type (we'll run everything on a single instance):
After the initial wizard, let's go to Settings (from the left menu) and input the instance URL with our (sub)domain we prepared for Coolify under General (make sure to include full URL including the leading https://).
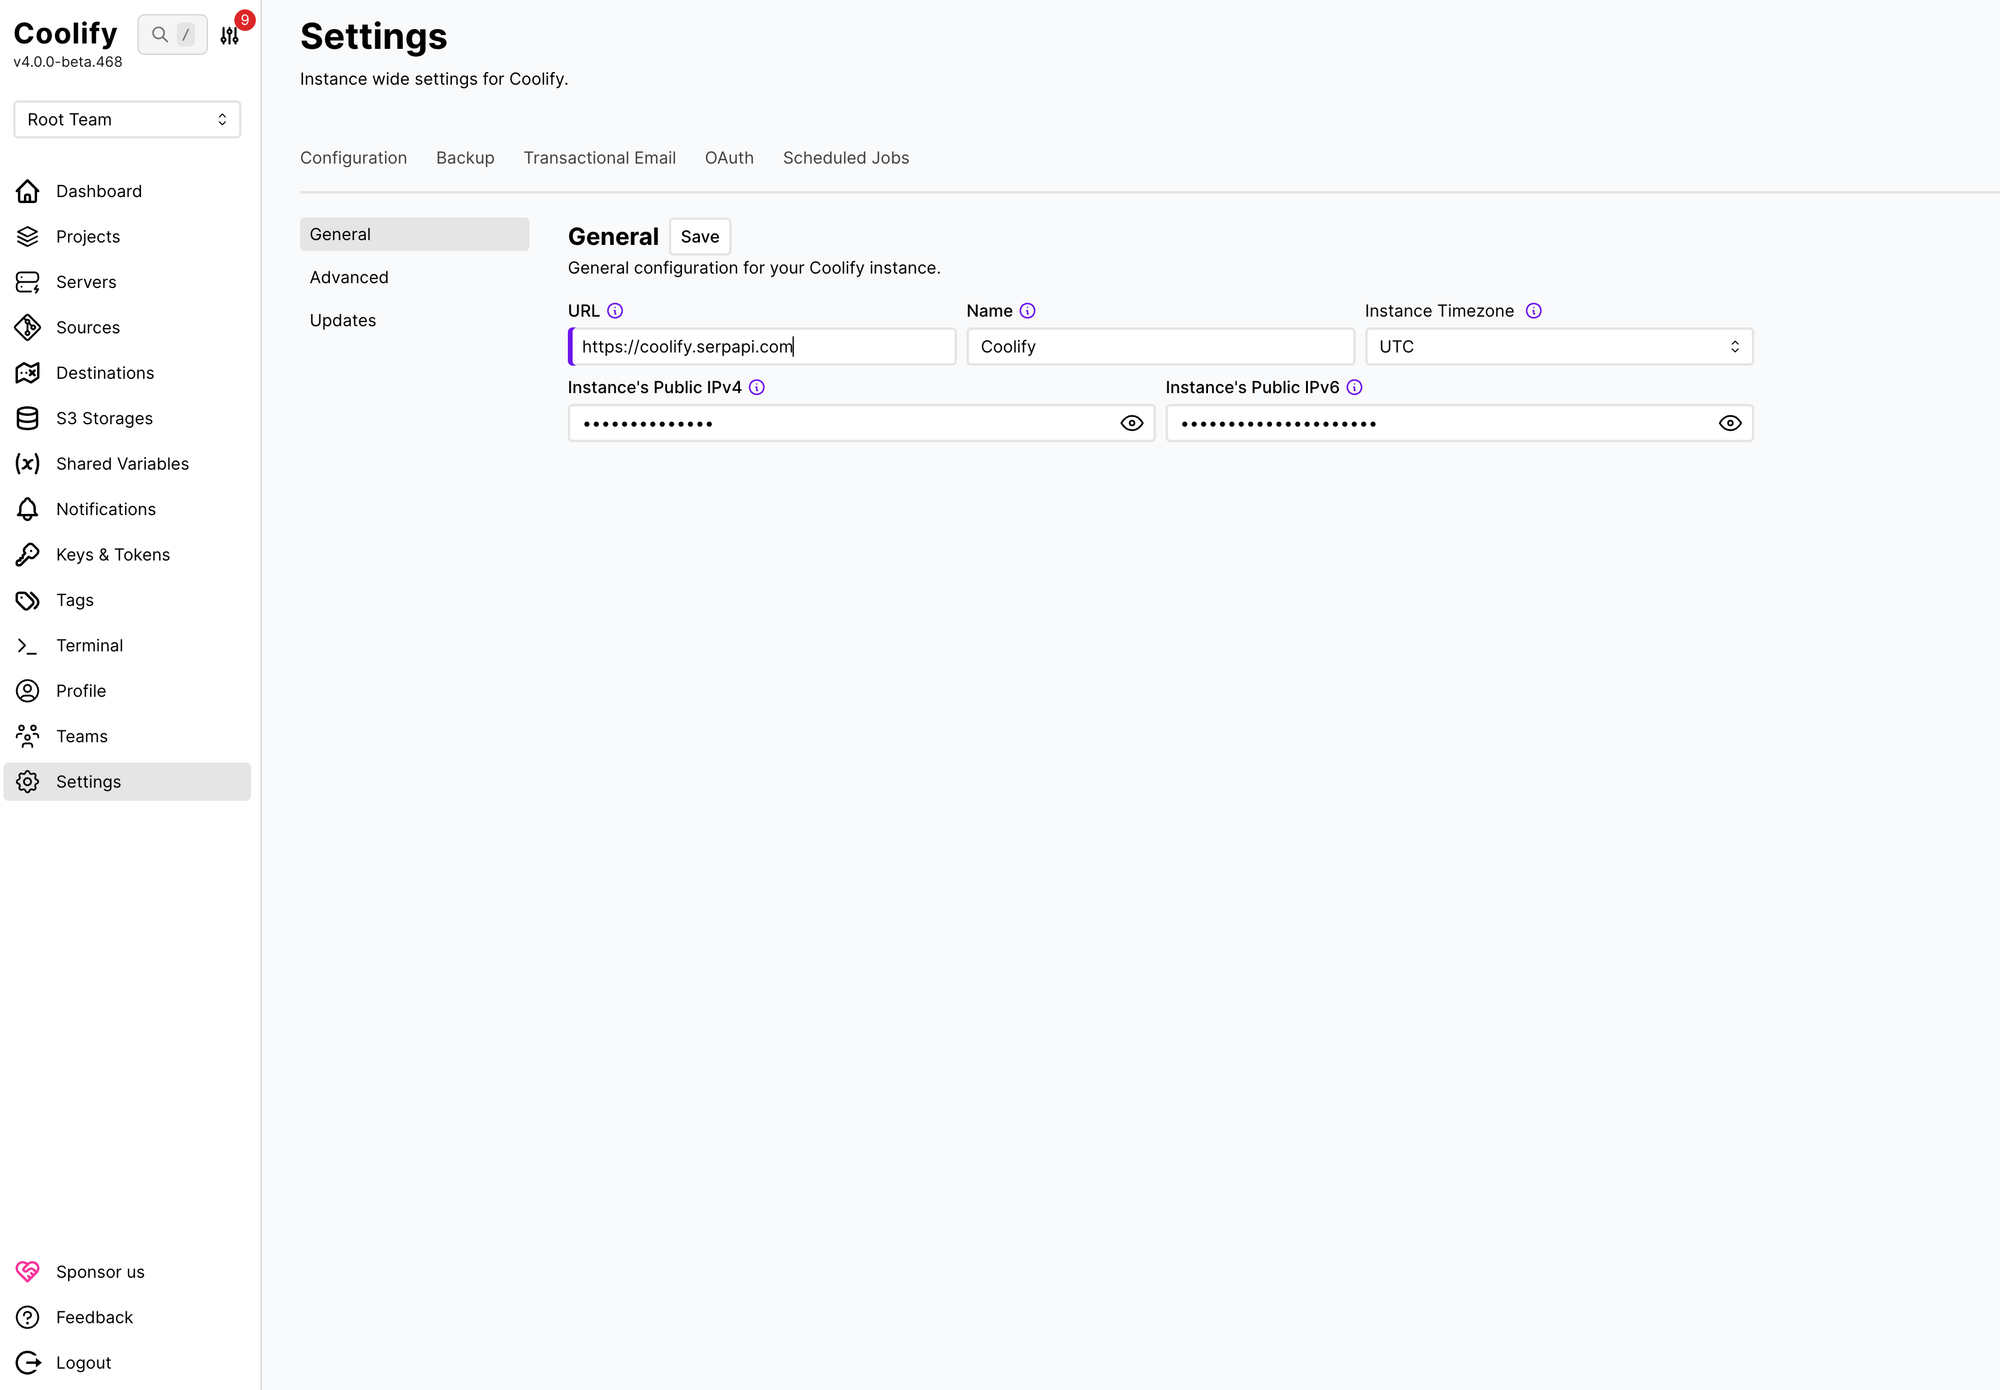
Optionally you can also explore the Backup and Transactional Email tabs for setting up Coolify backups and transactional emails (for things like forgotten password).
Then head over to Servers (from the left menu) where you should see our localhost instance (running Coolify). Here you'll find settings for the Coolify components. Open it and go to the Proxy tab:
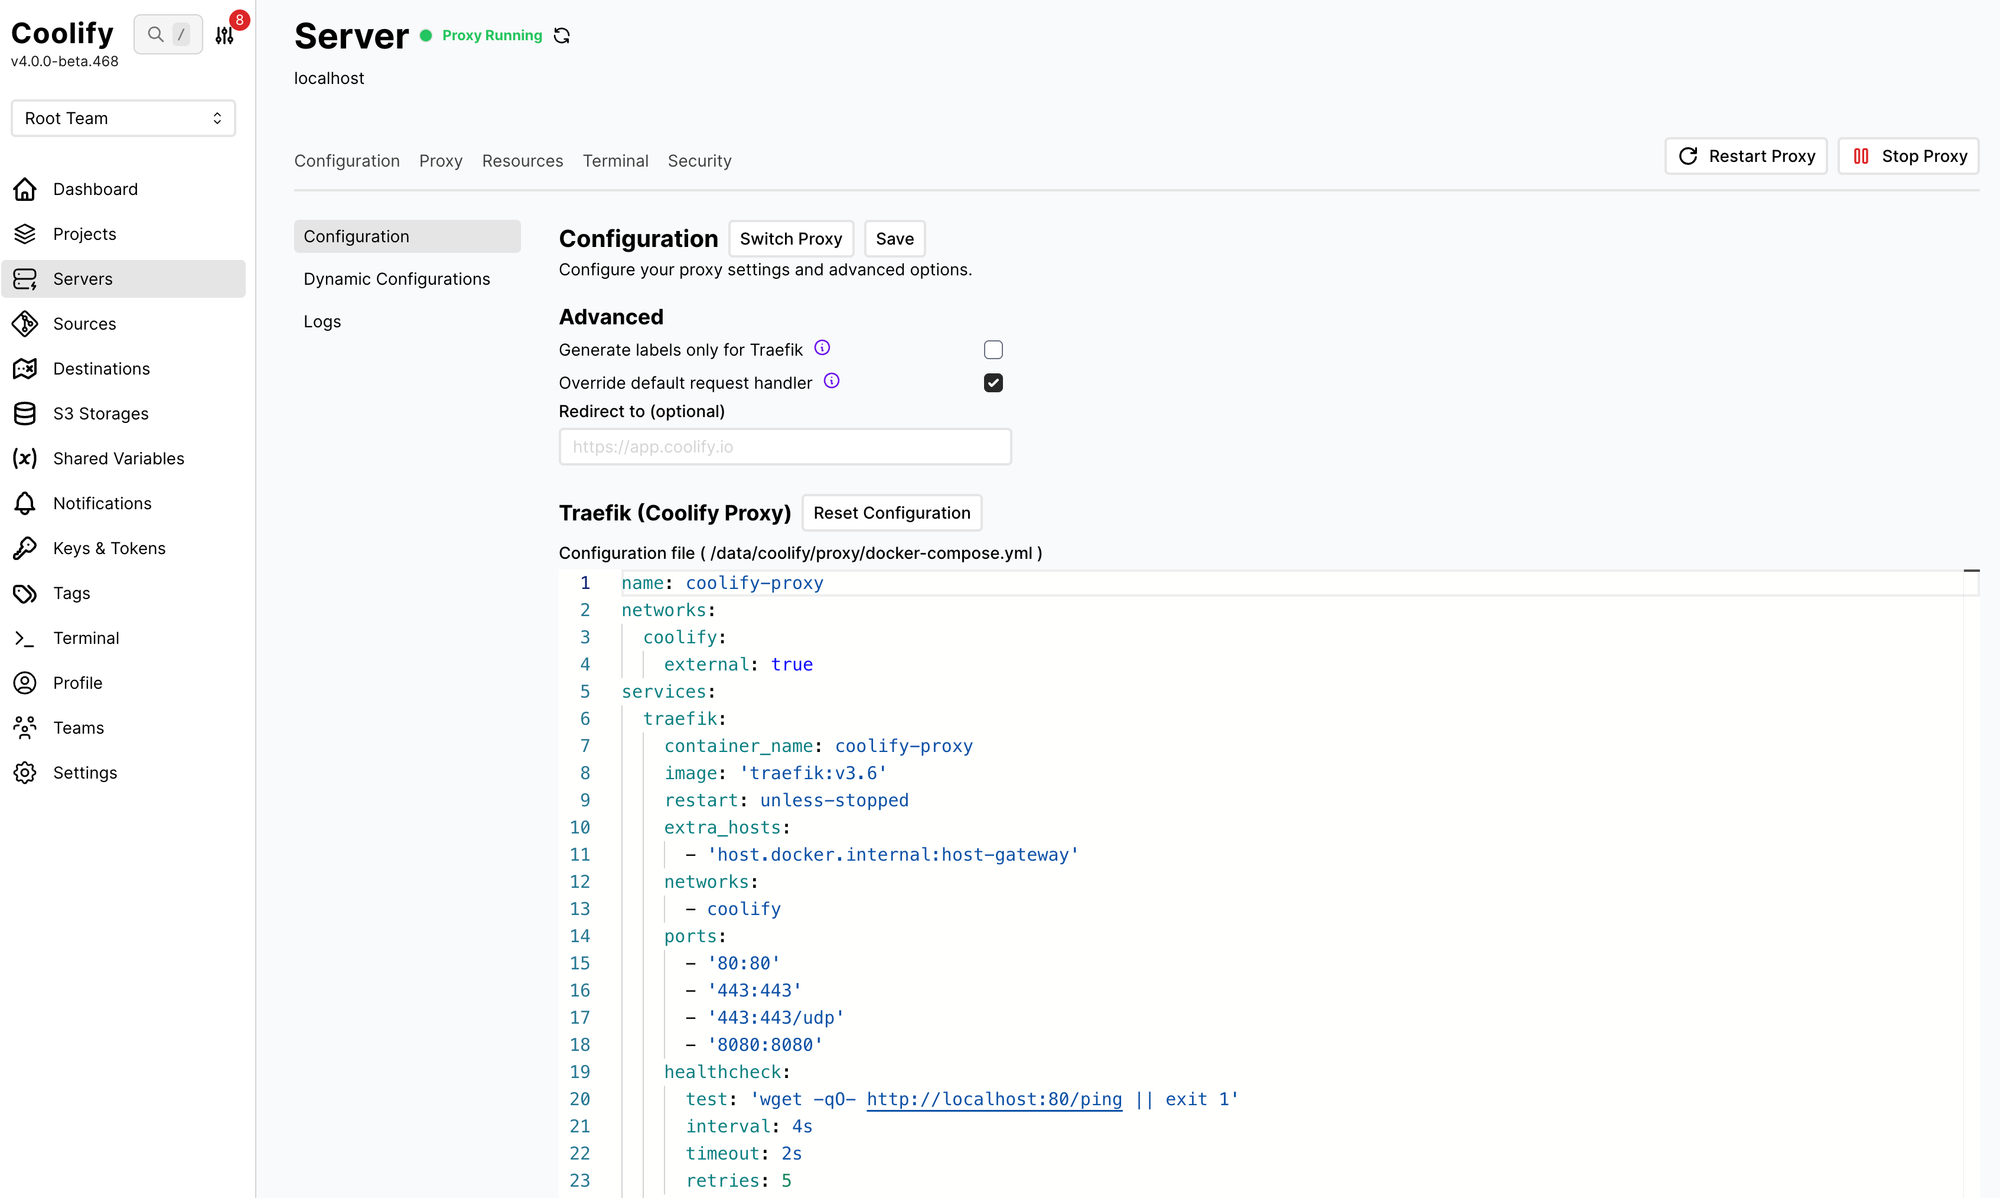
Checking that the proxy is running is important as it will route the traffic to the applications you'll self host. Even if Coolify is running and you are logged in inside the console, the coolify-proxy might not be.
In case the proxy is not running, open the logs and see what's wrong. In my case, the proxy wasn't running and I found the following inside the logs:
Creating required Docker Compose file.
Pulling docker image.
 Image traefik:v3.6 Pulling
 Image traefik:v3.6 Pulled
Ensuring network coolify exists...
Ensuring network havzqyfu212ybs9n5lg48gzy exists...
Starting coolify-proxy.
ParseAddr("fdb0:c330:3639::1/64"): unexpected character, want colon (at "/64")
There seemed to be an issue with parsing an IPv6 address. To resolve it I decided to turn off IPv6 support on the system. I opened an SSH connection to the server again to edit Docker's daemon.json file:
vi /etc/docker/daemon.json
I added an entry with "ipv6": false:
{
  "log-driver": "json-file",
  "log-opts": {
    "max-size": "10m",
    "max-file": "3"
  },
  "default-address-pools": [
    {"base":"10.0.0.0/8","size":24}
  ],
  "ipv6": false
}
Then I restarted Docker:
systemctl restart docker
After that I could restart the proxy and see coolify-proxy container running on the system.
And that was it! If you can log in and see that the proxy is running, you are ready to start adding individual applications and services. You can still also use a hosted version of Coolify if you never set up a server before and all of this looks daunting.
Deploying resources
Resources in Coolify needs a project, so open Projects from the left side menu, and click + Add next to Projects. Then click + New next to the Resources headline. You should arrive on a New Resource page which lets you choose what you want to run. You can deploy directly from a git repository, Dockerfile or custom Docker Compose.
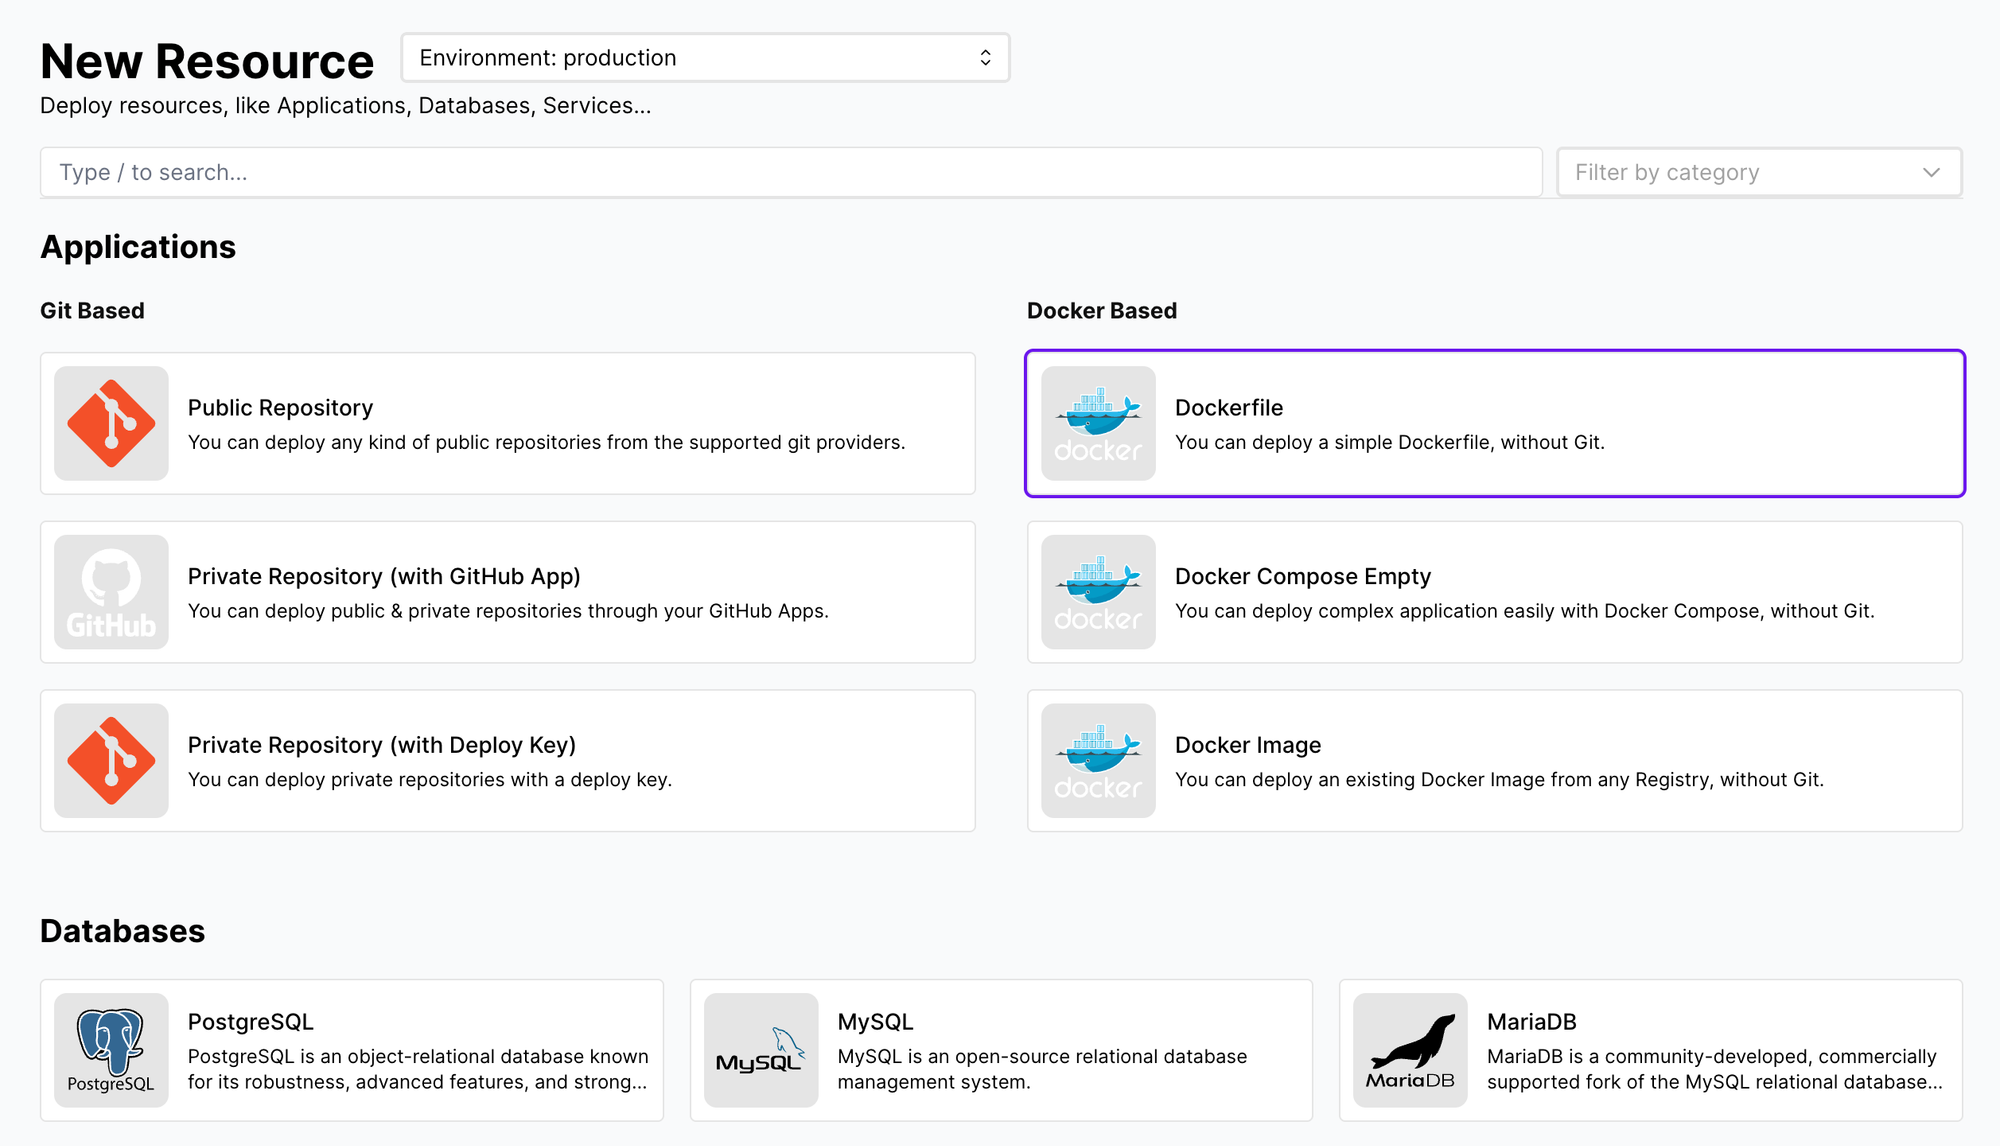
One-click services
One-click services are pre-configured Docker Compose templates provided directly by Coolify, skipping the complexity of manual setup and configuration. They are the easiest to start with.
Scroll a bit down and you should see them:
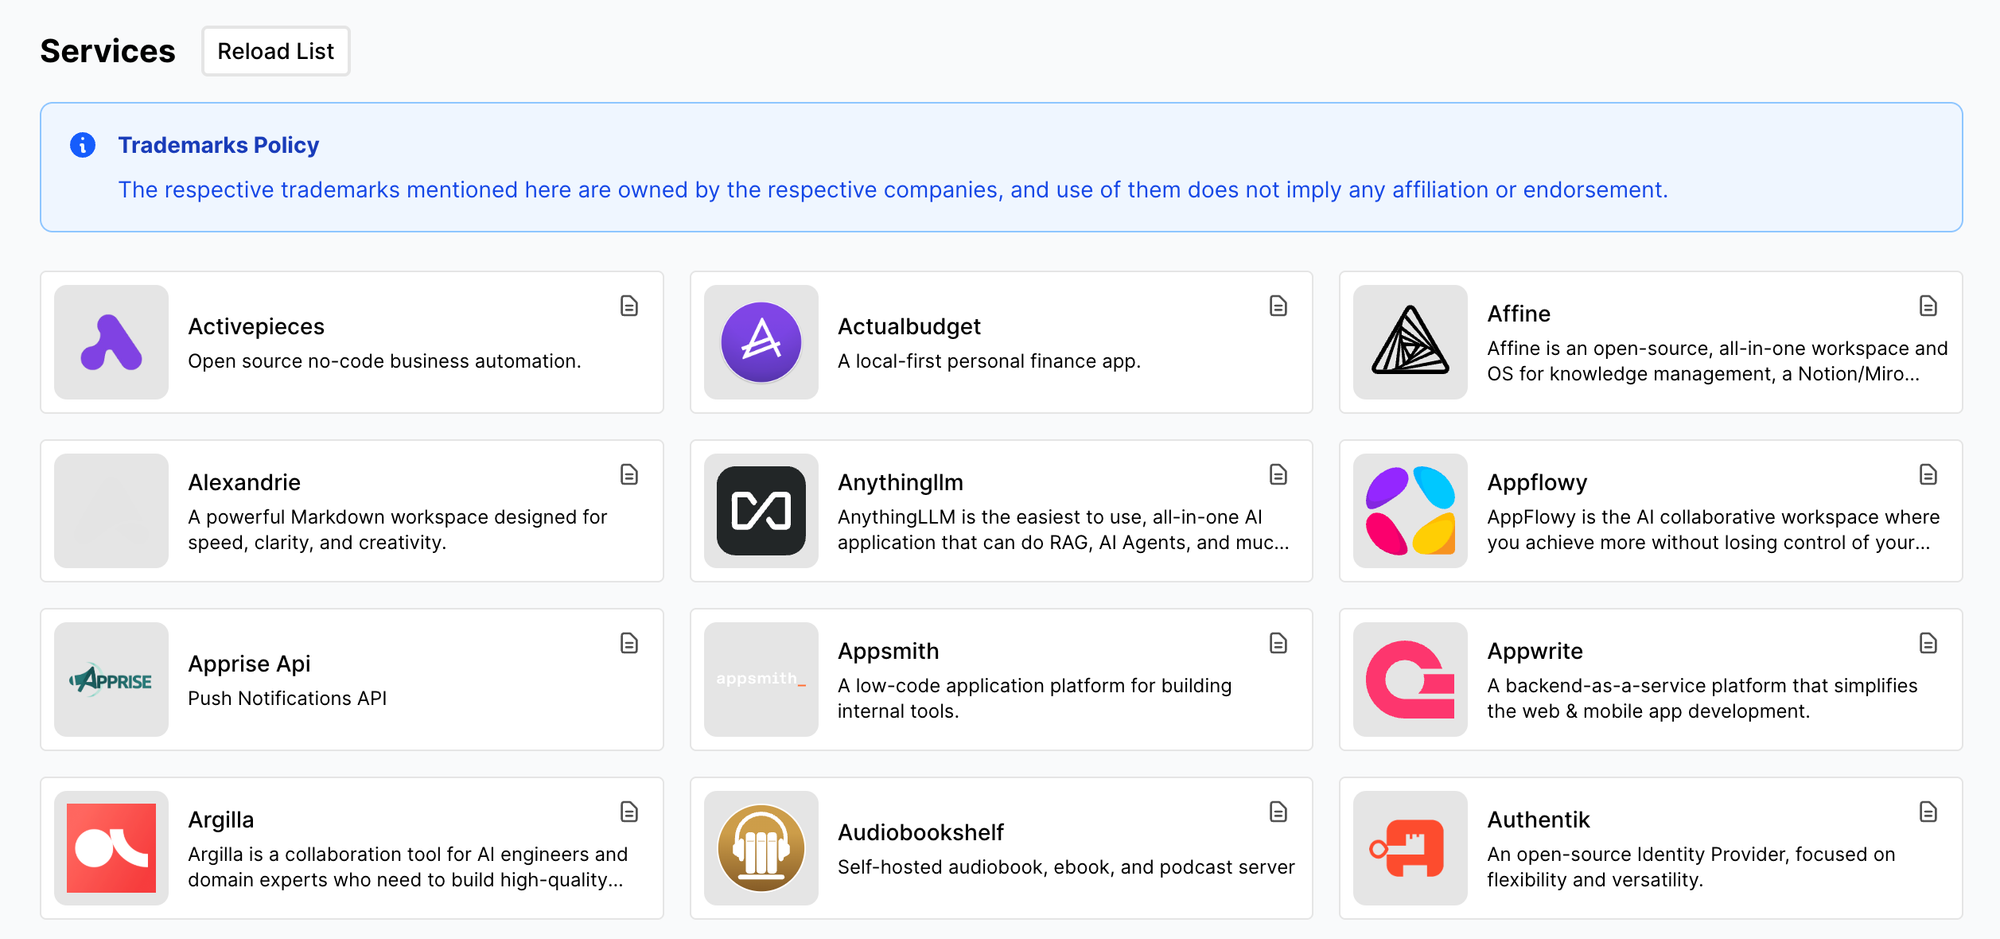
Coolify also maintains a directory for these services on the web. Some of services you can add are:
- Internal tools: Appsmith, Budibase, NocoDB.
- Chat & messaging: Matrix, Mattermost, Rocket.Chat.
- Development & CI/CD: VS Code Server, Gitea, Jenkins.
- Monitoring & analytics: Bugsink, CloudBeaver.
- CMS: WordPress, Ghost.
They are all pretested, optimized, and coming with sensible defaults.
Custom services
Custom services in Coolify are those that you deploy with your own Docker Compose file. They require a little bit more work, but allow you to run almost anything. Have a look at how to deploy SerpBear, a SEO tool for keyword tracking as an example of a custom service.
Next steps
If you are new to self-hosting make sure to learn a little bit more about SSH, DNS, Linux, Docker, and related topics. You should also have a look at the Coolify documentation for even more information and tips.
Tags
Comments
More Blog
View allaiContext bankruptcy: The case for strategic forgetting for AI Agents
Most of us have seen a coding agent fail to complete a task we know it can do. We just don't...
J
James O'ReillygooglecloudParallel Compliance Engine: Drive-to-Sheets Multi-Agent Orchestration
When building Generative AI applications, developers often encounter a massive bottleneck: sequential...
A
Aryan IranidiscussIs It Ethical to Post and Ask About Circuits on Dev.to?
I’ve been thinking about sharing some electronic circuit posts on Dev.to — small circuits, DIY...
C
codebunny20agentsThe One-Click Exporter: AI Studio Antigravity, Probed to Its Limits
What nobody tells you about exporting your multi-agent prototype to a local workspace. Every...
L
leslysandraagenticarchitectGuarding the till while autonomous data agents do the digging
Autonomous agents are genuinely good at answering messy business questions. Give one an LLM and a set...
S
Sireesha PulipatiaiReturn on Attention: Why AI Code Reviews Are Wearing Us Out
PR volume went up, ticket quality didn't, and the gap got filled with LLMs on both sides of the review: bots reviewing, bots replying, bots occasionally arguing with bots about priorities that only existed in a teammate's head. Our CEO named the actual problem, and it's bigger than code review.
C
christineReady-made automations for this
Workflows from the Neura Market marketplace related to this Stable Diffusion resource
- Learn Anything, Write Books & Design Curricula with AIn8n · $24.99 · Related topic
- Automatic Self-Hosted n8n Updates with Coolifyn8n · $12.99 · Related topic
- AI Web Hosting Support Chatbot with Gemini & WHMCSn8n · $24.99 · Related topic
- Learn Anything from HN: Top Hacker News Resource Recommendationsn8n · $14.99 · Related topic