
Back to Blog docker
 ai
ai googlecloud
 discuss
 agents
 agenticarchitect
 ai
ai
Shipping Your Machine: Building a Container in 50 Lines of Code (Part 1)
Yechiel Kalmenson May 20, 2026
0 views
The "Works on My Machine" Problem We've all been there. You spend days writing a new...
The "Works on My Machine" Problem
We've all been there. You spend days writing a new feature. You test it locally, everything passes, you push it to production, and... boom. It crashes immediately.
"But it works on my machine!" you cry out to your lead engineer.
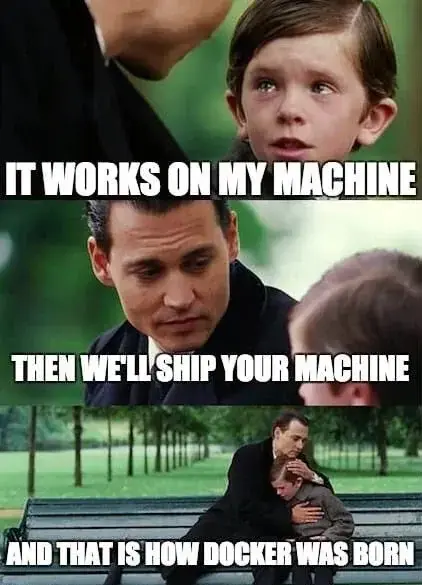
And that is exactly what containers are. They are a way to bundle up your application and the environment it runs in—your machine—so that it behaves exactly the same way in production as it does on your laptop.
But what is a container, really?
Most people have an intuition of containers as some kind of complicated application that runs on your computer and simulates another computer. That is the image I had in my head even after working on containers for a few months at Pivotal/VMware... and it's a myth.
The reality is a lot simpler, and a lot more interesting!
The truth is that a container is simply a directory on your computer—like any other directory—with a process running inside of it. What makes it a container and not just another process running inside a directory is that we use some clever built-in Linux features to trick the process into thinking that this directory is the entire computer. As far as this process is concerned, nothing exists outside of the directory we "trapped" it in and that directory is the entirety of its universe.
In this two-part series, we are going to demystify this illusion by building Docker from scratch in exactly 60 lines of Go code.
Note: Because containers rely heavily on the Linux Kernel, this tutorial will only run natively on a Linux machine. If you are following along on a Mac, you'll need to spin up a Linux VM first, as Macs run on the Darwin kernel and don't have these system calls!
Let's get started!
Setting the Stage
We'll be writing our container in Go. Why Go? Because it gives us incredibly clean access to underlying Linux system calls, which we'll need to create our container illusion. This is the reason Docker, Kubernetes, and other cloud-native projects are all written in Go.
Let's try to replicate the core behavior of Docker.
Normally, when using Docker, you run a command like:
docker run -it ubuntu /bin/bash
If you run that (assuming you have docker installed) you will see that you have been dropped into a new shell. This shell looks different than your original shell and you can tell it's completely isolated from the rest of your machine (the host) in a few ways (it's worth opening a new tab in your terminal so you can see these changes side by side):
-
Your prompt: Everyone's prompt is different, but most have something in the beginning that looks like
[username]@[hostname]. The prompt you see now probably looks likeroot@[some-random-string]. -
Your hostname: If you type
hostnamein your host computer's terminal, it will output your computer's actual name. If you runhostnameinside your container, on the other hand, you will see that same random sequence of characters from your prompt. Docker assigned this fake hostname to your container at random. -
Your File System: If you type
ls /inside your container you will see that none of the files from your computer's actual root directory are there, instead you will see a fresh list of files and directories, exactly like you would find in a brand new Ubuntu installation. -
Your processes: If you type
ps auxin your container you will find only 2 processes with very low Process IDs (PIDs)—typically PID 1 for the shell process you're in and another low number PID for thepscommand you just ran. Meanwhile, runningps auxon your host machine will show a massive list of running processes, many of them with very high PIDs.
We will try to replicate this behavior from scratch, with a few minor differences.
Our goal is to run:
go run main.go run /bin/bash
And if we do everything right the behavior will be mostly the same. We will drop into a new shell where:
-
We will see a different hostname than our existing one.
-
The root directory we will have access to will not be the root directory of our computer, instead it will be a new root directory.
-
If we inspect the processes running using
pswe will see only the processes running in our program and not all the processes on our computer.
So let's start!
Show Me the Code
Let's build this step by step. Create a new directory on your Linux computer, make a file named main.go, and let's add our initial boilerplate:
package main

import (
	"fmt"
	"os"
)

func main() {
	// os.Args is a list of everything typed in the terminal.
	// [0] is the program name (main.go), [1] is our command ("run")
	switch os.Args[1] {
	case "run":
		run()
	default:
		panic("Invalid argument")
	}
}

func run() {
	// os.Args[2:] takes everything AFTER the "run" command
	// e.g., ["echo", "hello", "world"]
	fmt.Printf("Running %v \n", os.Args[2:])
}
In Go, os.Args captures every word you type into the terminal as a list (a slice) of strings. We are telling our program to look at the second word (os.Args[1]). If it says "run", we trigger our run() function which, for now does nothing but print all our arguments to the terminal.
If we run this in our terminal:
$ go run main.go run echo hello world
Running [echo hello world]
Awesome. It successfully reads our command. But it's just printing text; it's not actually executing the command yet.
To make it execute the command, we need to wire up Go's os/exec package (a package for executing commands on our computer). Let's update our file:
package main

import (
	"fmt"
	"os"
	"os/exec"
)

func main() {
	switch os.Args[1] {
	case "run":
		run()
	default:
		panic("Invalid argument")
	}
}

func run() {
	fmt.Printf("Running %v \n", os.Args[2:])

        // 1. Define the command we want to execute. This includes the third element in our array
	// (the actual command, in our case "echo"), as well as any optional arguments we may
	// want to pass to it ("hello world").
	cmd := exec.Command(os.Args[2], os.Args[3:]...)

	// 2. Wire up the plumbing
	cmd.Stdin = os.Stdin
	cmd.Stdout = os.Stdout
	cmd.Stderr = os.Stderr

	// 3. Run the command and handle any errors
	must(cmd.Run())
}

// A tiny helper function to catch errors and crash the program
// cleanly if something goes wrong.
func must(err error) {
	if err != nil {
		panic(err)
	}
}
Let's look at what we just added to run():
-
Define the command:
exec.Commandtakes the program we want to run (likeecho) and any arguments we want to pass to it (hello world). -
Wire up the plumbing: This part is crucial. By default, when a program spins up a new process, it runs invisibly in the background. By pointing the new command's Standard Input, Output, and Error to our own
os.Stdin,os.Stdout, andos.Stderr, we are attaching its "mouth and ears" directly to our terminal so we can actually interact with it. -
Run it: We execute the command. Because Go requires explicit error handling, we wrapped it in a tiny
must()helper function to keep our code readable.
Let's test it out:
$ go run main.go run echo hello world
Running [echo hello world]
hello world
We actually get hello world echoed back at us by the system!
Even better, we can tell our program to drop us into an interactive shell:
$ go run main.go run /bin/bash
Running [/bin/bash]
root@your-computer:/home/yechiel/docker-clone#
However, this shell is absolutely not a container yet. If you type hostname, you'll see your host machine's actual name. If you type ls /, you can see all your host files. Right now, we have just written a fancy Go wrapper around a regular bash process.
It is time to start building the walls of our container.
Introducing Namespaces (The Invisibility Cloak)
To isolate our process from the rest of the computer, we need to put it inside a Namespace. A namespace is like an invisibility cloak that hides the rest of the computer from our process.
There are different namespaces that isolate different aspects of the system. Let's start with the UTS namespace, which isolates the hostname.
To create a new namespace, we pass a specific "clone flag" to the system call spinning up our process. Update your run() function:
func run() {
	fmt.Printf("Running %v \n", os.Args[2:])

	cmd := exec.Command(os.Args[2], os.Args[3:]...)
	cmd.Stdin = os.Stdin
	cmd.Stdout = os.Stdout
	cmd.Stderr = os.Stderr

	// Set up the namespace!
	cmd.SysProcAttr = &syscall.SysProcAttr{
		Cloneflags: syscall.CLONE_NEWUTS,
	}

	must(cmd.Run())
}
If you try to run the command now, you'll get a "permission denied" error. Because changing a namespace requires modifying kernel-level structures, you now need root privileges.
Instead, let's run sudo go run main.go run /bin/bash.
If you run hostname now you will still see your computer's actual hostname. This is because, by default, Linux has your new process inherit the hostname of the host computer.
However, if you manually run hostname container inside this new bash shell, and then type hostname, you'll see your hostname is now container. But if you switch to a terminal tab on your host machine and type hostname, you'll see your actual computer's name hasn't changed at all! Our process is successfully isolated.
Forking the Process
Did you notice something weird when you manually changed the hostname in the last step? Even though typing hostname printed out container, your actual bash prompt likely still said root@your-computer#!
This happens because the bash shell reads the machine's hostname when it first starts up. Changing the hostname after the shell is already running doesn't dynamically update your prompt. If we want our container to feel like a truly isolated environment from the second it boots, we need our Go program to change the hostname automatically before we execute /bin/bash.
Luckily, Go has a function to change the hostname: syscall.Sethostname().
But here we run into a "chicken and egg" problem: where do we call that function?
If we call it before cmd.Run(), it executes on our host machine and changes our actual computer's name (bad!). If we call it after cmd.Run(), it'll only run after our bash shell has already exited (still bad!).
We need a middleman. We need our Go program to cross over into the new namespace, set the hostname, and then execute the /bin/bash command.
To do this, we are going to have our Go program run itself again as a child process.
Let's update our main.go file. We will update the main() and run() functions, and add a brand new child() function:
package main

import (
	"fmt"
	"os"
	"os/exec"
	"syscall"
)

func main() {
	switch os.Args[1] {
	case "run":
		run()
	case "child":
		child() // We added a new command here!
	default:
		panic("Invalid argument")
	}
}

func run() {
	fmt.Printf("Running %v \n", os.Args[2:])

	// /proc/self/exe is a special Linux file that points to the program
	// currently running. So, our program is calling itself!
	// We pass "child" as the first argument, followed by the rest of our commands.
	args := append([]string{"child"}, os.Args[2:]...)
	cmd := exec.Command("/proc/self/exe", args...)

	cmd.Stdin = os.Stdin
	cmd.Stdout = os.Stdout
	cmd.Stderr = os.Stderr

	cmd.SysProcAttr = &syscall.SysProcAttr{
		Cloneflags: syscall.CLONE_NEWUTS,
	}

	must(cmd.Run())
}

func child() {
	fmt.Printf("Running in new child process %v \n", os.Args[2:])

	// We are now inside the namespace! It is safe to change the hostname.
	must(syscall.Sethostname([]byte("container")))

	// Now we run the actual command the user requested (like /bin/bash)
	cmd := exec.Command(os.Args[2], os.Args[3:]...)
	cmd.Stdin = os.Stdin
	cmd.Stdout = os.Stdout
	cmd.Stderr = os.Stderr

	must(cmd.Run())
}

func must(err error) {
	if err != nil {
		panic(err)
	}
}
Let's break down the magic happening in exec.Command("/proc/self/exe", args...):
-
"/proc/self/exe": In Linux,/procis a special directory that holds information about all running processes. If you check what's in there (by runningls /proc) you will see a whole bunch of directories that have numbers as names. Each number is a PID and that directory contains information about the process with that PID./proc/self/exeis essentially a shortcut to the directory for the process that's currently running (in our casego run main.go). -
args...: We are taking the word"child"and appending the rest of the user's commands (like/bin/bash) to it. The...syntax in Go simply "unpacks" the list so it can be passed as individual arguments.
So, when you type go run main.go run /bin/bash, here is what happens:
-
The program starts, sees
"run", and triggers therun()function. -
The
run()function sets up the invisibility cloak (theNEWUTSnamespace). -
Inside that cloak, it runs itself again, but this time passing the command
"child". -
The program starts a second time, sees
"child", and triggers thechild()function. -
Because we are now safely inside the namespace, it changes the hostname to
containerand finally runs/bin/bash.
Let's test it. Run sudo go run main.go run /bin/bash:
$ sudo go run main.go run /bin/bash
Running [/bin/bash]
Running in new child process [/bin/bash]
root@container:/home/yechiel/docker-clone#
Look at that prompt! We've successfully isolated the hostname programmatically before bash loaded. You'll see both print statements execute, and if you type hostname in the new shell, it will say container.
We are still not in a proper container, though. If you run ls /, you will see all the files on your host machine, and you can even use cd .. to "escape" the directory entirely. Worse, if you were running this in a shared cloud environment, you would theoretically be able to see everyone else's files and running processes—a massive security risk! We need a way to lock our process down so it can't escape its designated environment.
In Part 2, we will tackle the final pieces of the container puzzle: jailing the file system, isolating the Process IDs (PIDs) so our container can only see itself, and stopping infinite loops from crashing the host computer using cgroups. Stay tuned!
Comments
More Blog
View allaiContext bankruptcy: The case for strategic forgetting for AI Agents
Most of us have seen a coding agent fail to complete a task we know it can do. We just don't...
J
James O'ReillygooglecloudParallel Compliance Engine: Drive-to-Sheets Multi-Agent Orchestration
When building Generative AI applications, developers often encounter a massive bottleneck: sequential...
A
Aryan IranidiscussIs It Ethical to Post and Ask About Circuits on Dev.to?
I’ve been thinking about sharing some electronic circuit posts on Dev.to — small circuits, DIY...
C
codebunny20agentsThe One-Click Exporter: AI Studio Antigravity, Probed to Its Limits
What nobody tells you about exporting your multi-agent prototype to a local workspace. Every...
L
leslysandraagenticarchitectGuarding the till while autonomous data agents do the digging
Autonomous agents are genuinely good at answering messy business questions. Give one an LLM and a set...
S
Sireesha PulipatiaiReturn on Attention: Why AI Code Reviews Are Wearing Us Out
PR volume went up, ticket quality didn't, and the gap got filled with LLMs on both sides of the review: bots reviewing, bots replying, bots occasionally arguing with bots about priorities that only existed in a teammate's head. Our CEO named the actual problem, and it's bigger than code review.
C
christineReady-made automations for this
Workflows from the Neura Market marketplace related to this Stable Diffusion resource
- Automate Your Website Building with N8N: Unsubscribe Workflowmake · $6.62 · Related topic
- Automate Google Sheets Triggered List Building Workflown8n · $9.53 · Related topic
- Building Your First WhatsApp AI Sales Chatbotn8n · $19.99 · Related topic
- Automatically Correct Wrong Shipping Addresses in Billbee Ordersn8n · $16.99 · Related topic