
Back to Blog kubernetes
 ai
ai googlecloud
 discuss
 agents
 agenticarchitect
 ai
ai
Minimalist EKS: The Easy Way
Joaquin Menchaca June 26, 2026
0 views
Amazon EKS manages the Kubernetes control plane, but you remain responsible for provisioning the...
Amazon EKS manages the Kubernetes control plane, but you remain responsible for provisioning the underlying AWS infrastructure, including networking, security groups, IAM roles, and worker nodes.
The eksctl command-line tool automates this entire process. Using a clean, declarative syntax, it handles the complex multi-step orchestration across different AWS services that would normally require extensive manual configuration.
In this guide, we will use eksctl to deploy both the VPC and EKS layers simultaneously, establishing a complete testing sandbox with a single command.
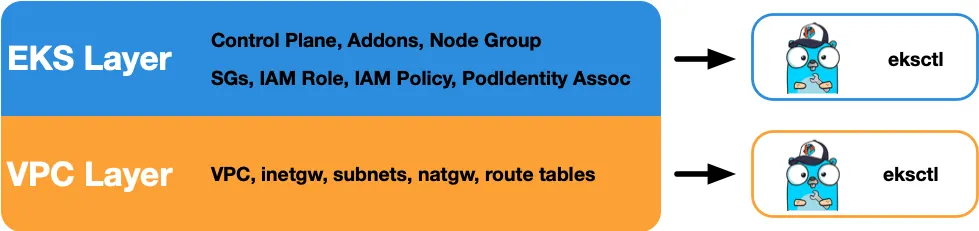
About eksctl
“eksctl is a command-line utility tool that automates and simplifies the process of creating, managing, and operating Amazon Elastic Kubernetes Service (Amazon EKS) clusters. Written in Go, eksctl provides a declarative syntax through YAML configurations and CLI commands to handle complex EKS cluster operations that would otherwise require multiple manual steps across different AWS services.” (source What is Eksctl?)
Tools
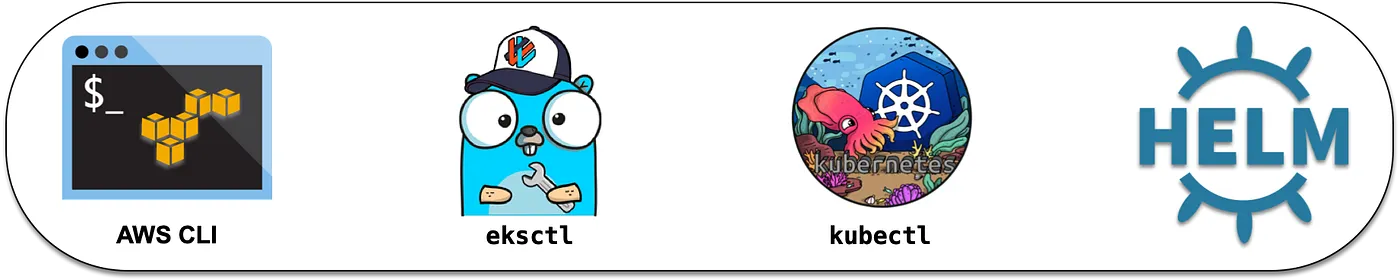
These are the tools used in this article.
- AWS CLI [
aws]: Interact with AWS services. - kubectl [
kubectl]: Manage Kubernetes clusters and workloads. - eksctl [
eksctl]: Provision Amazon EKS clusters and supporting infrastructure.
Optional:
- helm [
helm]: Install and manage Kubernetes applications.
Verifying Tool Versions
This guide has been tested with these tools:
aws: 2.35.7
kubectl: v1.36.2
helm: v4.2.0
eksctl: 0.227.0
You can verify your versions using a POSIX Shell, such as bash or zsh:
printf "aws: %s\nkubectl: %s\nhelm: %s\neksctl: %s\n" \
  "$(aws --version 2>&1 | awk -F'[/ ]' '{print $2}')" \
  "$(kubectl version --client | awk '/Client Version:/ {print $3}')" \
  "$(helm version --short | cut -d+ -f1)" \
  "$(eksctl version | cut -d- -f1)"
Prerequisite: AWS Profile
Before running the deployment script, you need an AWS CLI profile configured for an IAM identity with sufficient administrative permissions to provision EKS, IAM roles, and VPC infrastructure. NEVER use your AWS root account for local development.
📓 NOTE: Recent versions of the AWS CLI (v2.32.0+) support
aws login, which uses your AWS Management Console credentials to obtain temporary credentials. This eliminates the need to store long-lived static access keys on your machine.. (see Sign in through the AWS Command Line Interface)
1. Configure the Profile Setting
Run the following below to create a config profile block dynamically:
# Define your local variables
MY_ACCOUNT_ID="123456789012" # Replace with your real AWS Account ID
MY_REGION="us-east-2"

mkdir -p ~/.aws

# Append the login profile structure to your AWS config file
cat <<EOF >> ~/.aws/config
[profile myuser]
login_session = arn:aws:iam::$ACCOUNT_ID:user/myuser
region = $MY_REGION
EOF
2. Authenticate and Activate
Trigger the browser-based authentication handshake:
aws login --profile myuser
A browser window will open automatically, prompting you to complete your standard console sign-in. Once authorized, activate the profile in your active shell:
export AWS_PROFILE=myuser
3. Verify Your Active Session
Confirm that your terminal is actively communicating with AWS using your temporary token:
aws sts get-caller-identity
Upon successful connection, the AWS CLI will output your active identity details:
{
    "UserId": "AIDA0123456789EXAMPLE",
    "Account": "123456789012",
    "Arn": "arn:aws:iam::123456789012:user/myuser"
}
If the command returns your metadata, your authentication profile is active and ready to spin up your testing sandbox.
The Minimalist One-Command EKS Cluster
If you want the absolute fastest path to an operational Kubernetes sandbox, you can rely on the native CLI defaults of eksctl.
The following snippet isolates your configuration file, provisions a default public/private network topology, and configures the control plane using a single baseline execution:
This is the least amount of steps to create a Kubernetes cluster.
# Set your active profile and environment targets
export AWS_PROFILE="myuser"
export MY_CLUSTER_NAME="mycluster"
export MY_REGION="$(aws configure get region)"

# Direct your Kubernetes context to an isolated configuration file
mkdir -p $HOME/.kube/aws/
export KUBECONFIG="$HOME/.kube/aws/$MY_REGION.$MY_CLUSTER_NAME.yaml"

# Spin up the infrastructure stack
eksctl create cluster \
  --name $MY_CLUSTER_NAME \
  --region $MY_REGION \
  --version 1.36
🚨 IMPORTANT SECURITY NOTE: While this simple deployment is perfect for rapid testing, it relies on legacy permissions mapping. By default, it attaches the broad AWS VPC CNI network policy directly to the underlying worker node’s shared IAM Instance Profile role. This means any standard application pod running on the cluster technically inherits those raw EC2 network management capabilities at the hardware layer.
Once the creation process finishes, logging into your AWS Management Console will reveal your newly active cluster topology, complete with healthy control plane paths and managed compute node resources:
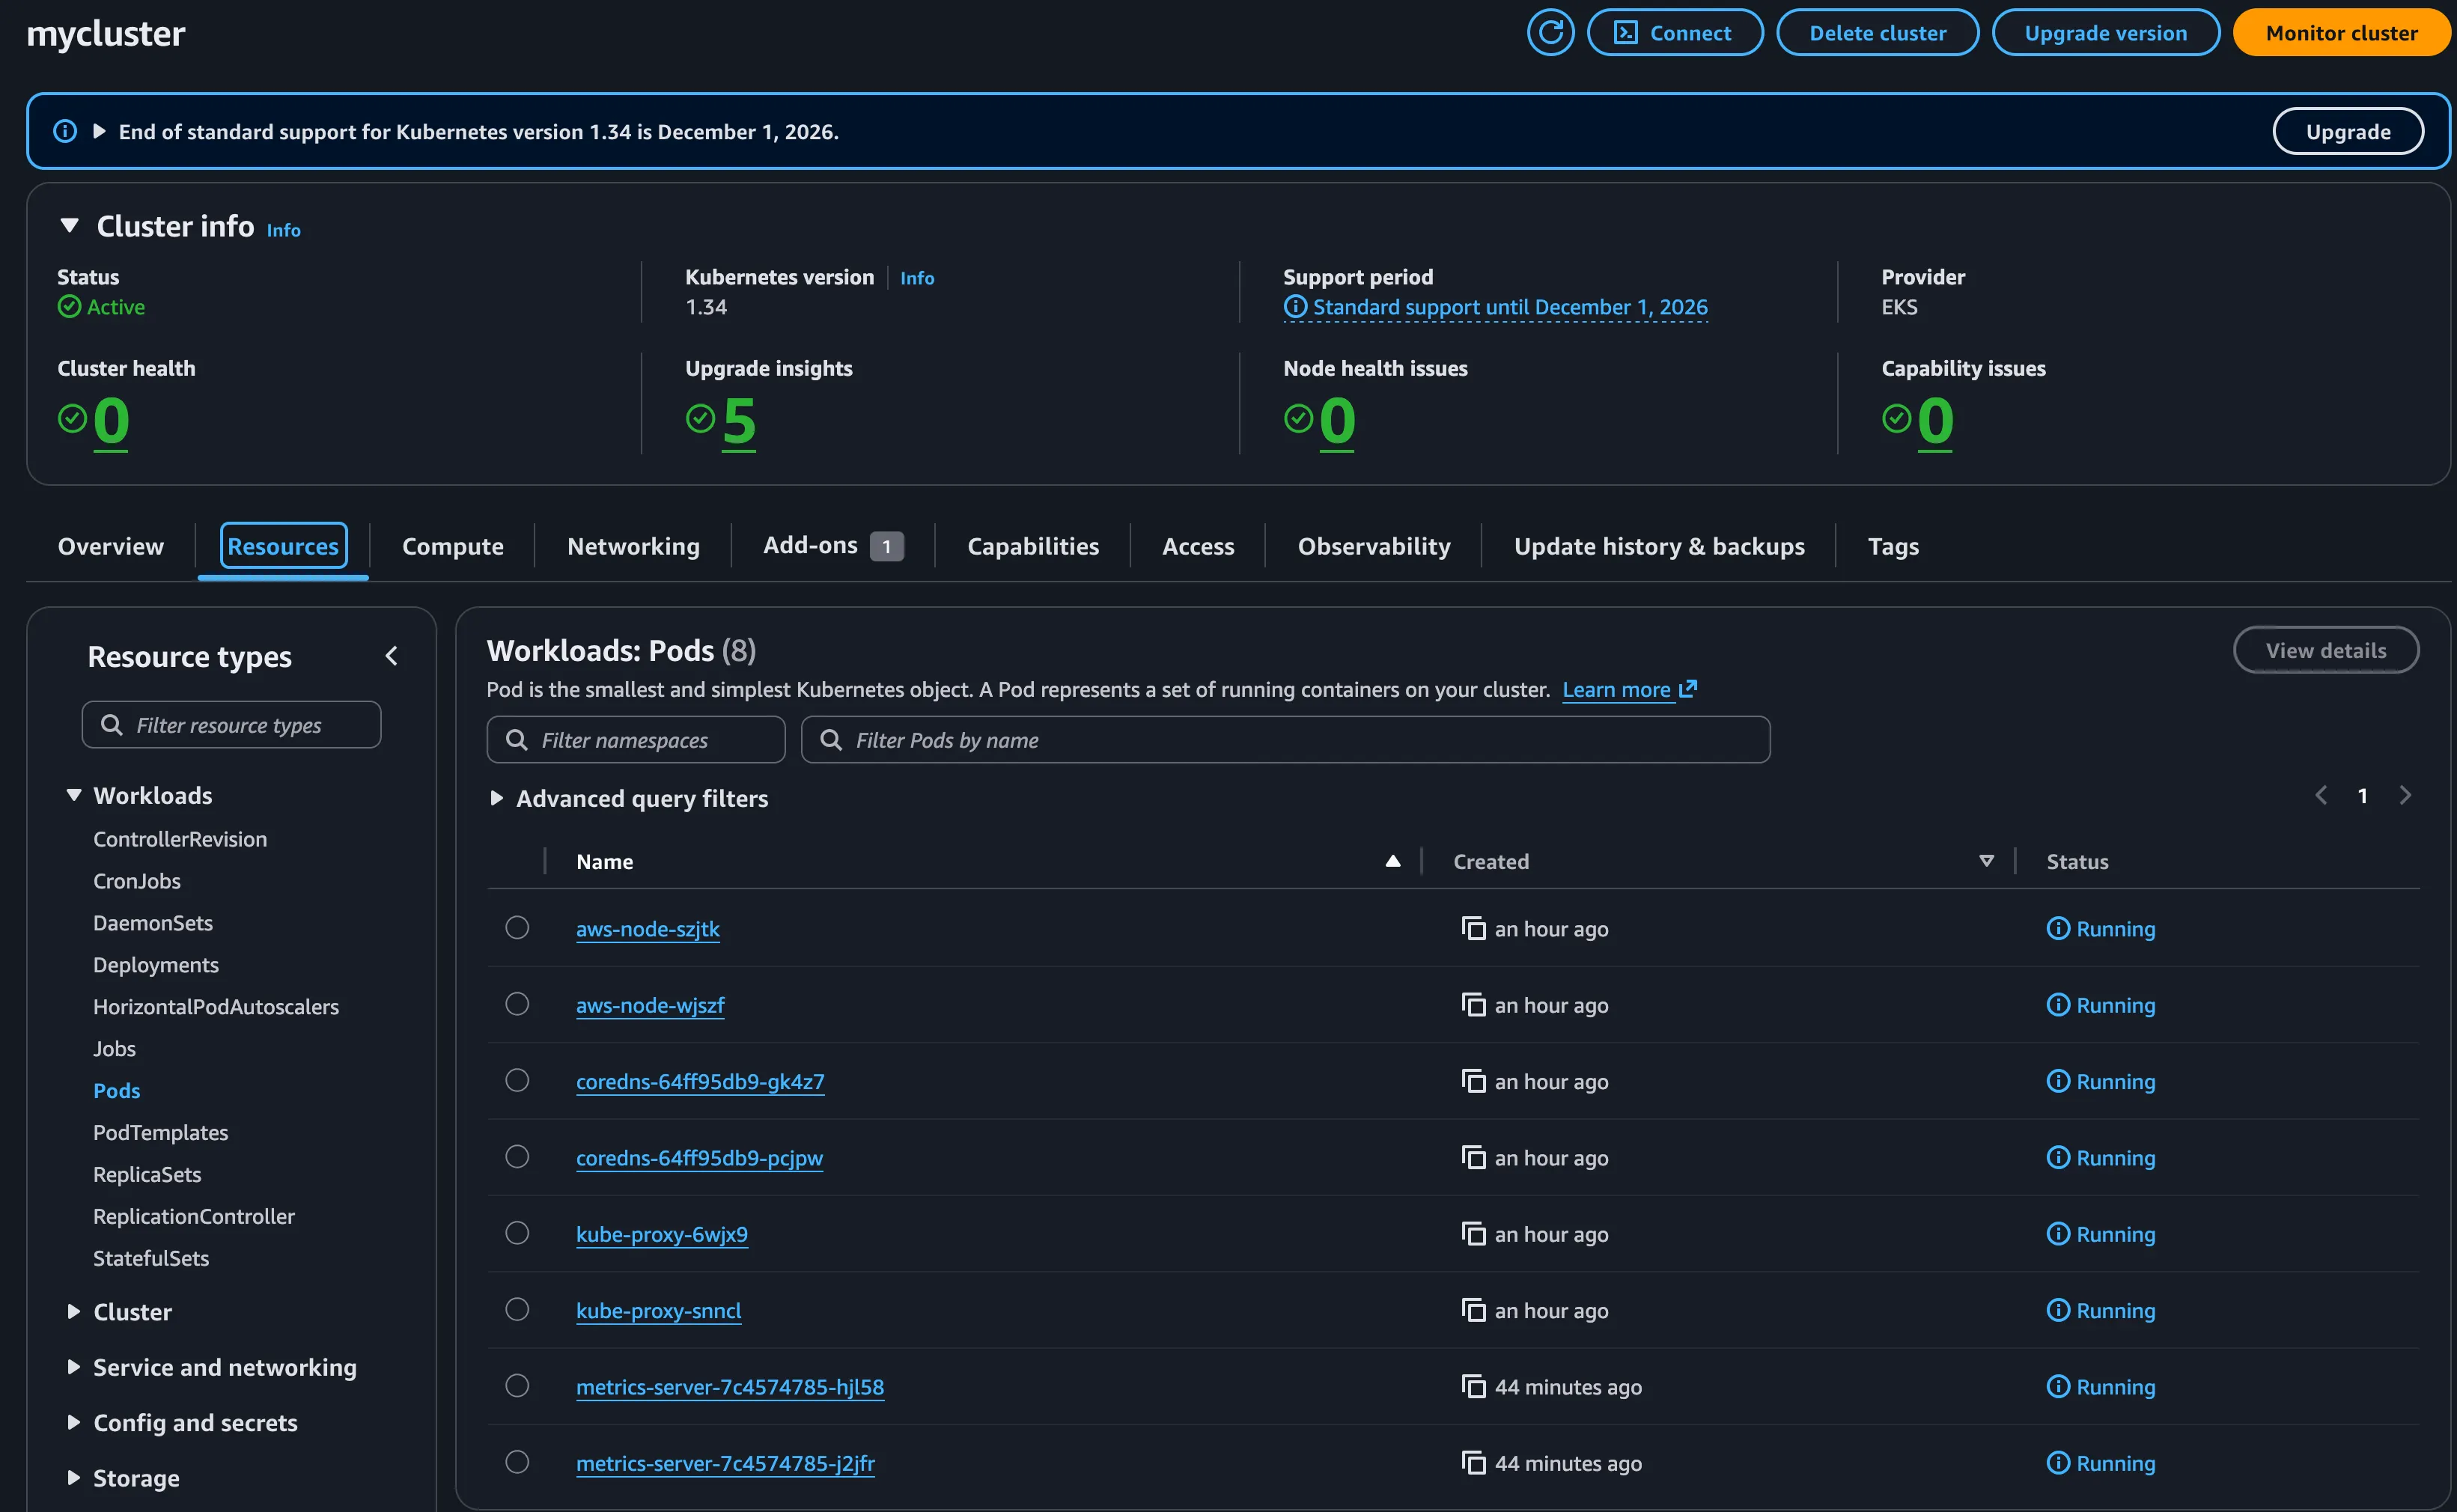
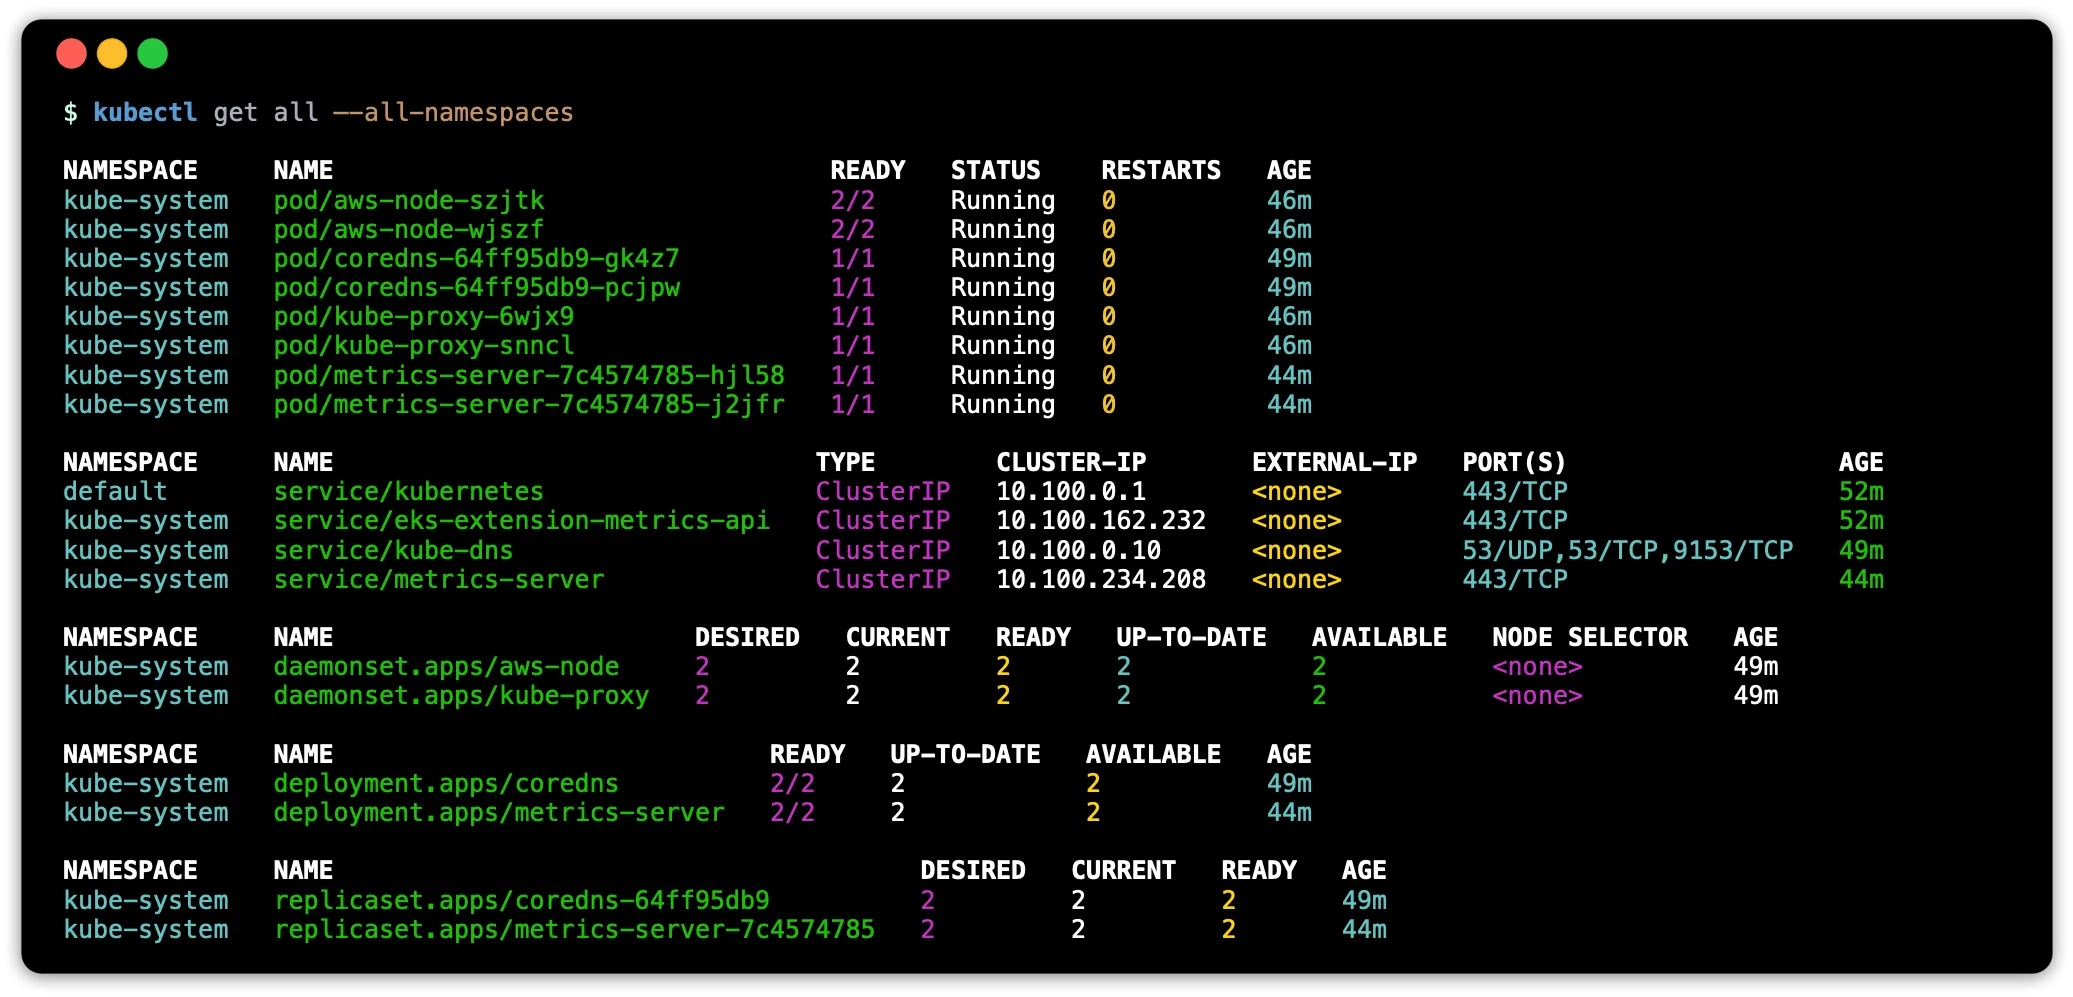
To verify the core system components running on your cluster, query all namespaces:
kubectl get all --all-namespaces
Running this command displays the baseline networking, metrics, and DNS workloads initialized on the cluster:
Deploying a Demo Nginx Application
With your cluster up and running, you can verify external traffic routing by deploying a simple Nginx application and exposing it via an AWS Classic Load Balancer (ELBv1):
# Create the Nginx deployment
kubectl create deployment demo-lb-app --image=nginx:alpine

# Expose the deployment as a Kubernetes LoadBalancer Service
kubectl expose deployment demo-lb-app --port=80 --type=LoadBalancer
To find the public AWS DNS name assigned to your load balancer, check the status of your services:
kubectl get services
This will display the external hostname provisioning in your AWS account:

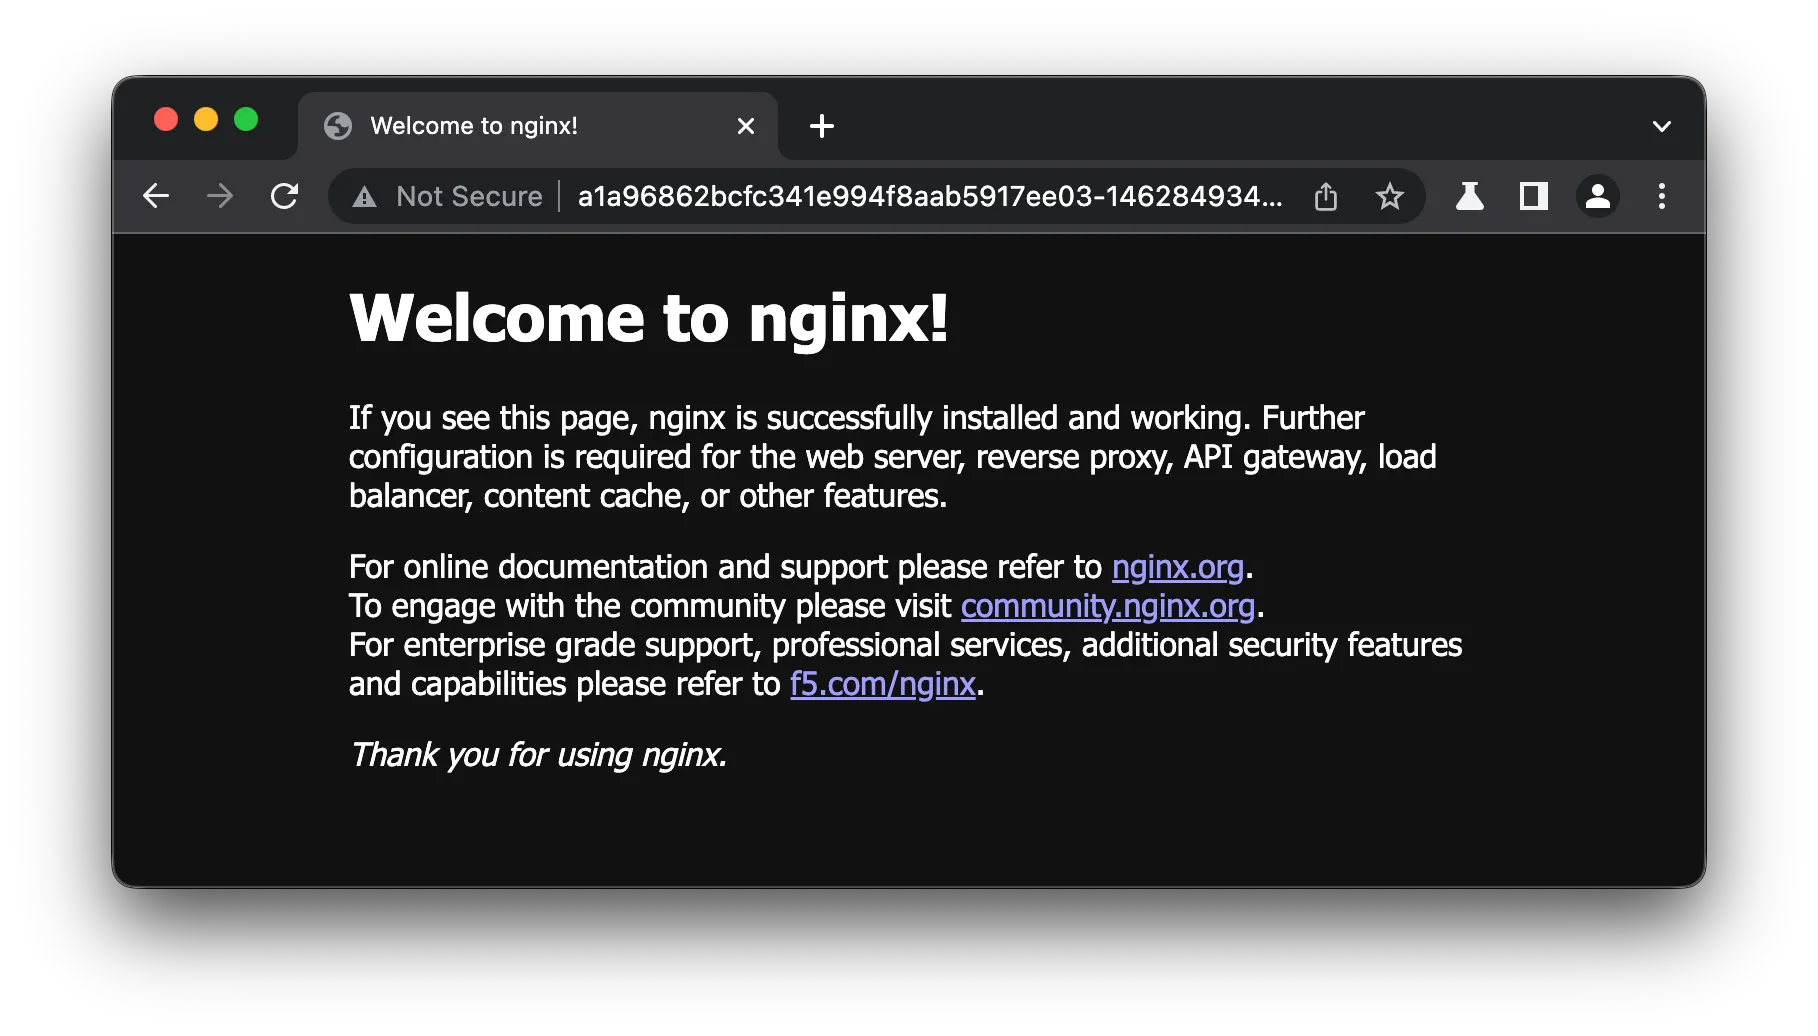
Copy the address from the EXTERNAL-IP field and paste it into a web browser to verify connectivity:
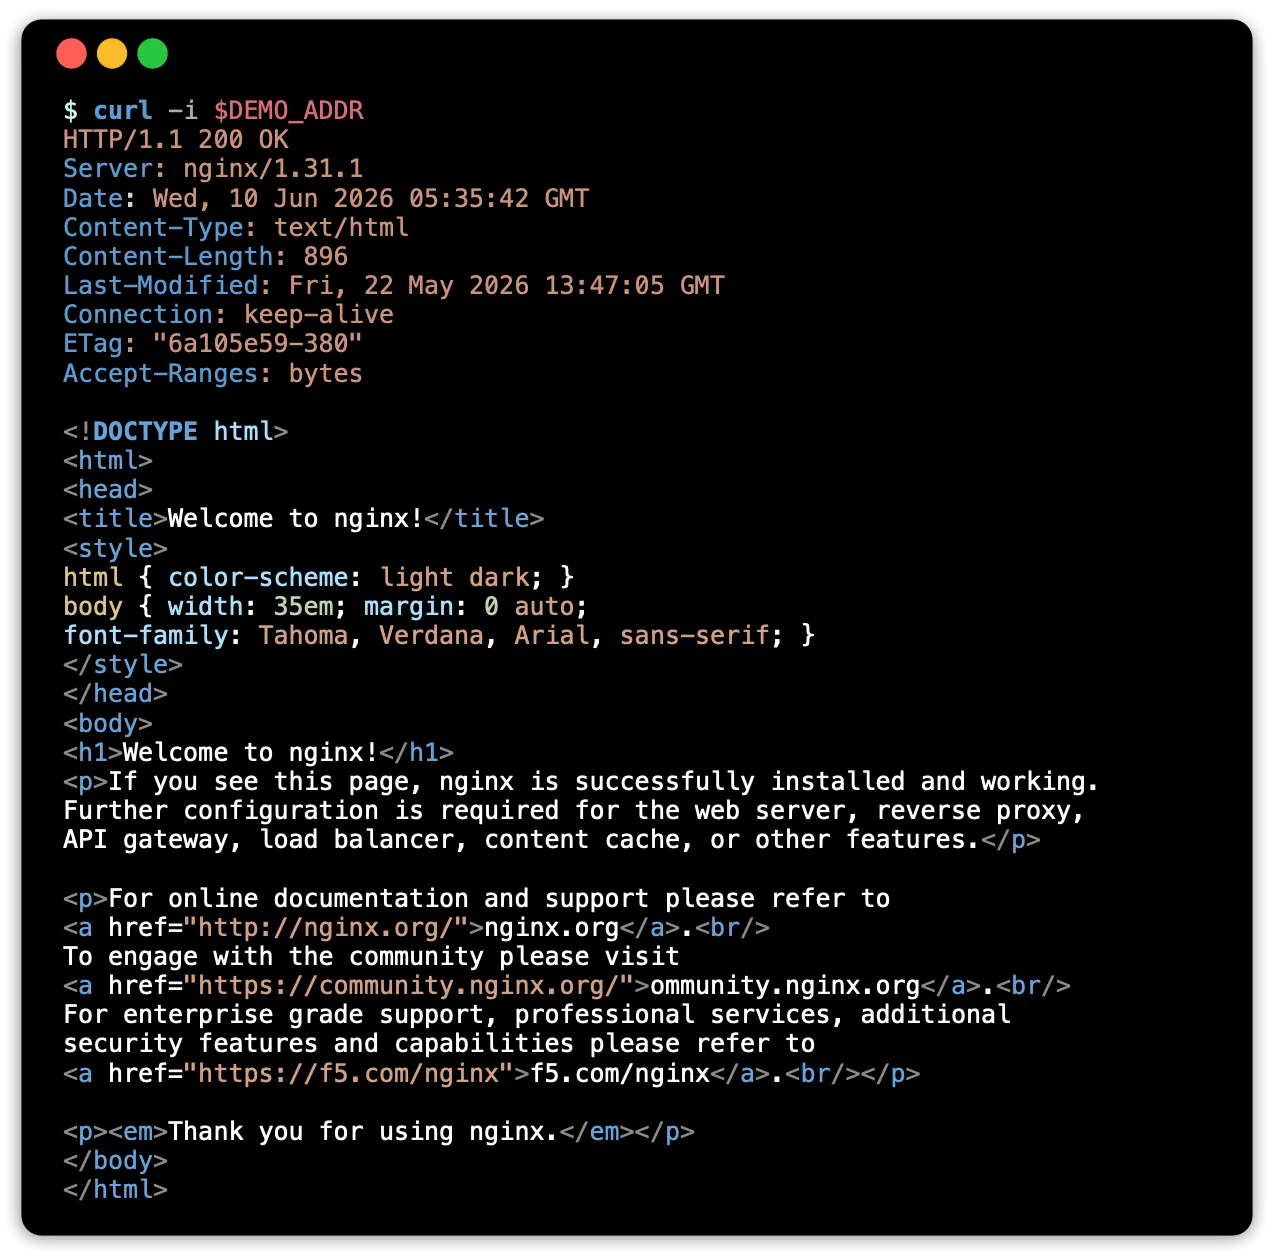
Alternatively, you can query the endpoint directly from your terminal using curl:
# Capture the hostname dynamically
DEMO_ADDR=$(kubectl get service demo-lb-app \
  -o jsonpath='{.status.loadBalancer.ingress[0].hostname}'
)

# Send an HTTP request to the load balancer
curl -i $DEMO_ADDR
The command returns the raw HTTP response headers and HTML body from the container:
Addendum: Free-Tier EKS Cluster
If you are strictly working within the AWS Free Tier, you can provision a minimal single-node cluster using t3.micro instances.
📓 NOTE: The t3.micro instances have severe memory and IP assignment limitations. To make a single micro node usable without running out of pod capacity instantly, you should pass the --zones flag to restrict network placement to two availability zones instead of three (saving NAT gateway overhead costs), and explicitly drop the node count to one:
# Set your environment variables
export AWS_PROFILE="myuser"
export MY_CLUSTER_NAME="mycluster"
export MY_REGION="$(aws configure get region)"

# Isolate your Kubernetes configuration file
mkdir -p $HOME/.kube/aws/
export KUBECONFIG="$HOME/.kube/aws/$MY_REGION.$MY_CLUSTER_NAME.yaml"

# Create a minimal, single-node free tier cluster
eksctl create cluster \
  --name $MY_CLUSTER_NAME \
  --region $MY_REGION \
  --zones "${MY_REGION}a,${MY_REGION}b" \
  --nodes 1 \
  --node-type "t3.micro"
⚠️ WARNING: This configuration is strictly for basic CLI testing and experimentation. Because a t3.micro only supports a maximum of 4 pods per network interface, default system components (like coredns, kube-proxy, and vpc-cni) will consume almost the entire available capacity, leaving minimal room to run custom applications.
Addendum: Robust Minimalist Cluster
For development or short-lived playground clusters, running standard eksctl create cluster command line defaults is perfectly adequate. However, for formal test and staging environments, you will want an infrastructure profile that is more robust, secure, and production-like:
- Strict Isolation via Pod Identity: Only the explicit vpc-cni driver is permitted to modify network configurations, locking out malicious or unprivileged application pods from tampering with AWS routing infrastructure.
- High Availability Architecture: Three managed worker nodes are automatically calculated and balanced across three distinct Availability Zones (AZs) to prevent single-datacenter outages from dropping your services.
- Native Persistent Storage: The AWS EBS CSI driver is packaged directly into the cluster lifecycle to easily back stateful application requirements.
- Modern Cost Optimization: Upgrades compute selections to the modern m6i.large general-purpose instance family (saving on price-per-performance relative to the older m5.large defaults).
Instead of managing an endless string of CLI arguments, you can capture these configurations cleanly inside a version-controlled file. Below is a one-touch command that dynamically interpolates your local environment variables into a ClusterConfig layout and pipes it directly into the eksctl builder:
export AWS_PROFILE="myuser"
export MY_CLUSTER_NAME="mycluster"
export MY_REGION="$(aws configure get region)"
export MY_EKS_VERSION="1.36"

eksctl create cluster --config-file /dev/stdin <<EOF
apiVersion: eksctl.io/v1alpha5
kind: ClusterConfig

metadata:
  name: $MY_CLUSTER_NAME
  region: $MY_REGION
  version: $MY_EKS_VERSION

managedNodeGroups:
  - name: ng-1
    instanceType: m6i.large
    desiredCapacity: 3
    minSize: 3
    maxSize: 3
    labels:
      alpha.eksctl.io/cluster-name: $MY_CLUSTER_NAME
      alpha.eksctl.io/nodegroup-name: ng-1
    tags:
      alpha.eksctl.io/nodegroup-name: ng-1
      alpha.eksctl.io/nodegroup-type: managed

iam:
  withOIDC: true

addonsConfig:
  autoApplyPodIdentityAssociations: true

addons:
  - name: vpc-cni
    useDefaultPodIdentityAssociations: true
  - name: aws-ebs-csi-driver
    useDefaultPodIdentityAssociations: true
  - name: eks-pod-identity-agent
EOF
Addendum: Optional Enhancements
The default minimalist cluster is sufficient for basic experimentation. If you choose not to use the automated ClusterConfig heredoc template from the earlier addendum, you can manually install these individual components via the CLI to support real-world application workloads:
1. IAM OIDC Provider
If your specific testing tools require legacy IAM Roles for Service Accounts (IRSA) rather than the modern EKS Pod Identity agent, you must manually associate an OpenID Connect (OIDC) identity provider with your cluster:
eksctl utils associate-iam-oidc-provider \
  --cluster $MY_CLUSTER_NAME \
  --region $MY_REGION \
  --approve
2. Pod Identity Agent Addon
The Pod Identity Agent enables Kubernetes service accounts to access AWS resources using EKS Pod Identity.
eksctl create addon \
  --cluster $MY_CLUSTER_NAME \
  --region $MY_REGION \
  --name eks-pod-identity-agent
3. Amazon EBS CSI Driver Addon
The EBS CSI Driver allows your cluster to dynamically provision and manage lifecycle storage volumes backed by Amazon EBS.
eksctl create addon \
  --cluster $MY_CLUSTER_NAME \
  --region $MY_REGION \
  --name aws-ebs-csi-driver
Cleanup
To avoid recurring AWS charges after you finish experimenting with your sandbox, delete all provisioned resources using the following command:
eksctl delete cluster --name $MY_CLUSTER_NAME --region $MY_REGION
This single command automatically tears down both the EKS compute resources and the underlying VPC network stack.
Comments
More Blog
View allaiContext bankruptcy: The case for strategic forgetting for AI Agents
Most of us have seen a coding agent fail to complete a task we know it can do. We just don't...
J
James O'ReillygooglecloudParallel Compliance Engine: Drive-to-Sheets Multi-Agent Orchestration
When building Generative AI applications, developers often encounter a massive bottleneck: sequential...
A
Aryan IranidiscussIs It Ethical to Post and Ask About Circuits on Dev.to?
I’ve been thinking about sharing some electronic circuit posts on Dev.to — small circuits, DIY...
C
codebunny20agentsThe One-Click Exporter: AI Studio Antigravity, Probed to Its Limits
What nobody tells you about exporting your multi-agent prototype to a local workspace. Every...
L
leslysandraagenticarchitectGuarding the till while autonomous data agents do the digging
Autonomous agents are genuinely good at answering messy business questions. Give one an LLM and a set...
S
Sireesha PulipatiaiReturn on Attention: Why AI Code Reviews Are Wearing Us Out
PR volume went up, ticket quality didn't, and the gap got filled with LLMs on both sides of the review: bots reviewing, bots replying, bots occasionally arguing with bots about priorities that only existed in a teammate's head. Our CEO named the actual problem, and it's bigger than code review.
C
christineReady-made automations for this
Workflows from the Neura Market marketplace related to this Stable Diffusion resource
- Kubernetes Management with GPT-4o and MCP Integrationn8n · $24.99 · Related topic
- Kubernetes RCA & Alerting: Gemini, Loki, Prometheus, Slackn8n · $24.99 · Related topic
- Kubernetes Management with NL using GPT-4o & MCP Toolsn8n · $24.99 · Related topic
- Conversational Kubernetes Management with GPT-4o & MCPn8n · $24.99 · Related topic