Build a Web-Browsing AI Agent with Playwright and GPT
Prerequisites
- ✓ Node.js 18+ installed
- ✓ OpenAI account (any tier) or Claude Code access
- ✓ Basic command line familiarity
- ✓ Code editor (VS Code recommended)
In this tutorial, you will build an AI agent that uses Playwright to control a web browser and GPT (via ChatGPT or Claude Code) to decide what actions to take. You will create a system that can navigate websites, fill forms, scrape data, and even fix its own bugs. The entire setup takes about 30 minutes and requires no prior experience with browser automation.
Prerequisites
- A computer running macOS, Windows, or Linux with Node.js 18+ installed
- An OpenAI account with access to ChatGPT (any tier works, including free) or access to Claude Code
- Basic familiarity with the command line (opening a terminal, running commands)
- A code editor (VS Code recommended)
- A target website or web app you want to automate (for testing)
Step 1: Install Playwright and Its CLI
Playwright is a browser automation library maintained by Microsoft. It can control Chromium, Firefox, and WebKit browsers programmatically. The CLI (command-line interface) lets you run Playwright scripts without writing a full Node.js application.
Open your terminal and run the following command to install Playwright globally:
npm install -g playwright
After the installation finishes, verify it worked by checking the version:
playwright --version
Expected output: a version number like 1.52.0 (the exact number may differ).
Now install the browser binaries that Playwright needs. This downloads Chromium, Firefox, and WebKit:
npx playwright install
This command may take a few minutes. You will see progress bars for each browser. When it finishes, you should see a message like "Done. 3 browsers installed."
If you only need one browser (Chromium is the most common), you can install just that:
npx playwright install chromium
Why this matters: Playwright needs actual browser binaries to run. Without this step, your scripts will fail with an error like "Browser not found."
Step 2: Create a Basic Playwright Script
Before connecting Playwright to an AI agent, test that Playwright works on its own. Create a new file called test.js in an empty directory:
const { chromium } = require('playwright');

(async () => {
  const browser = await chromium.launch({ headless: false });
  const page = await browser.newPage();
  await page.goto('https://example.com');
  console.log(await page.title());
  await browser.close();
})();
Run it with:
node test.js
Expected output: Example Domain printed in the terminal. A browser window should open briefly and close.
If you see an error like Cannot find module 'playwright', make sure you installed it globally and are running the script from the correct directory. You can also install it locally in the project:
npm init -y
npm install playwright
Step 3: Connect Playwright to an AI Agent (ChatGPT or Claude Code)
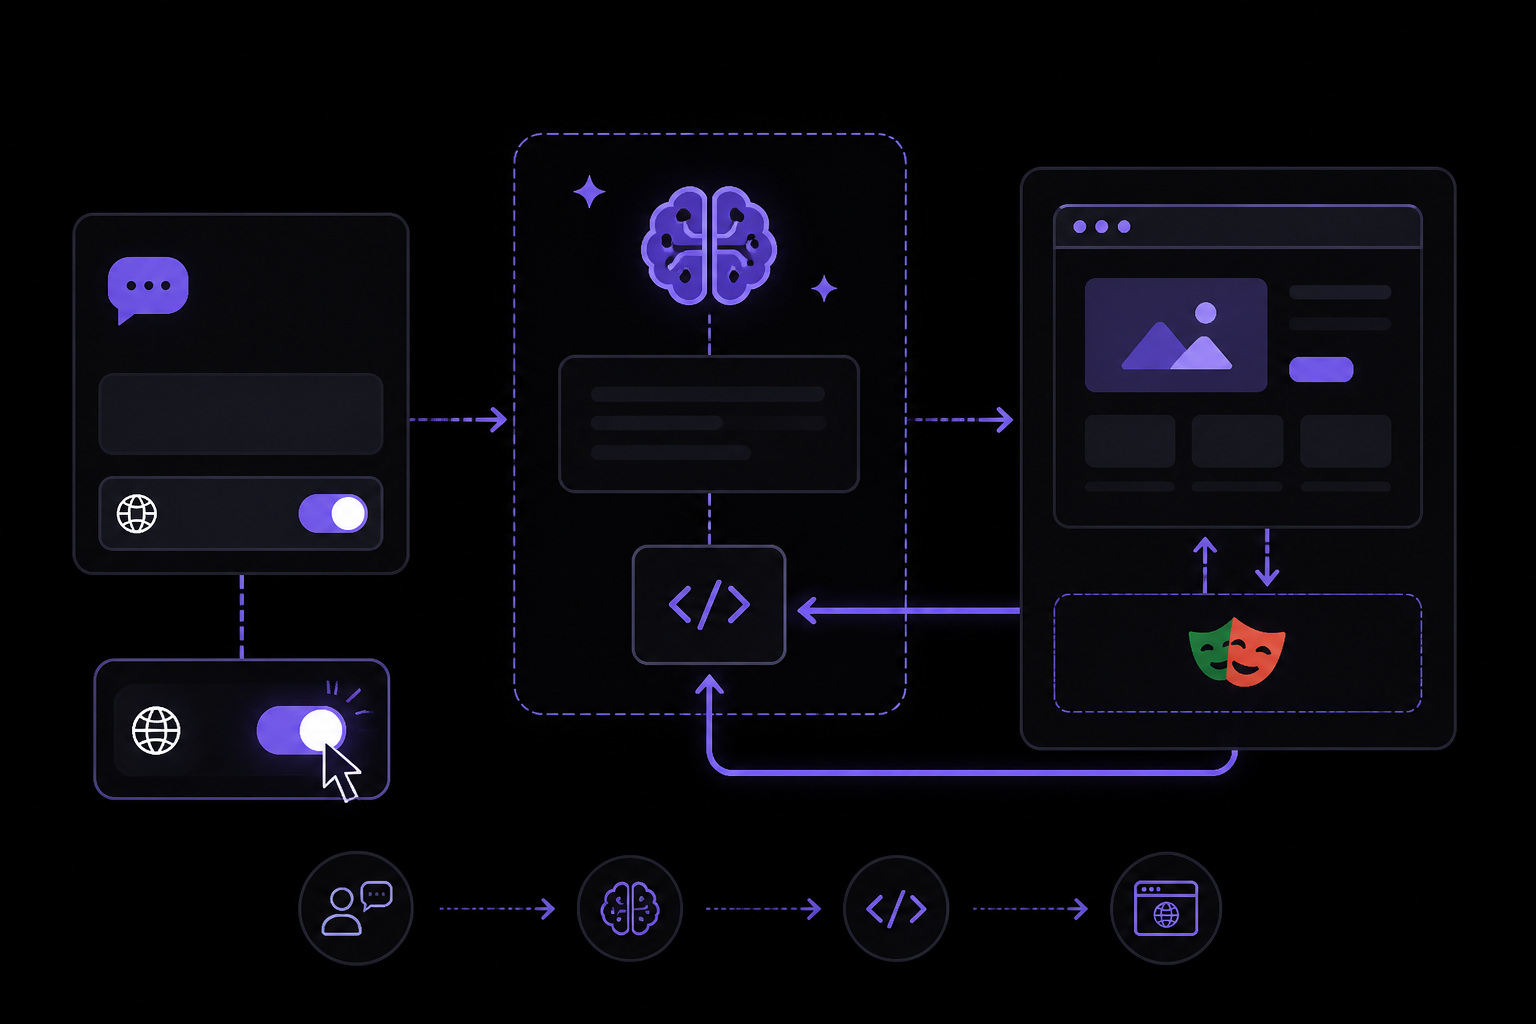
Now you will give an AI model the ability to call Playwright commands. The approach differs slightly depending on which AI tool you use.
Option A: Using ChatGPT with the cloud browser feature
OpenAI provides a built-in "cloud browser" feature in ChatGPT. According to the official documentation, this lets ChatGPT "complete supported web tasks in a remote browser." To use it:
- Open ChatGPT in your web browser or desktop app.
- In the chat input area, look for a button or toggle labeled "Browse" or "Use browser." The exact location depends on your ChatGPT version.
- Click it to enable the browser tool.
- Then ask ChatGPT something like "Go to example.com and tell me what the page title is."
ChatGPT will use its built-in browser to navigate the web and return results. This is the simplest method but gives you less control than writing your own Playwright scripts.
Option B: Using Claude Code with Playwright CLI (from the video source)
The YouTube tutorial demonstrates a more powerful approach: connecting Playwright CLI to Claude Code. This lets you run custom Playwright scripts that Claude Code writes and executes.
First, install Claude Code if you haven't already. The video creator uses a tool called "Claude Code" which is available through Anthropic. Follow their installation instructions.
Then, create a Playwright script that Claude Code can call. The video shows this pattern:
const { chromium } = require('playwright');
const fs = require('fs');

(async () => {
  const browser = await chromium.launch({ headless: false });
  const context = await browser.newContext();
  const page = await context.newPage();

  // The AI agent will fill in the URL and actions
  const url = process.argv[2];
  if (!url) {
    console.error('Please provide a URL as an argument');
    process.exit(1);
  }

  await page.goto(url, { waitUntil: 'networkidle' });

  // Take a screenshot for the AI to analyze
  await page.screenshot({ path: 'screenshot.png', fullPage: true });

  // Get the page content
  const content = await page.content();
  fs.writeFileSync('page_content.html', content);

  console.log('Page loaded successfully');
  console.log('Title:', await page.title());

  await browser.close();
})();
Save this as browser-agent.js. You can run it manually first to verify it works:
node browser-agent.js https://example.com
Expected output: Page loaded successfully followed by Title: Example Domain. A screenshot file screenshot.png and an HTML file page_content.html should appear in your directory.
Step 4: Build a Script That Can Follow AI Instructions
The real power comes when the AI agent can tell Playwright what to do dynamically. The video source shows how to create a script that accepts a JSON file of instructions from the AI.
Create a file called agent-executor.js:
const { chromium } = require('playwright');
const fs = require('fs');

(async () => {
  const instructionsPath = process.argv[2];
  if (!instructionsPath) {
    console.error('Please provide a path to instructions JSON');
    process.exit(1);
  }

  const instructions = JSON.parse(fs.readFileSync(instructionsPath, 'utf8'));

  const browser = await chromium.launch({ headless: false });
  const context = await browser.newContext();
  const page = await context.newPage();

  for (const step of instructions.steps) {
    console.log(`Executing: ${step.action} on ${step.selector || 'page'}`);

    switch (step.action) {
      case 'navigate':
        await page.goto(step.url, { waitUntil: 'networkidle' });
        break;
      case 'click':
        await page.click(step.selector);
        break;
      case 'type':
        await page.fill(step.selector, step.value);
        break;
      case 'screenshot':
        await page.screenshot({ path: step.filename || 'screenshot.png', fullPage: true });
        break;
      case 'extract':
        const elements = await page.$$eval(step.selector, (els) =>
          els.map((el) => el.textContent.trim())
        );
        fs.writeFileSync(step.outputFile || 'extracted.json', JSON.stringify(elements, null, 2));
        break;
      default:
        console.log(`Unknown action: ${step.action}`);
    }
  }

  console.log('All steps completed');
  await browser.close();
})();
This script reads a JSON file that contains an array of steps. Each step has an action, a selector (CSS selector), and optional values. The AI agent generates this JSON file, then calls this script to execute it.
Create a sample instructions file instructions.json:
{
  "steps": [
    {
      "action": "navigate",
      "url": "https://example.com"
    },
    {
      "action": "screenshot",
      "filename": "example.png"
    },
    {
      "action": "extract",
      "selector": "h1",
      "outputFile": "headings.json"
    }
  ]
}
Run it:
node agent-executor.js instructions.json
Expected output: Executing: navigate on page, Executing: screenshot on page, Executing: extract on h1, then All steps completed. Check that example.png and headings.json were created.
Step 5: Use the AI Agent to Generate Instructions
Now you need to prompt the AI to generate the instructions JSON. The YouTube source shows how to do this with Claude Code, but the same approach works with ChatGPT.
Open ChatGPT and give it a prompt like this:
"I have a Playwright automation script that reads a JSON file of instructions. The JSON format is:
{
  "steps": [
    {
      "action": "navigate|click|type|screenshot|extract",
      "url": "...",
      "selector": "...",
      "value": "...",
      "filename": "...",
      "outputFile": "..."
    }
  ]
}
Generate instructions to go to https://example.com, take a screenshot, and extract all h1 text."
ChatGPT will return a JSON object. Copy it into instructions.json and run the executor script.
For a more automated workflow, the video source shows how to pipe the AI's output directly into the script. With Claude Code, you can use a command like:
claude "Generate Playwright instructions to scrape all dentist names and phone numbers from a Google search for 'dentist in Austin TX' and save them to dentists.json" | node agent-executor.js
This approach works because Claude Code can write and execute code directly. With ChatGPT, you would need to manually copy the output.
Step 6: Handle Logged-In Browser Sessions
Many useful automations require being logged into a website. The video source demonstrates how to save and reuse browser sessions so you don't have to log in every time.
Modify your agent-executor.js to support session persistence:
const { chromium } = require('playwright');
const fs = require('fs');
const path = require('path');

(async () => {
  const instructionsPath = process.argv[2];
  if (!instructionsPath) {
    console.error('Please provide a path to instructions JSON');
    process.exit(1);
  }

  const instructions = JSON.parse(fs.readFileSync(instructionsPath, 'utf8'));

  const browser = await chromium.launch({ headless: false });

  // Try to load saved session
  let context;
  const sessionPath = path.join(__dirname, 'session.json');
  if (fs.existsSync(sessionPath)) {
    context = await browser.newContext({ storageState: sessionPath });
    console.log('Loaded saved session');
  } else {
    context = await browser.newContext();
    console.log('Starting new session');
  }

  const page = await context.newPage();

  for (const step of instructions.steps) {
    console.log(`Executing: ${step.action} on ${step.selector || 'page'}`);

    switch (step.action) {
      case 'navigate':
        await page.goto(step.url, { waitUntil: 'networkidle' });
        break;
      case 'click':
        await page.click(step.selector);
        break;
      case 'type':
        await page.fill(step.selector, step.value);
        break;
      case 'screenshot':
        await page.screenshot({ path: step.filename || 'screenshot.png', fullPage: true });
        break;
      case 'extract':
        const elements = await page.$$eval(step.selector, (els) =>
          els.map((el) => el.textContent.trim())
        );
        fs.writeFileSync(step.outputFile || 'extracted.json', JSON.stringify(elements, null, 2));
        break;
      case 'saveSession':
        await context.storageState({ path: sessionPath });
        console.log('Session saved');
        break;
      case 'wait':
        await page.waitForTimeout(step.milliseconds || 1000);
        break;
      default:
        console.log(`Unknown action: ${step.action}`);
    }
  }

  console.log('All steps completed');
  await browser.close();
})();
To create a saved session, first log in manually. Create an instructions file that navigates to the login page, fills in credentials, and saves the session:
{
  "steps": [
    {
      "action": "navigate",
      "url": "https://your-target-site.com/login"
    },
    {
      "action": "wait",
      "milliseconds": 2000
    },
    {
      "action": "type",
      "selector": "#username",
      "value": "your-username"
    },
    {
      "action": "type",
      "selector": "#password",
      "value": "your-password"
    },
    {
      "action": "click",
      "selector": "button[type='submit']"
    },
    {
      "action": "wait",
      "milliseconds": 3000
    },
    {
      "action": "saveSession"
    }
  ]
}
Run this once to create session.json. After that, any script that uses the same session file will start already logged in.
Security warning: The session file contains cookies and tokens that grant access to your account. Never commit it to a public repository. Add session.json to your .gitignore file.
Step 7: Chain Scripts into Scheduled Tasks
The video source demonstrates how to chain multiple Playwright scripts together and run them on a schedule. This turns your AI agent into a fully autonomous system.
Create a master script called orchestrator.js that runs multiple instruction sets:
const { exec } = require('child_process');
const path = require('path');

const tasks = [
  { instructions: 'check-email.json', name: 'Check Email' },
  { instructions: 'scrape-data.json', name: 'Scrape Data' },
  { instructions: 'send-report.json', name: 'Send Report' },
];

async function runTask(task) {
  console.log(`Starting task: ${task.name}`);
  return new Promise((resolve, reject) => {
    const child = exec(
      `node agent-executor.js ${path.join(__dirname, task.instructions)}`,
      (error, stdout, stderr) => {
        if (error) {
          console.error(`Task ${task.name} failed:`, error.message);
          reject(error);
        } else {
          console.log(`Task ${task.name} output:`, stdout);
          resolve(stdout);
        }
      }
    );
  });
}

(async () => {
  for (const task of tasks) {
    try {
      await runTask(task);
    } catch (err) {
      console.error(`Task ${task.name} encountered an error, continuing...`);
    }
  }
  console.log('All tasks completed');
})();
To schedule this to run automatically, use your operating system's task scheduler:
On macOS/Linux (cron):
Open your crontab:
crontab -e
Add a line to run the orchestrator every hour:
0 * * * * /usr/bin/node /path/to/orchestrator.js >> /path/to/log.txt 2>&1
On Windows (Task Scheduler):
- Open Task Scheduler.
- Click "Create Basic Task."
- Set the trigger (e.g., daily at 9 AM).
- Set the action to "Start a program."
- Browse to
node.exe(usually inC:\Program Files\nodejs\). - Add arguments:
C:\path\to\orchestrator.js.
The video source also mentions using a tool called "AIS Agent" for scheduling. This is a third-party service that can run scripts on a schedule and send notifications. If you want a cloud-based scheduler, services like cron-job.org, EasyCron, or GitHub Actions can run your script on a schedule.
Step 8: Implement Self-Healing (QA Testing Use Case)
One of the most impressive demonstrations in the video source is having the AI agent test a web app and fix its own bugs. This requires a feedback loop where the AI sees the result of its actions and adjusts.
Create a script that tests a web page and reports issues:
const { chromium } = require('playwright');
const fs = require('fs');

(async () => {
  const url = process.argv[2] || 'http://localhost:3000';

  const browser = await chromium.launch({ headless: true });
  const page = await browser.newPage();

  const issues = [];

  // Navigate to the page
  await page.goto(url, { waitUntil: 'networkidle' });

  // Check for console errors
  page.on('console', (msg) => {
    if (msg.type() === 'error') {
      issues.push({ type: 'console error', text: msg.text() });
    }
  });

  // Check for broken images
  const images = await page.$$('img');
  for (const img of images) {
    const src = await img.getAttribute('src');
    if (src) {
      const response = await page.evaluate(async (src) => {
        const res = await fetch(src);
        return res.status;
      }, src);
      if (response >= 400) {
        issues.push({ type: 'broken image', src });
      }
    }
  }

  // Check for missing alt text
  const imagesWithoutAlt = await page.$$('img:not([alt])');
  if (imagesWithoutAlt.length > 0) {
    issues.push({ type: 'missing alt text', count: imagesWithoutAlt.length });
  }

  // Take a screenshot
  await page.screenshot({ path: 'qa-screenshot.png', fullPage: true });

  // Save issues to JSON
  fs.writeFileSync('qa-issues.json', JSON.stringify(issues, null, 2));

  console.log(`Found ${issues.length} issues`);
  console.log(JSON.stringify(issues, null, 2));

  await browser.close();
})();
Save this as qa-tester.js. Run it against your web app:
node qa-tester.js https://your-app.com
The script outputs a JSON file with all issues found. You can then feed this JSON to ChatGPT with a prompt like:
"Here are the QA issues found on my web app. Generate a fix for each one:" followed by the JSON content.
The AI will suggest code changes. You can then apply those changes manually or, if you have a more advanced setup, have the AI write a Playwright script that applies the fixes.
Verifying It Works
After completing all steps, verify your setup with an end-to-end test:
- Create an instructions file that performs a complete workflow: navigate to a site, log in (using a saved session), extract data, and save a screenshot.
- Run the executor script.
- Check that the output files (screenshot, extracted data) exist and contain the expected content.
- If you set up scheduling, wait for the scheduled time and check the log file for successful execution.
The video source demonstrates a real example: scraping dentist contact information from Google search results. To replicate this, create an instructions file like:
{
  "steps": [
    {
      "action": "navigate",
      "url": "https://www.google.com/search?q=dentist+in+Austin+TX"
    },
    {
      "action": "wait",
      "milliseconds": 2000
    },
    {
      "action": "extract",
      "selector": "div[data-local-attribute='d3ad']",
      "outputFile": "dentists.json"
    },
    {
      "action": "screenshot",
      "filename": "search-results.png"
    }
  ]
}
Run it and check dentists.json for the scraped data.
Common Problems
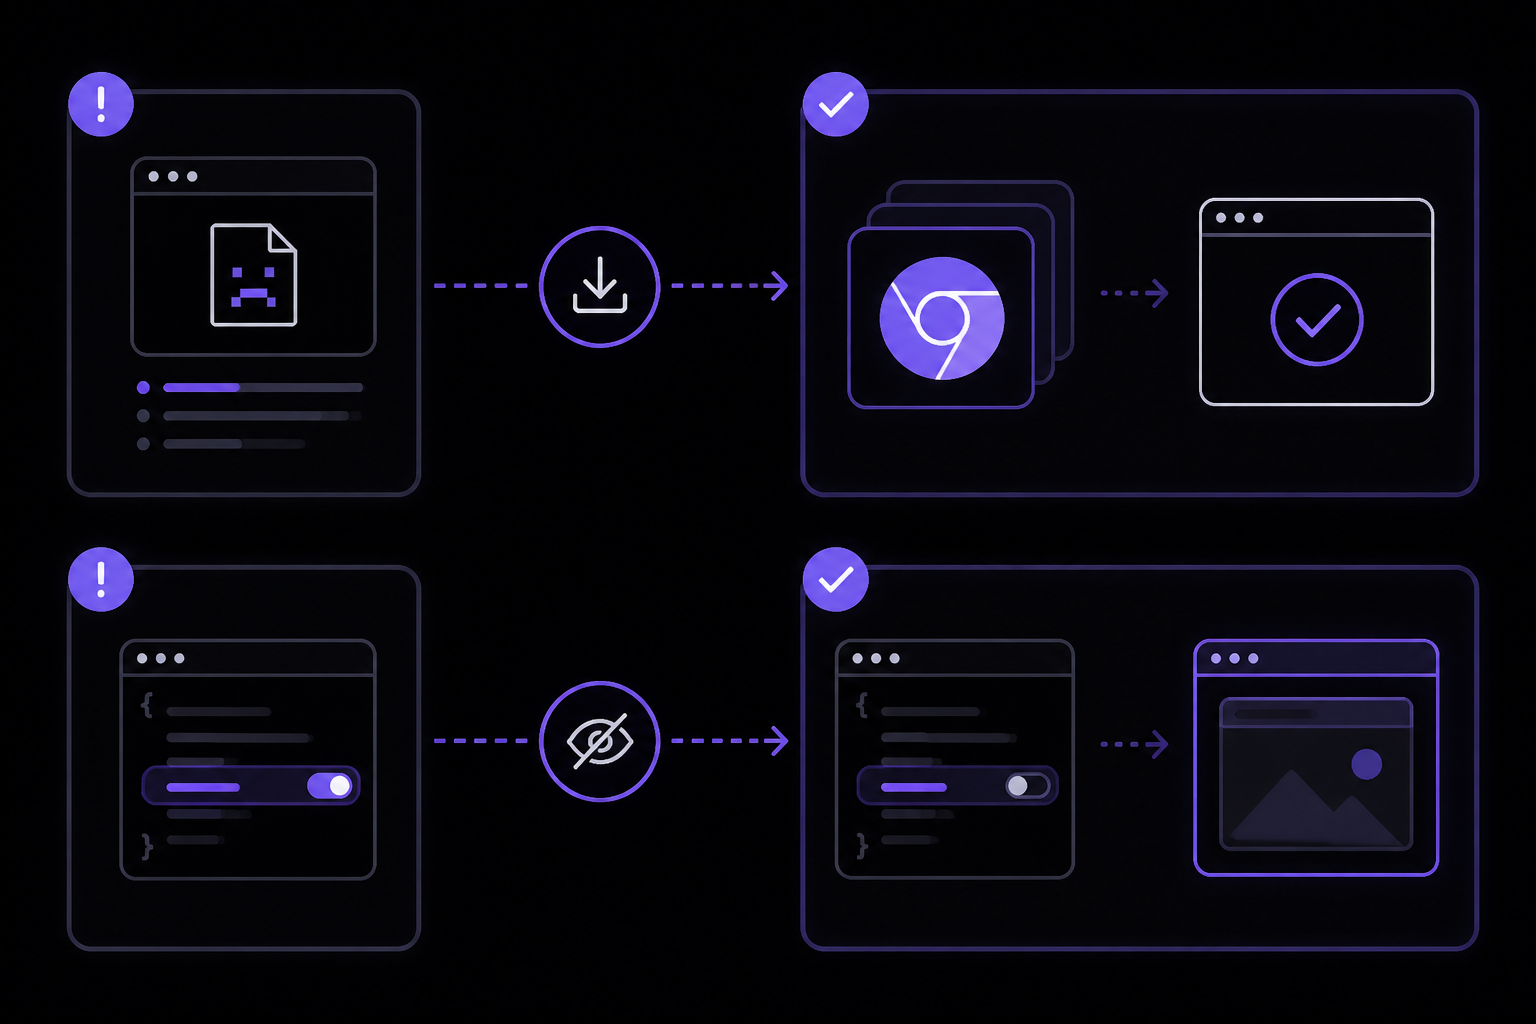
Playwright fails to launch browser
Error message: browserType.launch: Executable doesn't exist at ...
Fix: Run npx playwright install chromium to download the browser binaries. If you already ran this, try running it again with the --force flag: npx playwright install --force chromium.
Script runs but no browser window appears
Cause: The headless: true option hides the browser window. This is normal for automated scripts but confusing when you're testing.
Fix: Change headless: true to headless: false in your launch options. The video source uses headless: false throughout to show what's happening.
Session file not loading
Error message: browser.newContext: storageState option: expected an object
Fix: Make sure the session file exists and is valid JSON. If you haven't created one yet, the script should fall back to a new session. Check that the file path is correct.
Selectors not matching
Problem: The AI agent generates CSS selectors that don't match any elements on the page.
Fix: Ask the AI to use more robust selectors. Instead of .class-name, use [data-testid="..."] or #id. The official Playwright documentation recommends using text selectors like text="Submit" for buttons. You can also have the AI first take a screenshot and analyze the page structure before generating selectors.
Script times out waiting for page to load
Error message: TimeoutError: page.goto: Timeout 30000ms exceeded
Fix: Increase the timeout or use a different wait strategy. Replace { waitUntil: 'networkidle' } with { waitUntil: 'domcontentloaded' } for faster loading. Or add a longer timeout: { timeout: 60000 }.
ChatGPT refuses to generate automation instructions
Problem: ChatGPT may refuse to generate code that could be used for malicious purposes (like scraping without permission).
Fix: Be explicit about your legitimate use case. Say "I am the owner of this website and want to automate testing" or "I have permission to scrape this public data." If ChatGPT still refuses, try rephrasing your request as a general programming question: "How would I use Playwright to extract text from a webpage?"
Scheduled tasks not running
Problem: Cron jobs or Task Scheduler tasks don't execute.
Fix: Check that the full path to Node.js is correct. In cron, use /usr/bin/node (find yours with which node). Make sure the script file has execute permissions (chmod +x script.js). Check the log file for error messages. The video source notes that using absolute paths for all files in the script is more reliable than relative paths.
Community-reported: Playwright CLI not found after global install
Fix (from community): On some systems, global npm packages aren't in the PATH. Run npm root -g to find the global directory, then add it to your PATH. Alternatively, use npx playwright instead of playwright.
Community-reported: Script works manually but not when scheduled
Fix (from community): Scheduled tasks often run with a different environment. Set the DISPLAY environment variable on Linux if you're using headless: false. On macOS, scheduled tasks may not have access to the GUI. Always use headless: true for scheduled tasks.
Next Steps
-
Build a personal data assistant: Use the agent to monitor websites for changes (price drops, new articles, job postings) and send you notifications via email or Slack. The video source shows how to chain scripts together for this purpose.
-
Create a social media automation tool: Have the agent log into platforms like LinkedIn or Twitter, perform searches, and extract leads. The session persistence feature makes this practical for sites that require login.
-
Develop a visual regression testing suite: Extend the QA testing script to compare screenshots over time. Use a tool like
pixelmatchto detect visual changes and have the AI agent analyze the differences. -
Integrate with a database: Instead of saving extracted data to JSON files, have the agent insert it into a database (SQLite, PostgreSQL, or MongoDB). This makes it easier to query and analyze the collected data over time.
-
Add error handling and retries: Enhance the executor script to retry failed steps, rotate user agents, and handle CAPTCHAs. The official ChatGPT documentation mentions that CAPTCHAs are used by ChatGPT itself, and your agent may encounter them too. For now, the simplest approach is to detect CAPTCHAs and pause for manual intervention.
-
Build a web UI for your agent: Create a simple dashboard where you can submit new tasks, view results, and monitor the agent's activity. This turns your command-line tool into a full application.
The #1 Chatgpt Newsletter
The most important chatgpt updates, guides, and fixes — one weekly email.
No spam, unsubscribe anytime. Privacy policy
Related Tutorials
Keep exploring ChatGPT
ChatGPT resources
Latest AI answers
Skip the manual work
Ready-made AI workflows and automation templates — import and run instead of building from scratch.